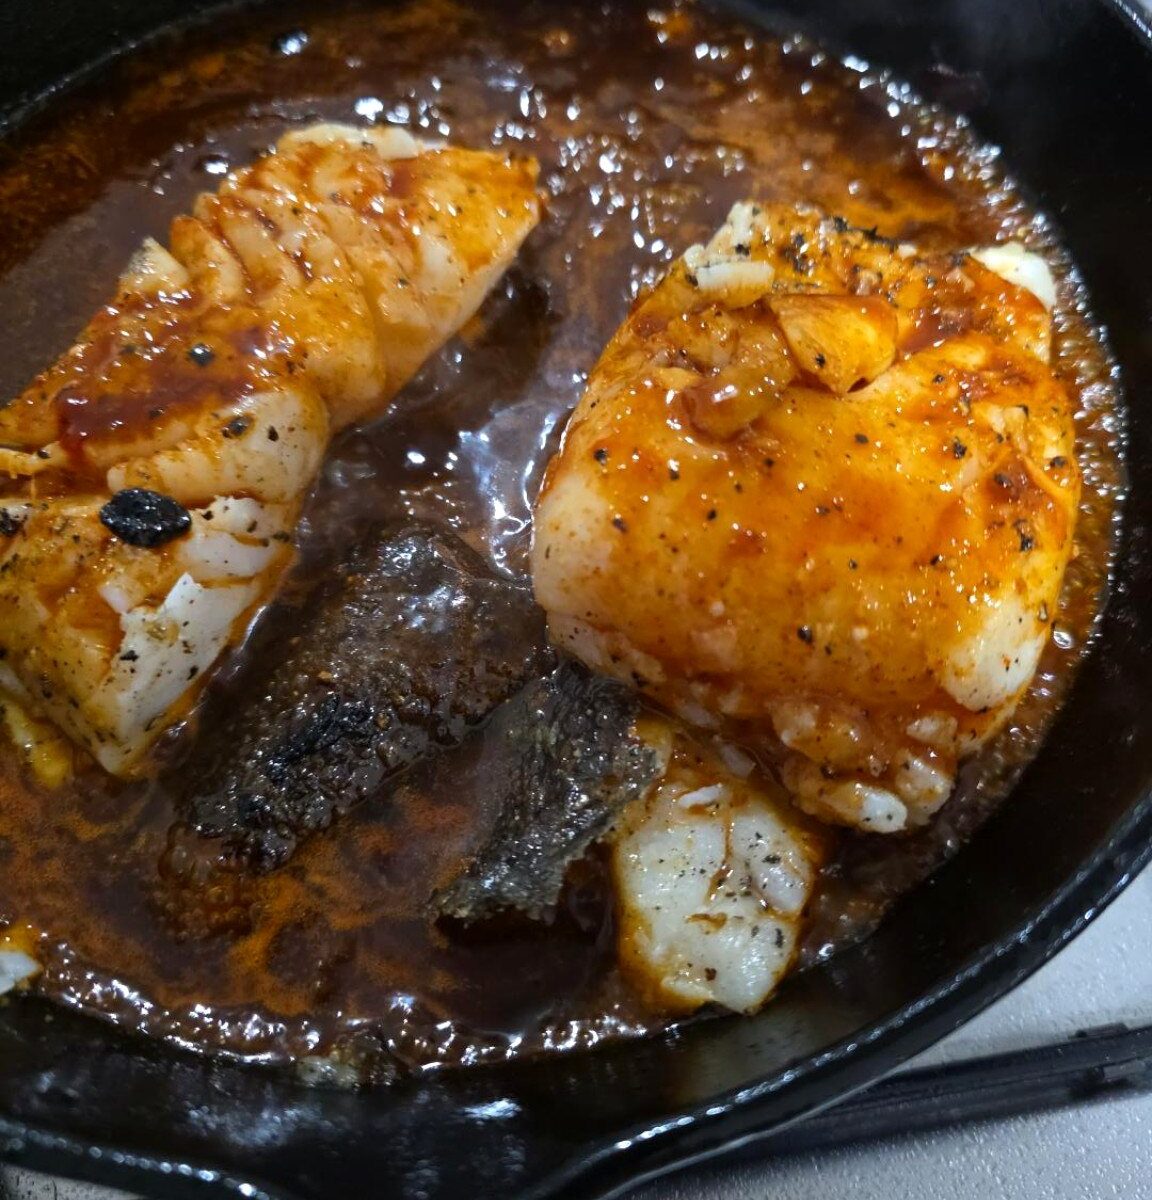
I wanted something quick with a bit of heat, rather than another plain piece of fish. The gochujang makes a sweet-spicy glaze; I cook the cod gently and serve it with rice and peppers.
SERVES 2 · PREP 15 min · COOK 20 min
Ingredients
2 skinless cod fillets, about 140–180 g each
150–180 g dry sushi rice
2 peppers, cut into strips
1 onion, thin half-moons
1 tbsp neutral oil
½ tsp garlic granules
2 tbsp gochujang
2 tbsp light soy sauce
2 tbsp golden syrup
1 tsp sesame oil
1 tbsp rice vinegar or lemon juice
2 tbsp water; sesame seeds optional
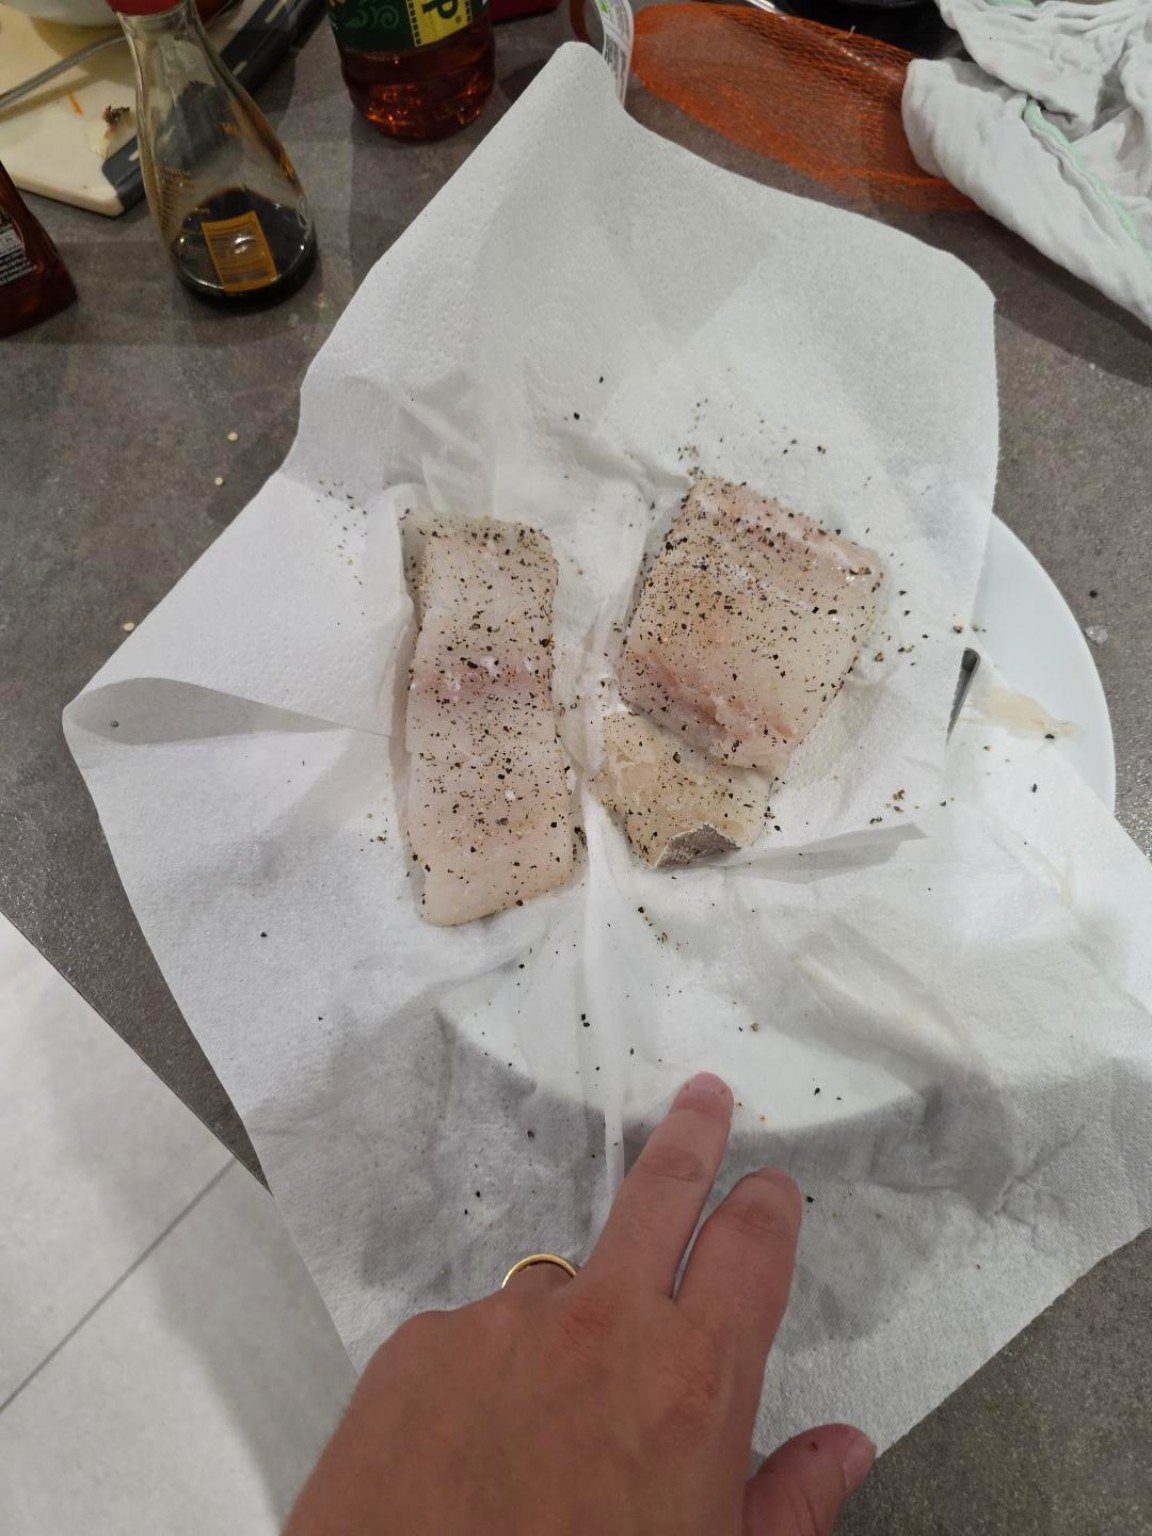
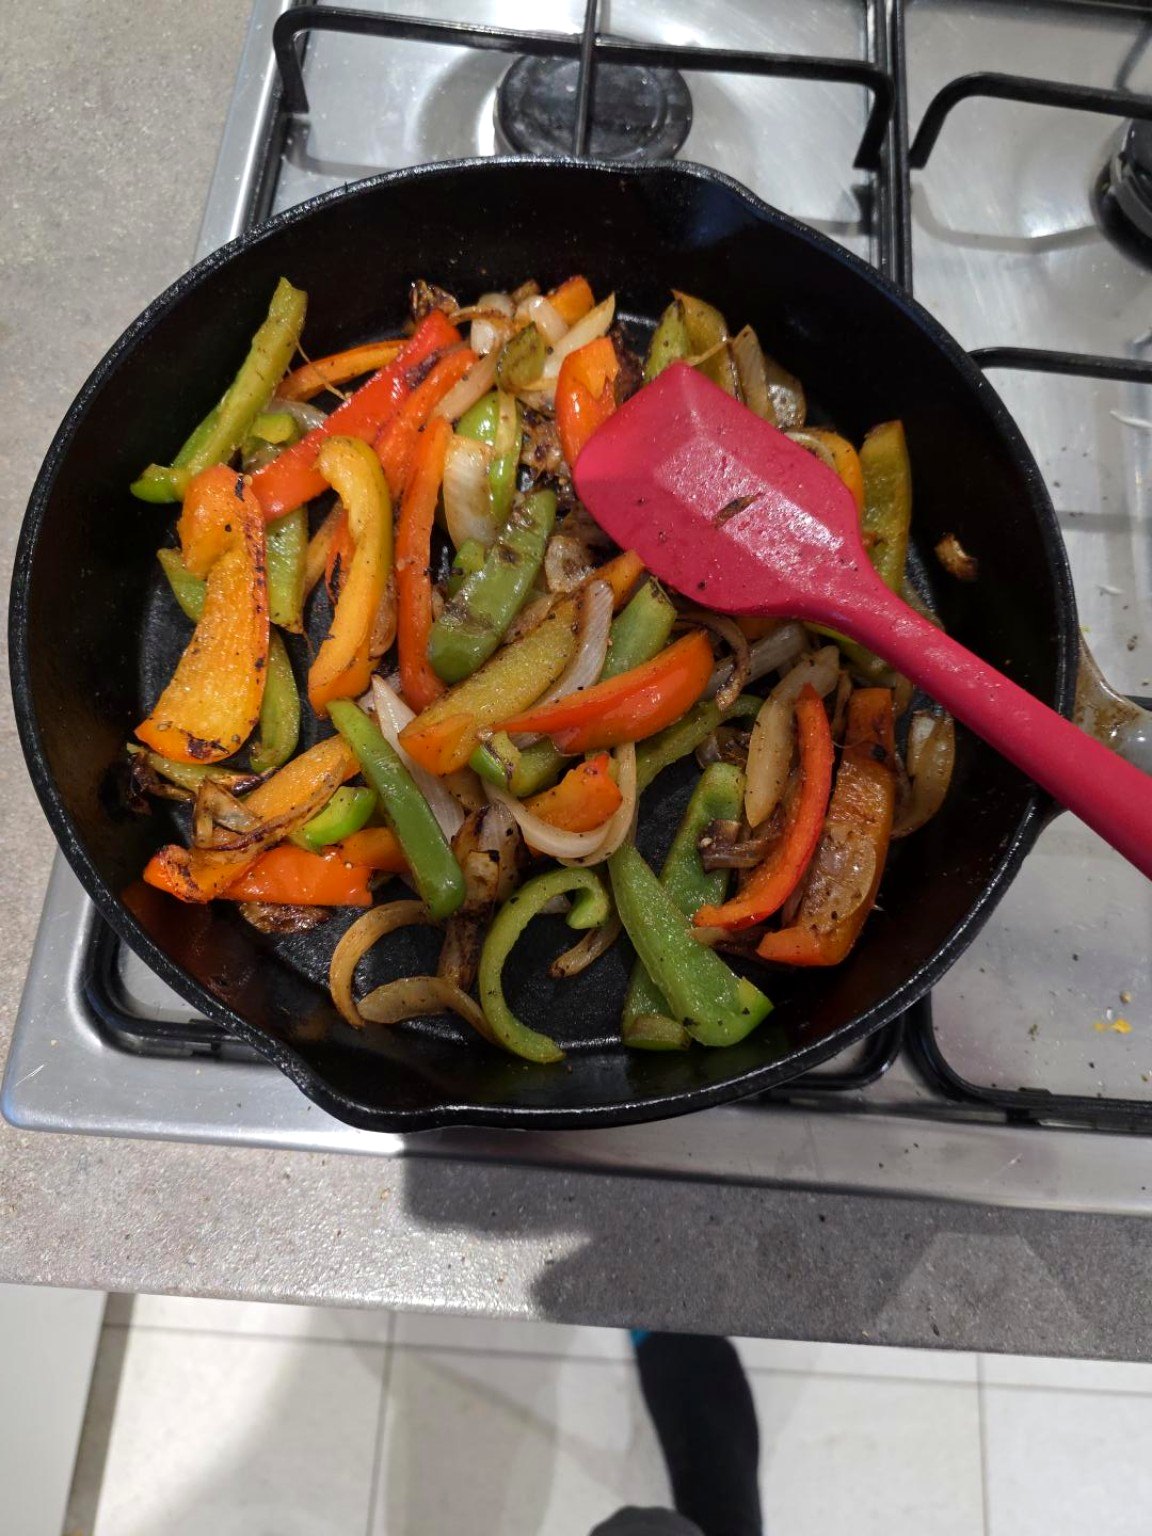
30 July 2026: drying the cod before seasoning and cooking.The peppers cooked in cast iron before combining the rice bowls.
Method
Rinse rice in cold water 3–4 times. Cook to packet instructions and leave covered; it is easier to do the fish when rice is already nearly ready.
I combine gochujang, soy, golden syrup, sesame oil, vinegar and water in a mug. Taste a drop: add water if painfully salty, or a little syrup if too sharp.
I cut onion lengthways and slice peppers into strips. Heat half the oil in a large frying pan over medium-high. Cook onion 2–3 minutes, then add peppers, garlic granules and a grind of pepper.
I stir-fry the peppers for 6–8 minutes until softened, with some browned edges. Transfer the vegetables to a bowl and keep warm. Wipe the pan clean if any sauce or vegetables have stuck to it.
I pat the cod fillets dry, season lightly, then warm the remaining oil in the cast-iron frying pan over medium heat. Lay the fish into the pan and leave it undisturbed for around 3 minutes so it develops some colour. Carefully turn with a fish slice, keeping the fillets intact.
I pour in 2–3 tbsp sauce and cook another 3–5 minutes, spooning glaze over fish. Keep heat modest so the syrup does not scorch. Cod is done when opaque and flakes easily.
I tip vegetables back to the pan for the final minute and toss with another spoonful of sauce. Check the fish gently rather than breaking it up.
I spoon rice into bowls, add vegetables, sit fish on top and drizzle any safe, simmered pan glaze over everything. Scatter sesame seeds if available.
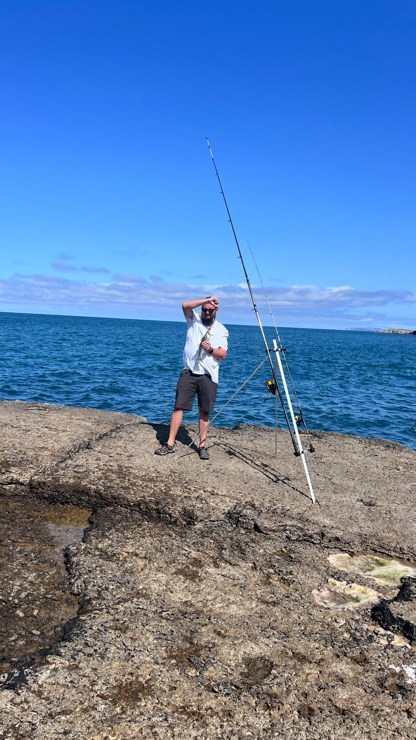
I don’t fish for sport; I fish to catch and cook. I also find fishing extremely relaxing. Give me a quiet stretch of the Anglesey coastline, a couple of rods and the sound of the sea and I’m happy. There’s something brilliant about bringing a fresh bass home and turning the catch into dinner. I caught this one off Anglesey on 20 July 2026 and cooked the sea bass supper the following evening. I want crisp skin, moist fish and a decent amount of garlic-and-herb butter, without doing anything complicated to a lovely fresh bass.
From Anglesey to the kitchen
Fishing on the Anglesey coast. It’s as much about the peace and quiet as it is about bringing home something good for dinner.
When I keep a fish for the table, I want to look after it properly from the moment it comes out of the water. I dispatch it promptly, bleed and gut it there at the shore, and get it straight onto ice. For the journey home, the catch goes into my temperature-controlled car freezer. Getting it home in good condition is every bit as important as what happens in the frying pan.
Back home, there’s one other job before I can start cooking: scaling. My approach isn’t glamorous, but it’s effective. I work with a fish-scaling tool inside a large bin bag, so I’m not finding scales around the kitchen for the next fortnight. I make three passes on each side, tail towards head, then check around the fins and belly for anything I’ve missed. After that, it’s a quick rinse, a thorough pat dry and into the pan.
A heavy cast-iron or stainless-steel frying pan and a broad fish slice
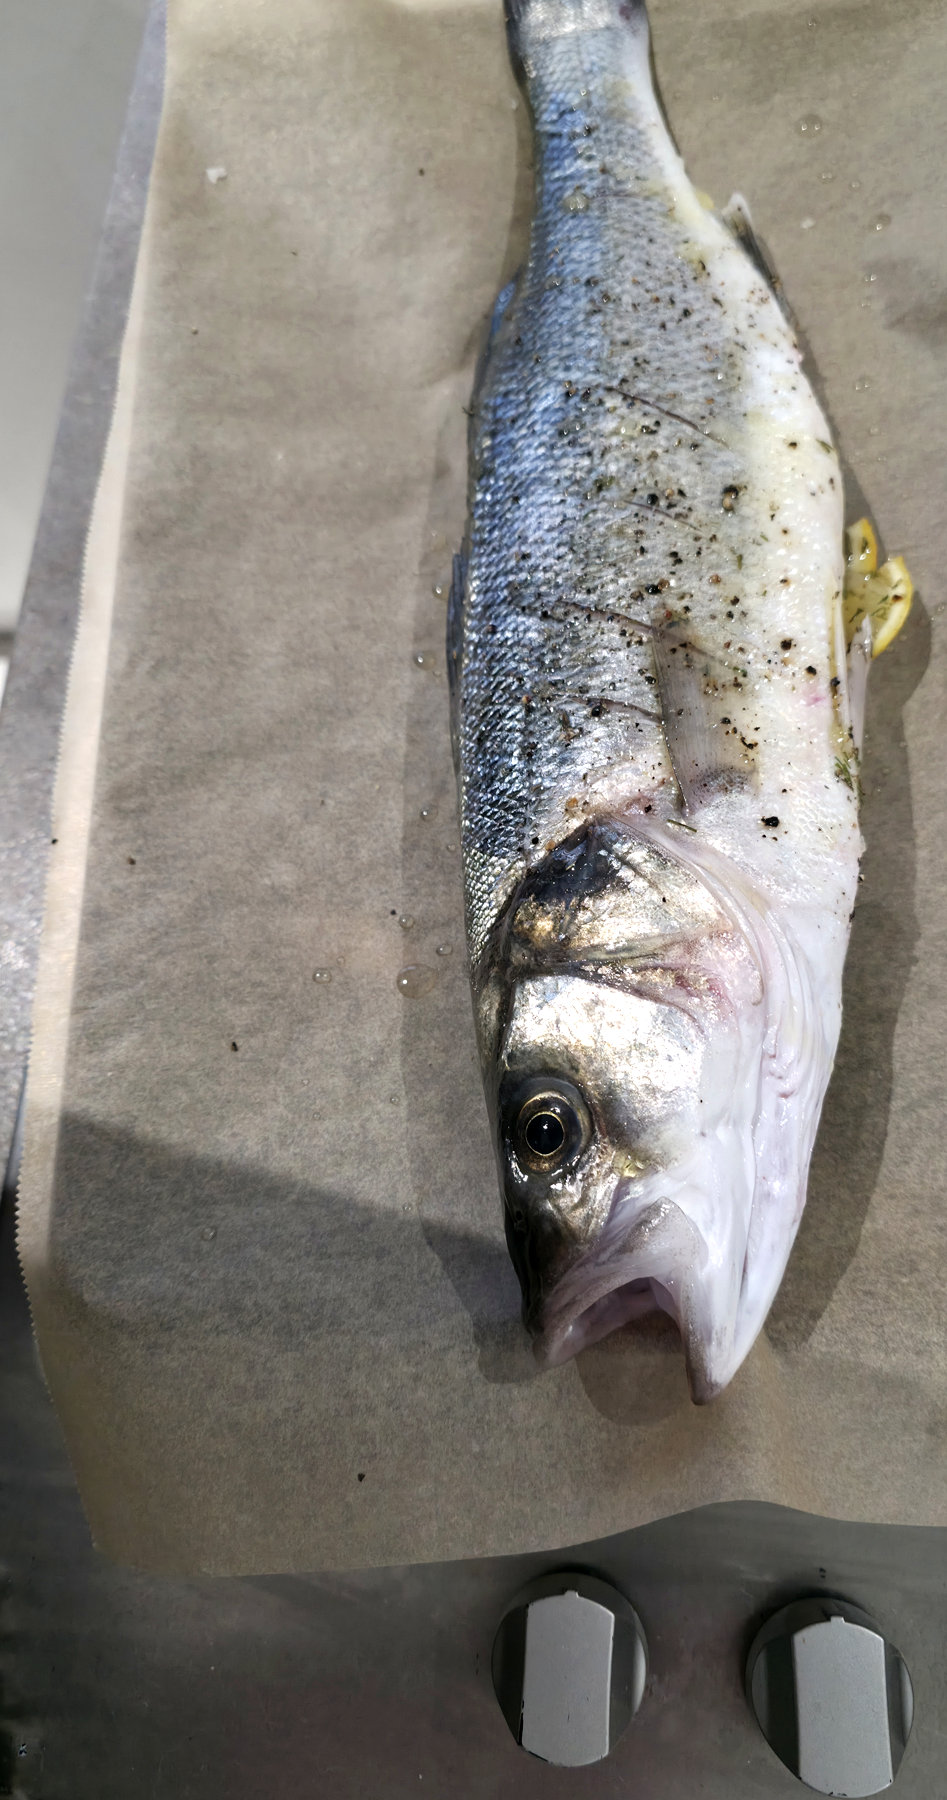
The whole fish, before cooking.
Method
Once the fish is home, I finish the preparation. I have already dispatched, bled and gutted it promptly at the water, placed it straight on ice and driven it home in my temperature-controlled car freezer. I scale the fish inside a large bin bag to contain the mess, using a proper fish-scaling tool. Starting at the tail and working towards the head, I make three passes on each side, including the areas around the belly and fins. I check for any scales I’ve missed, rinse the fish briefly, and pat the skin and belly cavity completely dry with kitchen paper.
I set everything beside the hob first. Score each side of the fish with 2-3 shallow cuts through the skin only. Rub the skin and belly with salt, pepper and 1 tbsp oil. Let stand for 5-10 minutes while preparing the pan.
I use a pan large enough for the fish to lie flat. Heat the empty heavy pan on medium-high for 1-2 minutes, add the remaining oil and swirl. You want hot, shimmering oil, not smoke pouring from the pan.
I lay the bass into the pan away from you. Press gently for 10 seconds so the skin contacts the pan. Leave it undisturbed for roughly 5-6 minutes until the skin looks golden and releases without tearing. If it sticks, give it a little longer: forcing it off the pan is how I end up tearing the skin.
Slide a broad fish slice underneath, support the fish and turn carefully. Reduce to medium. Fry the second side about 4-5 minutes, adjusting according to fish thickness. If the pan is getting too dark, lower the heat.
I add butter, bruised garlic and thyme for the final 2 minutes. Tip the pan slightly and spoon foaming butter over the fish repeatedly. If the garlic blackens, pull the pan off the heat immediately.
I check the centre near the backbone at the thickest point: flesh should be opaque, separate readily from the bones and be steaming hot throughout. If not, return to low-medium heat for a further minute per side; avoid drying it out.
Lift the bass onto a warm platter; squeeze lemon into the pan juices and spoon those juices over. Rest 2 minutes, remove visible pin bones as you serve and add lightly buttered green beans if desired.
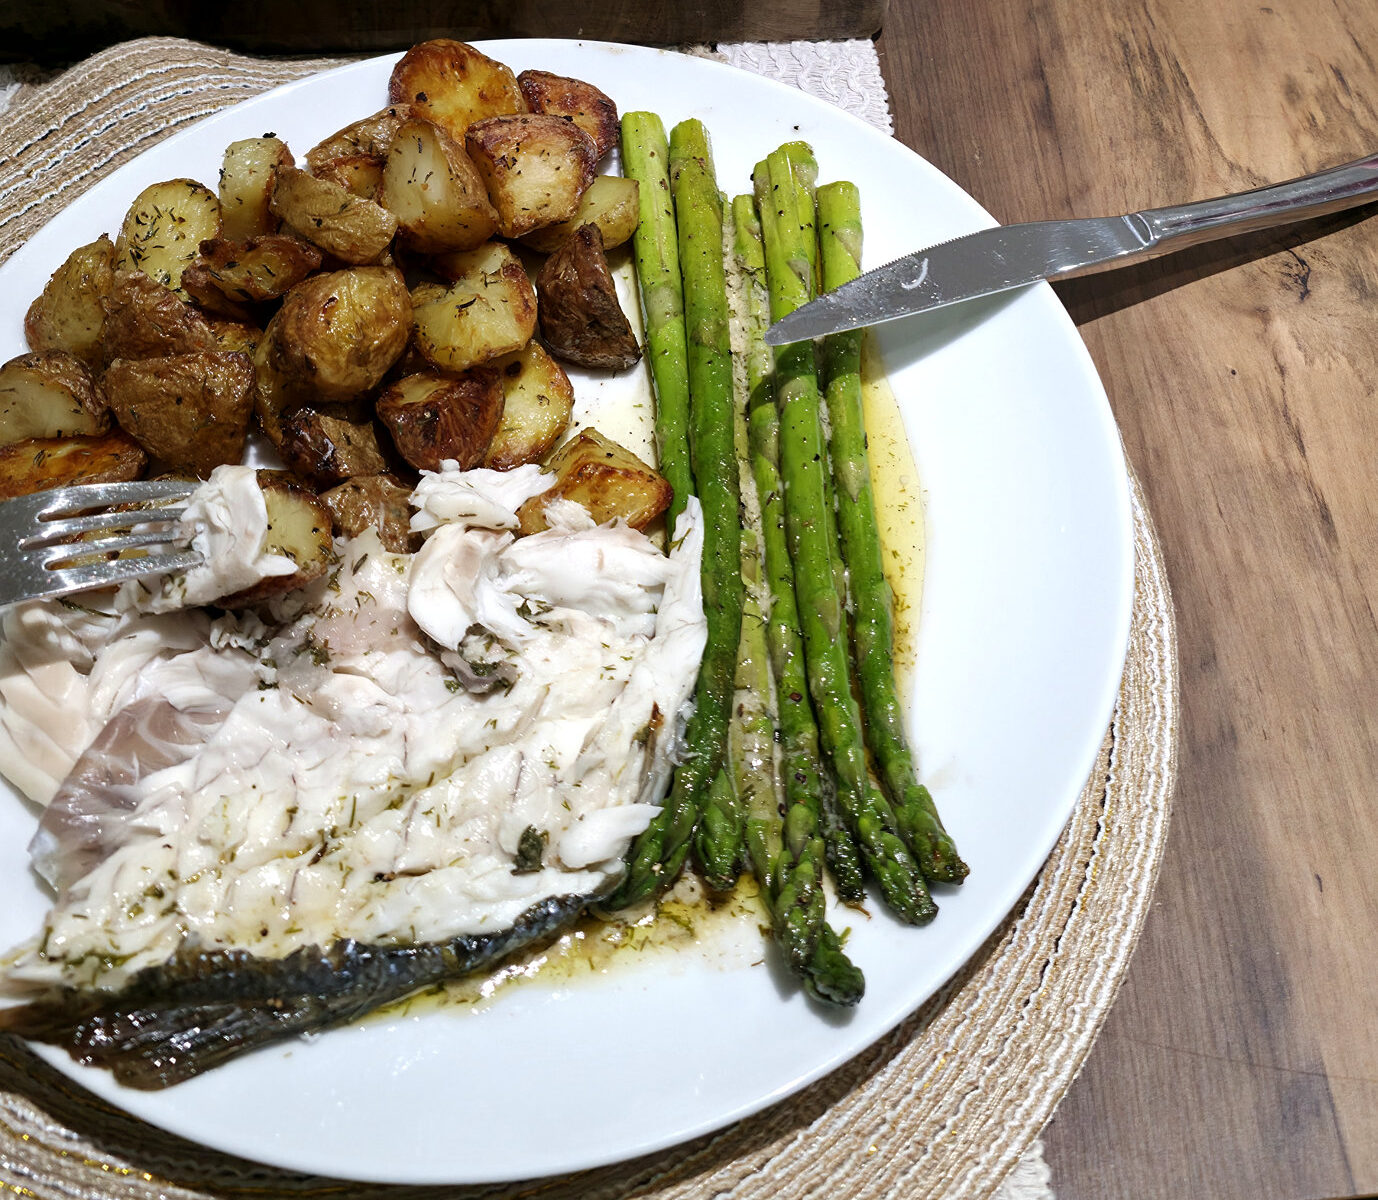
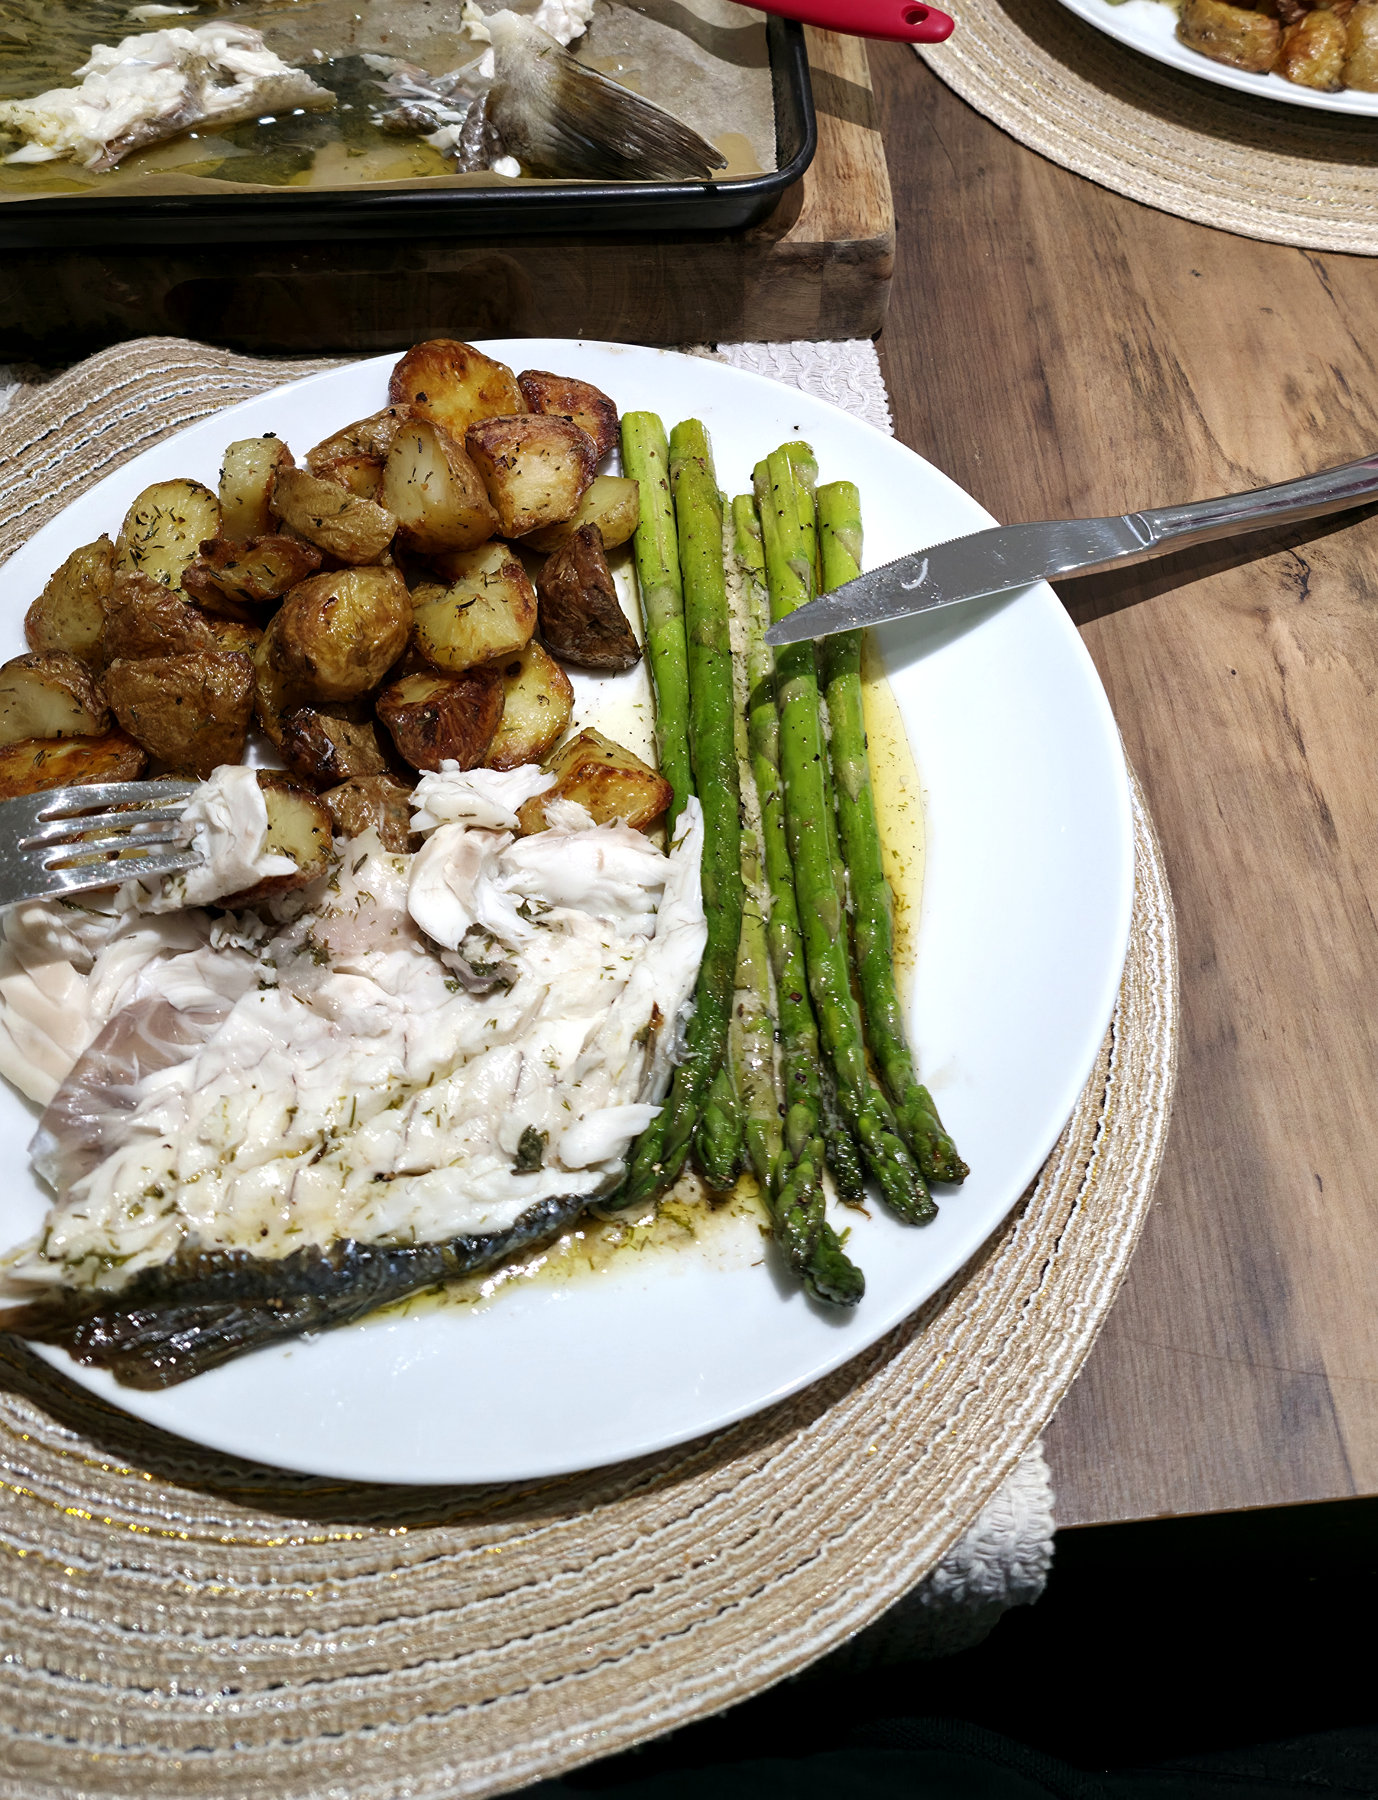
The finished supper from 21 July 2026 — sea bass with golden potatoes, green vegetables and buttery pan juices.
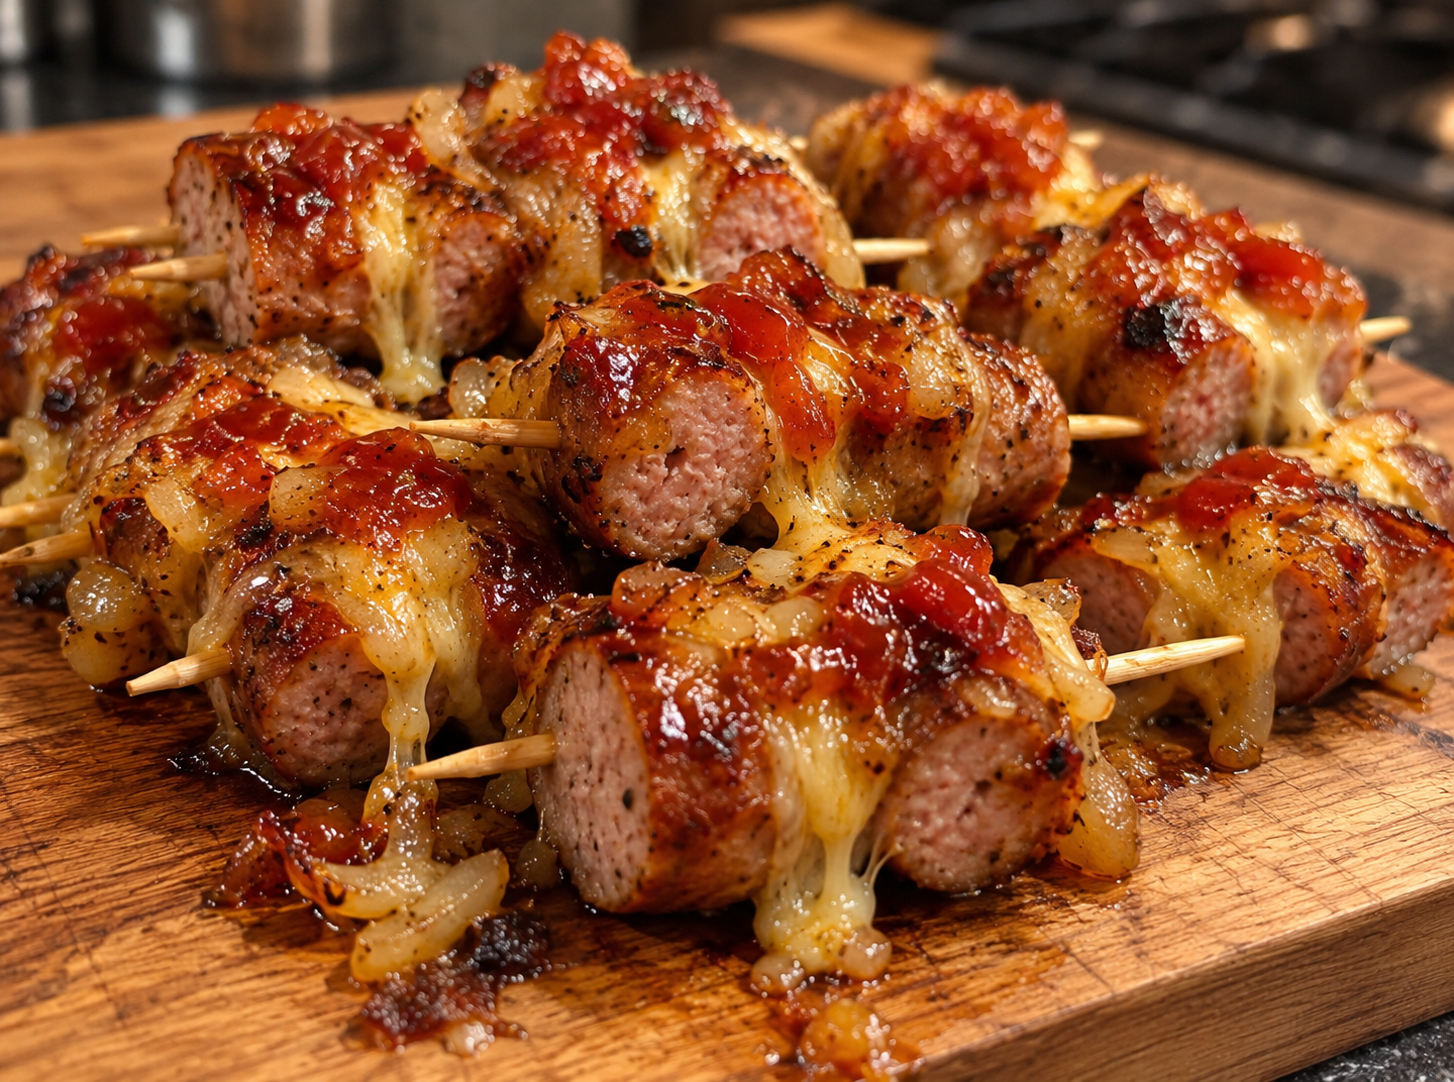
These are my Polish-style Posh Dog sausage kebabs. My preferred sausages are M&S Posh Dogs. I cook them first, line several up side by side, and push cocktail sticks through their long sides, right across the group. Then I bury the lot in melted cheese, onion and harissa ketchup and cut across the sausages between the sticks. What I’m left with is a row of little, cheesy, tomatoey sausage kebabs, each stick holding pieces from several sausages. It’s messy, slightly ridiculous, and absolutely worth doing.
The order is cook → line them up → skewer across several sausages → cheese, onion and harissa ketchup → cut crosswise into kebabs. I don’t split the sausages lengthways or thread an individual sausage down its centre. The cocktail sticks hold multiple sausage pieces together, rather like a tiny sausage kebab.
Serves: 4 as a sharing snack, depending on how many sausages I do · Prep: about 10–15 minutes · Cook: according to the sausage pack, plus a brief finish to melt the cheese. The suggested amounts below are practical repeat estimates; I didn’t weigh the toppings on the original cook.
Ingredients
4 M&S Posh Dogs, my preferred sausages for this, or enough to feed the table
100–150g cheese, grated or sliced so it melts nicely over the hot sausages (working quantity)
1 onion, finely chopped or thinly sliced (working quantity)
3–4 tbsp harissa ketchup, or enough to give each sausage a generous coating (working quantity)
12–20 wooden cocktail sticks, depending on sausage length and how small I want the portions
A little oil if I’m cooking the onion first
A cast-iron or stainless-steel pan, baking tray, sharp knife, tongs and an instant-read thermometer if the sausages are raw
Little sausage kebabs loaded with melted cheese, onions and harissa ketchup.
Method
Get everything ready. I lay out the M&S Posh Dogs, onion, cheese, harissa ketchup, cocktail sticks and a very sharp knife. A large board and a tray make this a lot easier. Check the Posh Dog packaging so you know whether they’re ready-cooked or need cooking from raw.
Cook the sausages completely first. I cook them according to their pack instructions until hot and properly cooked. If they’re raw pork sausages, I check the centre reaches a safe endpoint, such as 75°C for 30 seconds. The cocktail sticks go in after cooking, so they don’t interfere with browning.
Prepare the onion and topping. Finely chop or thinly slice the onion. I can soften it gently in a little oil if I want it sweeter. Have the cheese ready to melt and the harissa ketchup close to hand.
Lay several whole sausages side by side. On the board, I line up two or more cooked Posh Dogs parallel, with their long sides against each other. I work in groups small enough for a cocktail stick to pass through all the sausages, with a good length of stick left sticking out as a handle.
Impale them through the long sides. Here’s the important bit: I push each cocktail stick sideways through the row of sausages, from the long side of the first sausage through the next, so one stick holds pieces of several different sausages. I put a series of these sticks at regular intervals along the length of the sausages. I’m not running a stick lengthways down the middle of one sausage, and I’m not making single-sausage bites.
Cover the connected sausages in cheese. Keeping the sausage group together, I pile on a generous layer of cheese. Enough to melt across the sausages and help bind the little kebabs together.
Add onions and harissa ketchup. Scatter the onion over the cheese and spoon or squeeze the harissa ketchup generously across the top. I want the finished pieces to be cheesy, oniony, tomatoey and a little spicy, with the toppings going across all the sausages.
Give the cheese a quick melt. If the sausages aren’t hot enough to melt it on their own, I move the assembled group to a heatproof tray for a brief oven finish. Keep wooden cocktail-stick ends away from direct flame or a hot grill element; don’t dry the sausages out.
Cut across the sausages between the sticks. Now I slice the topped sausage group crosswise, between each pair of cocktail sticks. Each cut goes through all the parallel sausages, turning the row into separate small kebabs. Every stick should end up holding multiple sausage pieces next to one another, not a single sausage with a stick up its middle. A sharp knife and gentle pressure keep the cheese-and-onion topping in place.
Serve the little sausage kebabs. Onto a serving board while they’re hot, with all that melted cheese, onion and harissa ketchup clinging to them. They are finger food, so everyone needs to know there are wooden sticks in each portion.
I prefer M&S Posh Dogs for this. The whole point is to get several sausage sections on each little skewer, covered in a properly generous amount of cheese, onion and harissa ketchup. They’re not traditional Polish kielbasa, and they aren’t my Borniak smoked sausages. This is a different, very good way of turning a few cooked sausages into a sharing plate.
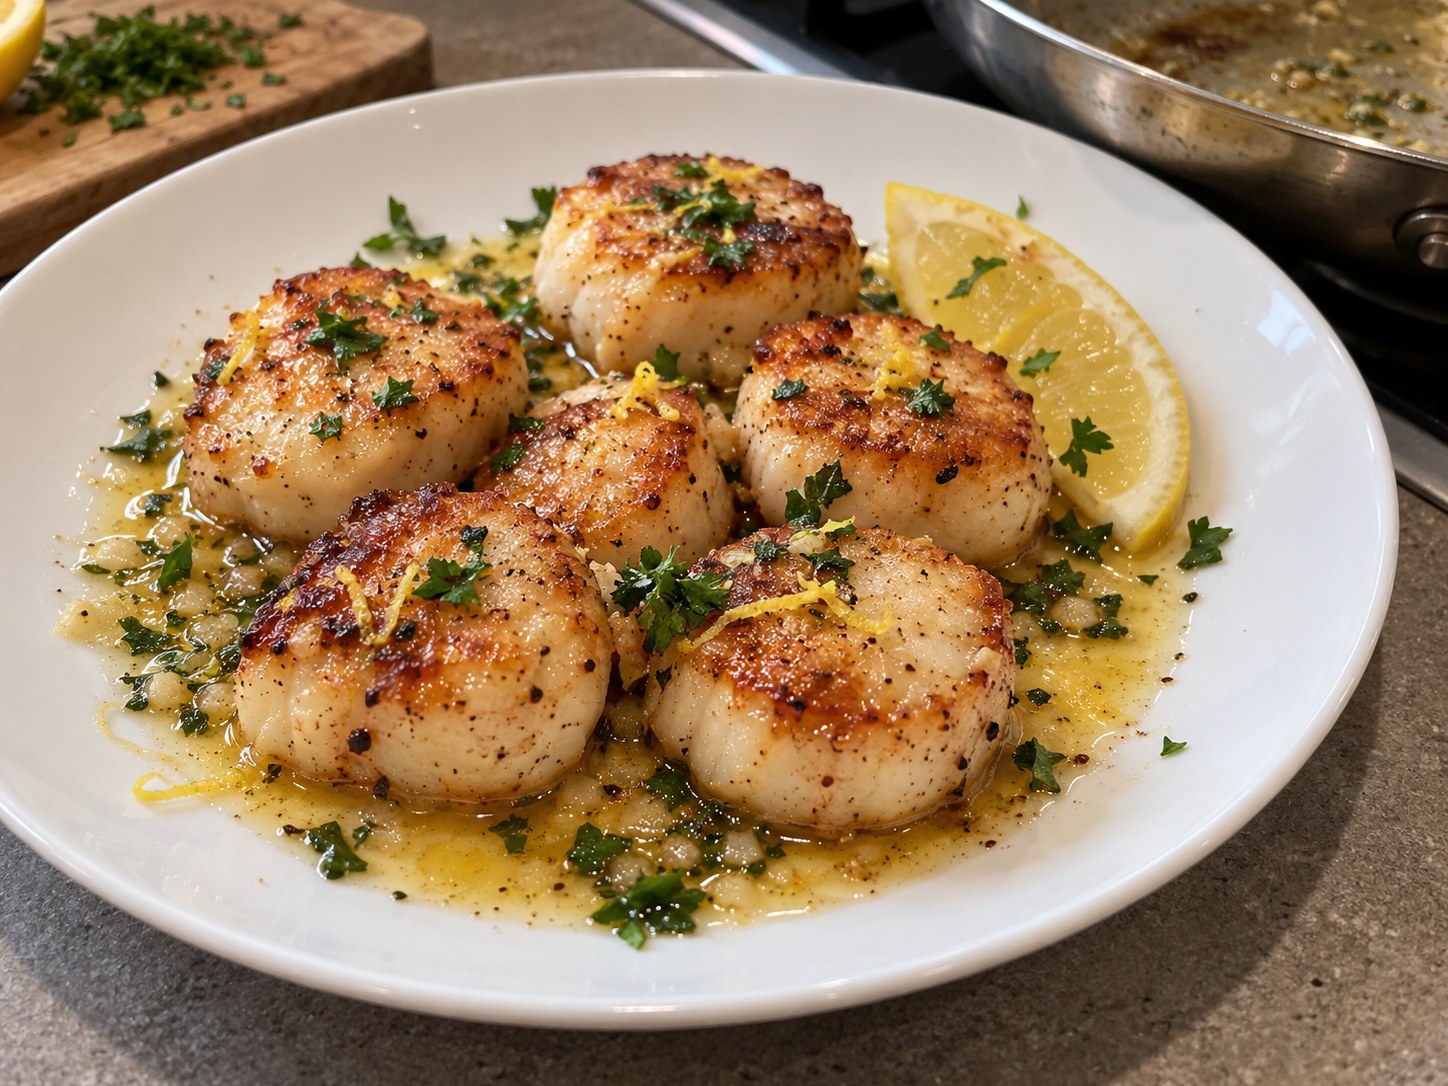
Scallops don’t need much doing to them, but the pan does need to be properly hot. I aim for golden edges, a tender middle and butter only at the end so it doesn’t burn.
SERVES 2 starter / side · PREP 10 min · COOK 5 min
Ingredients
8-10 large fresh scallops with roe (or 12 smaller), cleaned
1 tbsp neutral oil
25 g unsalted butter
1 small garlic clove, lightly crushed (optional)
1/2 lemon
Freshly ground black pepper
Pinch of salt
Kitchen paper, heavy frying pan and fish slice
Deep golden scallops with foaming lemon butter — all about a hot pan and a short cook.
Method
I check that every scallop is clean and smells fresh, not sour. Remove the tough little side muscle if attached. If the orange roe is intact, leave it attached: these are the roe-on scallops we cooked. Keep everything refrigerated until just before you start.
I lay the scallops on kitchen paper and pat the tops, sides and undersides completely dry. This is essential: wet scallops steam instead of searing. Set a clean plate next to the hob so you can remove them immediately when cooked.
I put a heavy frying pan over medium-high heat for around 2 minutes. Add the oil and swirl. It should shimmer across the surface but should not be sending clouds of smoke into the kitchen. Do not overcrowd the pan; sear in two batches if necessary.
I season the scallops lightly and place them flat side down, laying them away from your hand. Leave them alone for about 90 seconds: do not keep moving or flipping them. Look for a deep, even golden crust and whitening edges.
I turn each scallop with tongs or a small fish slice. Cook the second side around 60-90 seconds. Larger specimens need slightly longer. The flesh should turn opaque and feel springy, not rubbery; cook thoroughly for the chosen preparation.
I turn the heat down to medium-low. Add butter and the lightly crushed garlic if using. When butter foams, tip the pan and spoon it over the scallops for about 20-30 seconds. If the butter turns very dark, remove the pan from the heat rather than letting it burn.
Lift scallops onto the plate immediately; their residual heat continues cooking them. Squeeze a little lemon into the warm butter (it may sputter) and spoon a small amount over the scallops. Add black pepper, taste and serve straight away.
If they released lots of liquid and did not colour, the pan was too cool or the scallops were too wet. Do not keep frying indefinitely to chase a crust: serve them tender and dry them more thoroughly next time.
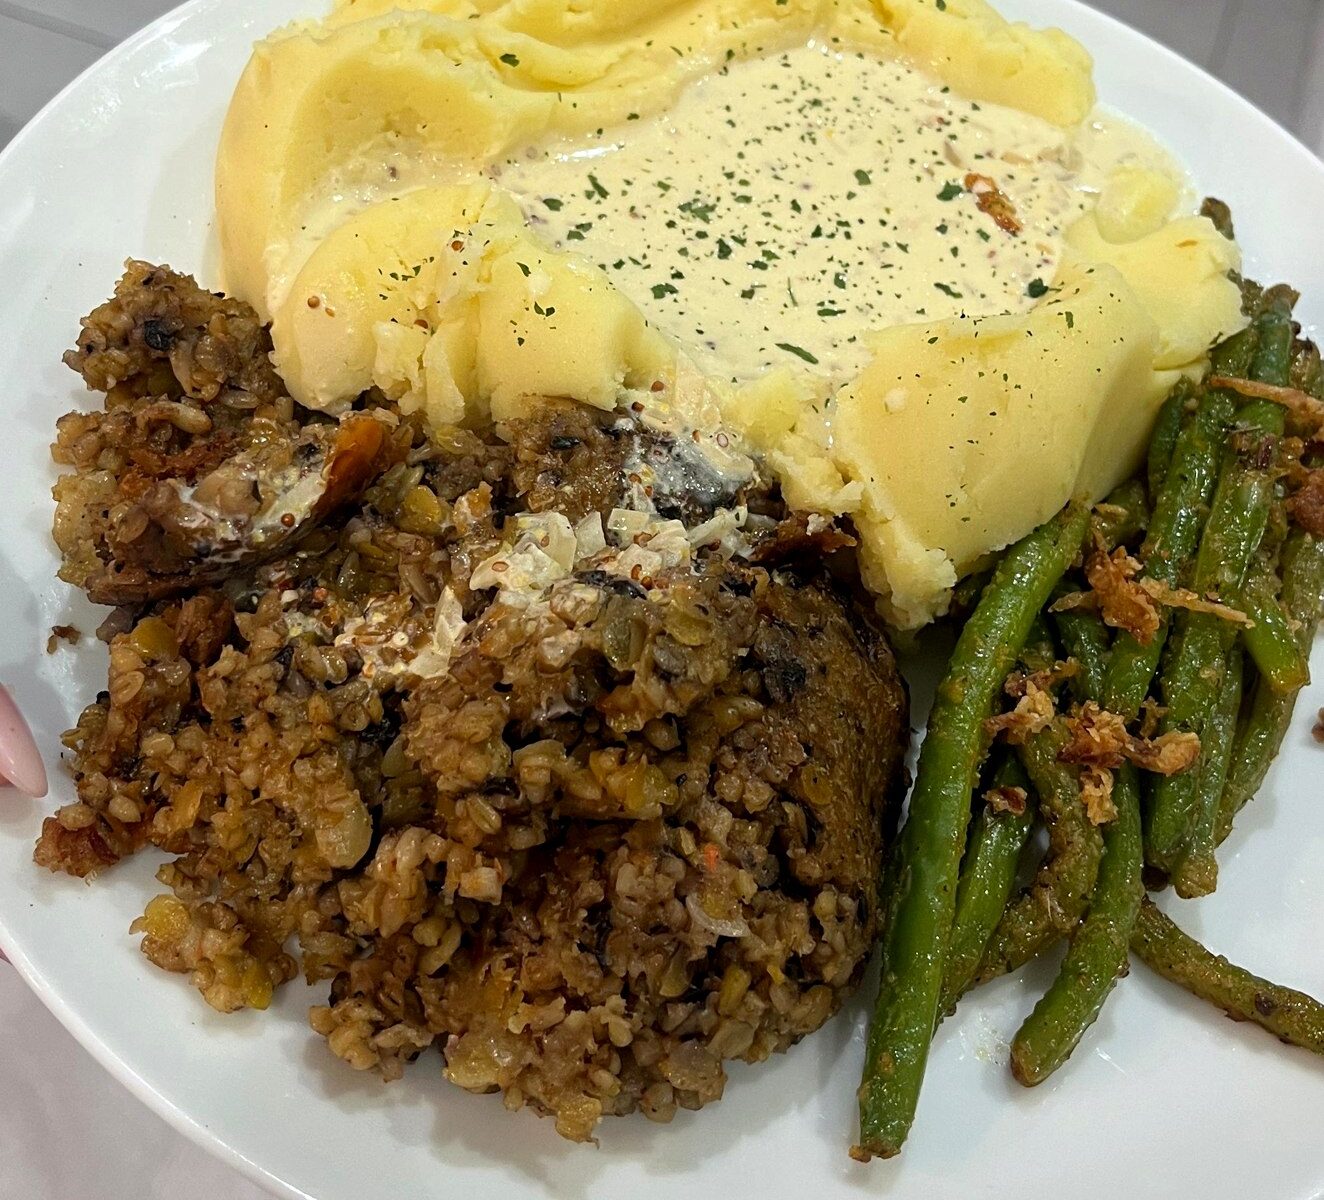
The haggis dinner I made on 28 April 2026 was a proper 10 out of 10. I didn’t make a polite little drizzle of whisky sauce either: I tripled the quantity, used a whole white onion rather than a shallot, and ended up with enough for everyone to be generous.
The thing I learnt is to reduce the stock before adding the cream. If you don’t, the whisky sauce goes a bit too much towards gravy rather than a rich, spoon-coating cream sauce.
2 prepared haggis, around 450g each (check the cooking instructions on the packs)
1kg floury potatoes, such as Maris Piper
60g butter and up to 120ml warm milk for the mash
400g green beans
25g butter and the zest and juice of ½ lemon for the beans
Whisky sauce: 45g butter
1 whole white onion, finely diced
150ml Woodman Blend whisky (the whisky I used)
150ml beef or vegetable stock to start, with up to another 150ml only if necessary
300ml double cream
Black pepper, to taste
Method
Start the haggis. I check the packet first and get it cooking or reheating according to its instructions. Haggis products vary, so I don’t substitute a generic cooking time for the packaging directions.
Get the mash going. I peel the potatoes, cut into roughly even chunks and boil in lightly salted water for around 15–20 minutes, until a knife slides straight through. I drain them well and let the steam escape, then mash until smooth before working in the butter and a little warm milk.
Soften the onion. In another saucepan I melt 45g butter over medium-low heat and cook the whole finely diced white onion for 6–8 minutes, stirring until soft without burning it.
In goes the whisky. I take the pan away from a gas flame, if there is one, before pouring in the 150ml whisky. Back over the heat, I simmer it for 3–4 minutes. I don’t flambé it, and simmering doesn’t necessarily remove all the alcohol.
Reduce the stock properly. I pour in 150ml stock and let it bubble uncovered until reduced by at least half. This is the bit I would not rush: the first time, not reducing enough left the sauce too thin.
Add cream. I turn the heat down and stir in the 300ml double cream, gently simmering another 4–6 minutes until the sauce coats the back of a spoon. More stock only if it genuinely needs loosening, not automatically.
Finish the beans. I boil the green beans for about 4–6 minutes until tender but still bright, drain, then toss with 25g butter, lemon zest and a little lemon juice.
Plate up. Once the haggis is thoroughly hot, I serve it with buttery mash and the lemony beans, then pour the whisky cream sauce generously over the lot. Any spare sauce goes in a jug.
I used a whole white onion and the triple portion of sauce on the night. The weights for mash and beans are practical repeat quantities because I didn’t weigh them at the time.
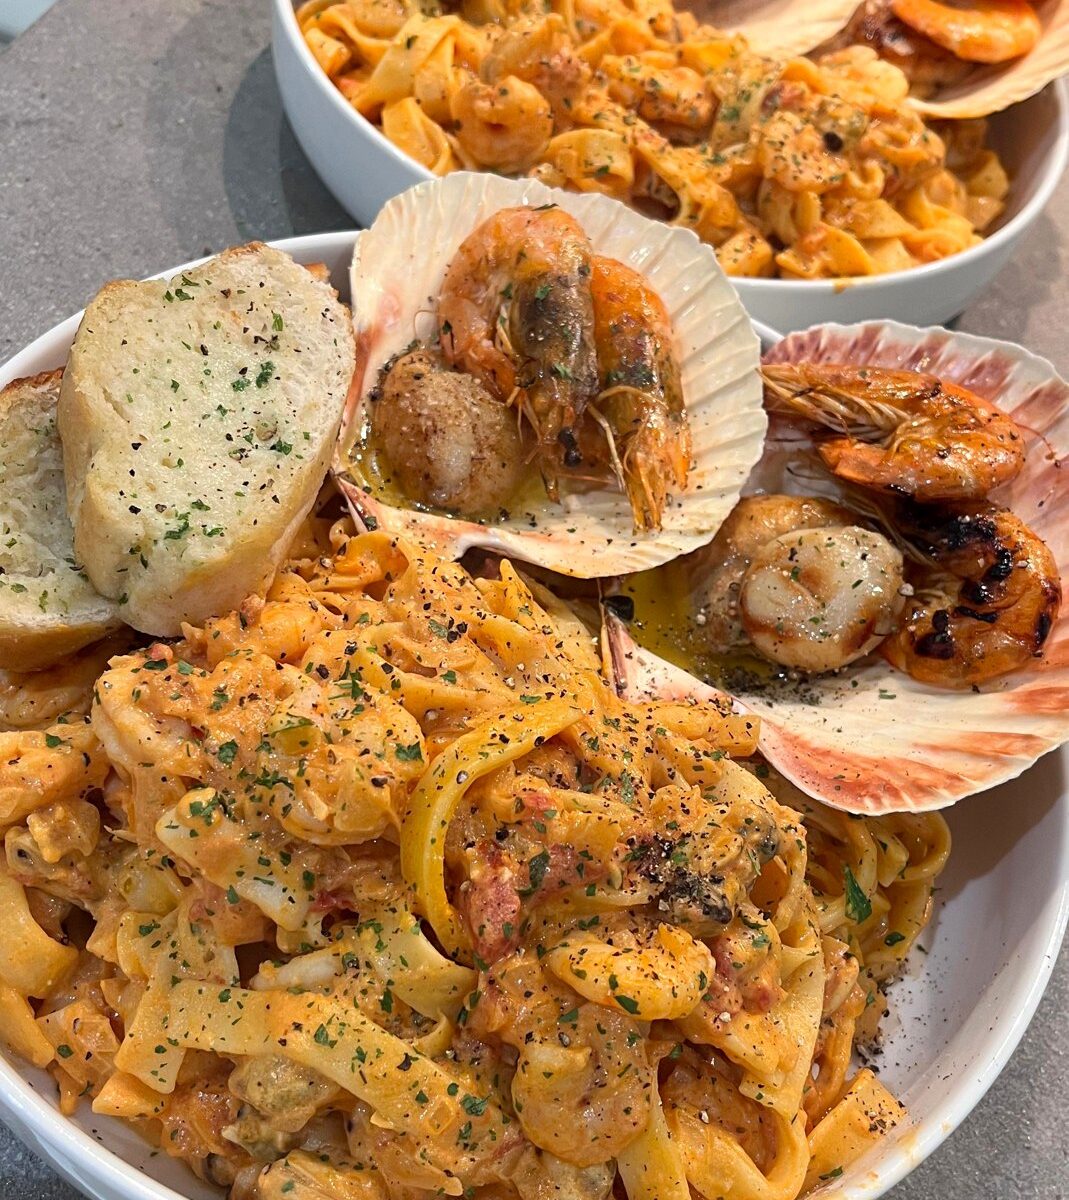
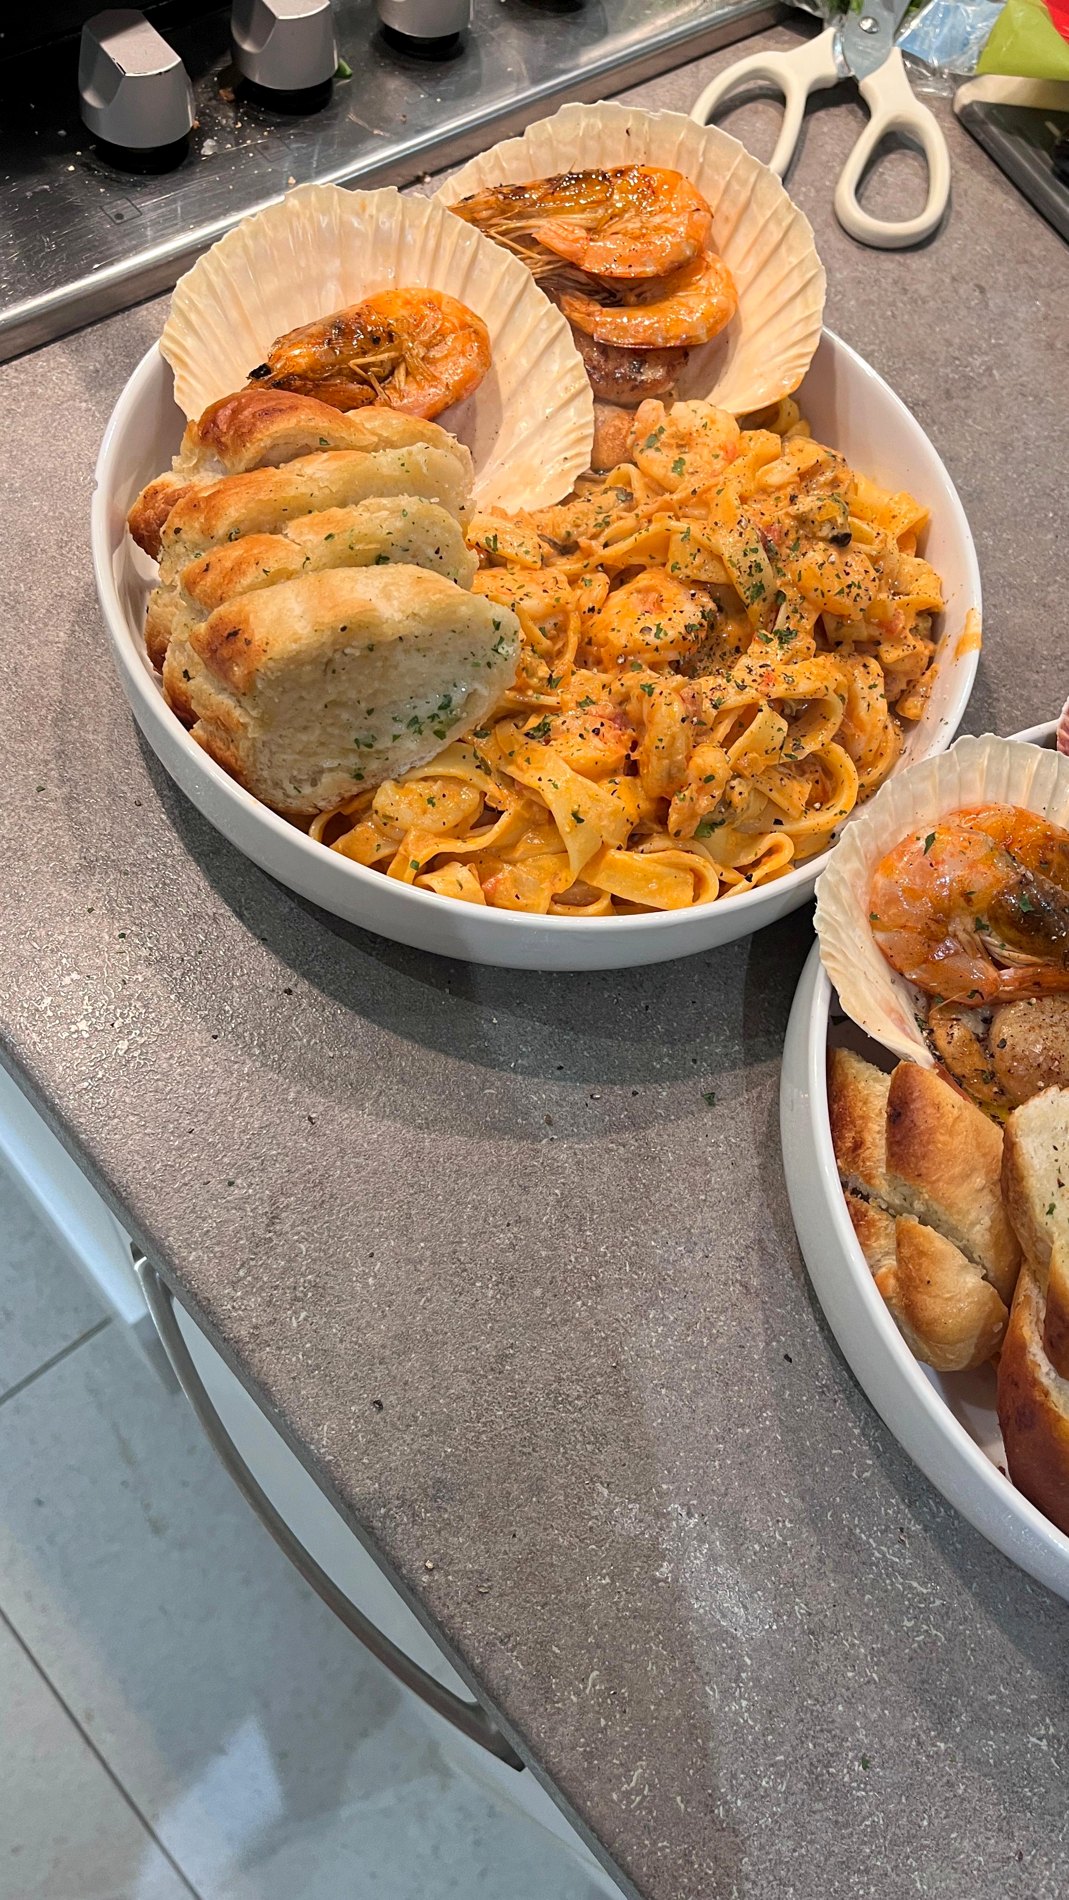
This was the seafood tagliatelle I made on 4 April 2026, when I decided that a perfectly decent bowl of pasta apparently wasn’t enough. There were king prawns, king scallops, a creamy tomato sauce, seafood through the tagliatelle, and garlic bread. Some of the scallops and shell-on prawns went back into cleaned scallop shells for serving. It was rather excessive, but that’s never been much of a deterrent.
I split the prawns in two: half peeled and mixed into the pasta, the rest cooked shell-on with the scallops for the top. Peeling a mountain of king prawns is a right faff, so this was a reasonable compromise.
Serves: 2 generously · Prep: around 30 minutes · Cook: around 25–30 minutes
These quantities are practical repeat estimates, rather than weights taken on the night. The combination and cooking order come from the original April cook.
Ingredients
200–250g dried tagliatelle
8–12 large raw king prawns, split between peeled prawns for the sauce and shell-on prawns for serving
4–6 large king scallops, removed from their shells, with the clean shells reserved for presentation if wanted
200–250g mixed seafood, chilled and prepared according to its pack instructions
1 heaped tsp Stirling sun-dried tomato paste, or another good sun-dried tomato paste
About ½ x 400g tin chopped tomatoes
2–3 tbsp crème fraîche
1–2 tbsp olive oil and a knob of butter
Freshly ground black pepper, and a little dried or fresh parsley
A splash of reserved pasta cooking water
Garlic bread to serve
Optional: a little lemon juice right at the end
The original dinner on 4 April 2026 — scallops in their shells and garlic bread alongside.
Method
Get the seafood ready first. I remove the scallops from their shells, trim away anything that shouldn’t be eaten and pat the scallop meat dry. I peel about half the king prawns and leave the others shell-on. Everything goes back into the fridge until I’m ready to cook it. If I’m using the scallop shells to serve, I clean them thoroughly, boil them and dry them in the oven before food goes anywhere near them.
Start the sauce in stainless steel. In a large stainless-steel frying pan I heat a little olive oil over medium heat, add the finely diced onion and cook gently for about 5–6 minutes, until it softens. I add the garlic towards the end and stir without letting it burn.
Build the tomato flavour. I add a heaped teaspoon of sun-dried tomato paste and cook it for a minute, stirring it through the onion. Then in goes roughly half a tin of chopped tomatoes. I let that reduce gently for 8–10 minutes. I want it rich and concentrated, not swimming in watery tomato juice.
Cook the tagliatelle. Once the sauce is reducing nicely, I get a large pan of salted water boiling and cook the pasta to just short of the packet time. Before draining, I save a mug of starchy pasta water. That’s what brings everything together.
Add the seafood to the sauce. I stir through the mixed seafood, following its pack instructions and cooking it thoroughly. The peeled raw prawns go in near the end and usually need only a couple of minutes, until opaque and cooked. I turn the heat down, stir in 2–3 tablespoons of crème fraîche and add a little pasta water if it needs loosening. It should coat the pasta rather than resemble soup.
Sear the king scallops separately. I get a clean stainless-steel frying pan properly hot with a little oil. The scallops must be dry; wet scallops steam rather than sear. I cook them for around 60–90 seconds on the first side and roughly 45–60 seconds on the other, adjusting for size, until golden and cooked through. A little butter goes in towards the end, not at the start where it can burn.
Finish the shell-on prawns. In the same pan I cook the remaining king prawns until the shells are nicely coloured and the flesh is opaque and thoroughly cooked. They take a little longer than the peeled ones depending on size. I give them a turn and keep the pan juices.
Toss the pasta. I tip the drained tagliatelle into the creamy tomato seafood sauce and toss it carefully with a spoonful or two of pasta water. The sauce should cling to every ribbon. I taste for black pepper and add parsley.
Do the scallop-shell presentation. For the original dinner I put some scallops and shell-on prawns into the cleaned scallop shells with a little buttery sauce. If the shells and contents need warming, a very brief finish under the grill will do; I don’t want to overcook the scallops after searing them.
Serve immediately. Into big bowls goes the tagliatelle, followed by the scallop shells, the remaining shell-on king prawns and all those pan juices. Garlic bread alongside, because apparently this dish still needed another carbohydrate.
There was no ’nduja in this version — I used the sun-dried tomato paste we already had. The trick is to keep the creamy sauce fairly gentle and the scallops separate until the end, so good scallops don’t get buried in a pan of pasta and overcooked.
And yes, this is a completely different dish from my red-wine seafood tagliatelle. Both have their place, but this is the one with the scallop shells and garlic bread.
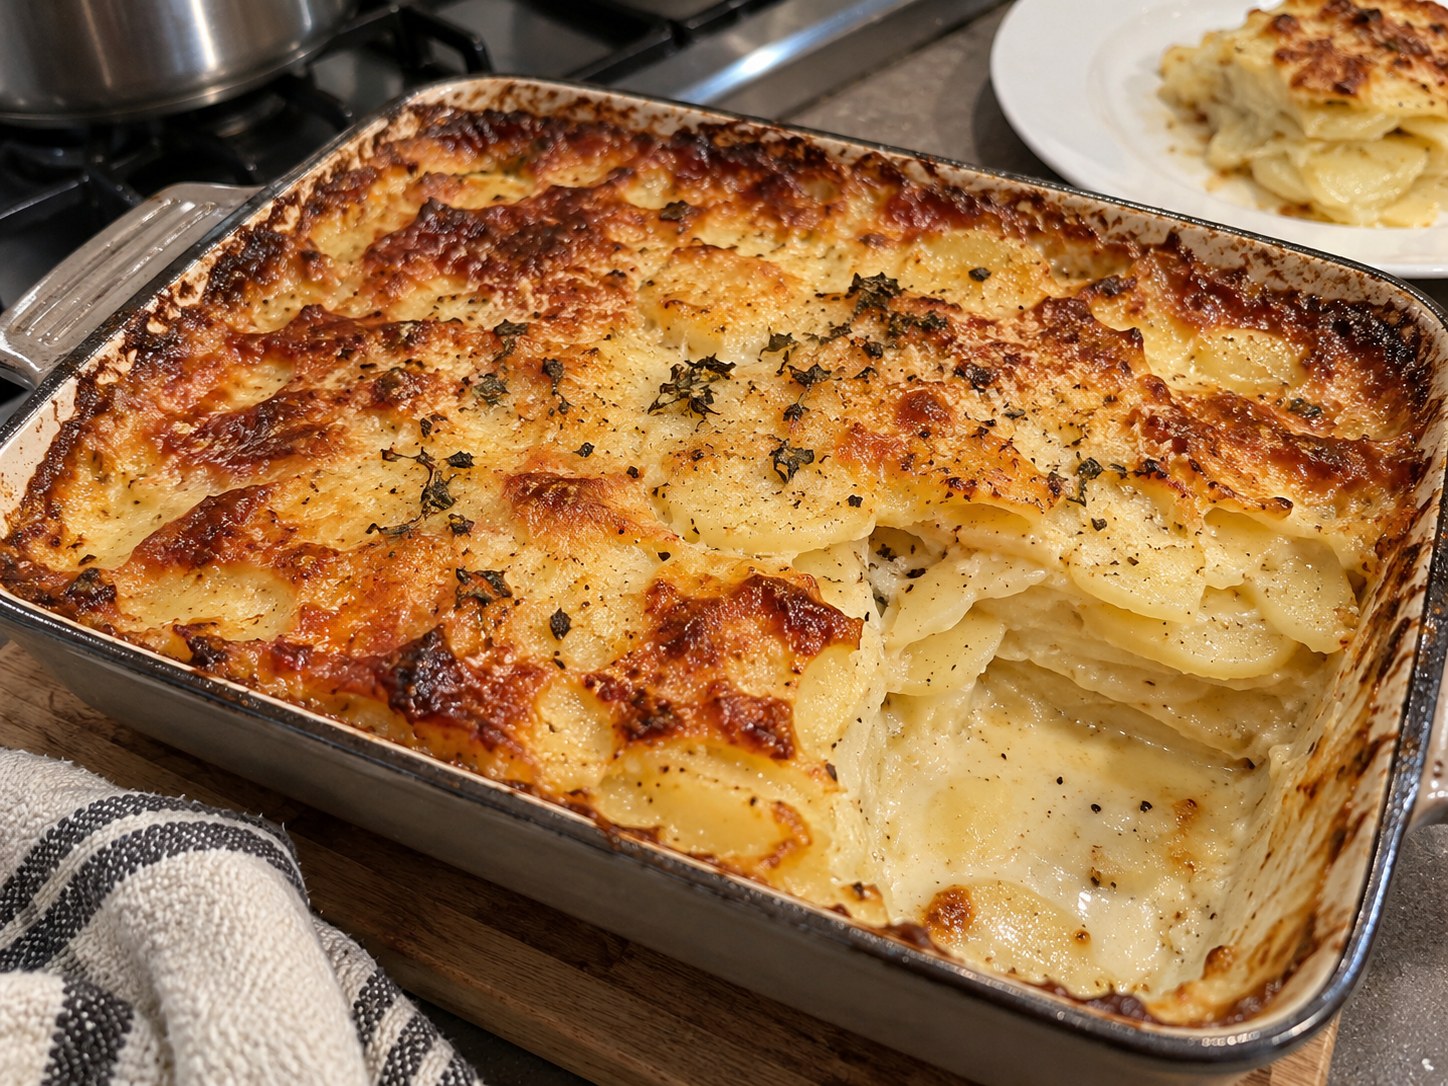
I want the potatoes sliced thin enough to go completely tender, with garlic running through the cream and just enough cheese on top to brown. A dauphinoise isn’t supposed to be a dry stack of potato slices.
SERVES 4-6 · PREP 25 min · COOK 75-95 min
Ingredients
1.2 kg waxy or all-rounder potatoes, peeled
300 ml double cream
250 ml whole milk
4-5 garlic cloves, crushed or thinly sliced
30 g butter for the dish
100 g mature Cheddar, grated (finishing layer; reconstructed)
1 tsp fine salt, plus pepper
Small pinch ground nutmeg (optional)
Baking dish approx. 24 x 18 cm; foil and sharp knife/mandoline
Garlic dauphinoise: creamy layers of potato beneath a deeply golden top.
Method
I set the fan oven to 165°C and put one shelf in the middle. Butter the entire inside of a medium baking dish, including the corners. Put the dish onto a sturdy baking tray to catch any cream that bubbles over.
Peel the potatoes. Slice them very thinly, ideally 2-3 mm, using a mandoline guard or sharp knife. Keep the slices together. Do not rinse them: their surface starch will help thicken the cream around the layers.
I pour the cream and milk into a saucepan. Add the garlic, salt, a few grinds of pepper and optional nutmeg. Warm over a medium-low heat, stirring, until the mixture begins to steam. Do not boil hard or allow it to catch on the pan base.
Layer a third of the potato slices into the buttered dish, overlapping like roof tiles and spreading into the corners. Pour over roughly a third of the warm infused cream. Repeat twice until all potatoes and cream are used. Press down gently so most slices are wetted.
Cover the dish tightly with foil, leaving enough room that it does not stick to the top layer. Bake on the middle shelf for 50 minutes. You should see gentle bubbling near the edge when you lift a corner carefully with oven gloves.
I remove foil carefully because hot steam will escape. Push a thin knife into the centre: it should enter the layers with little resistance. If the middle still feels hard, re-cover and bake for another 10-15 minutes before attempting to brown the top.
Sprinkle a light, even layer of grated cheese over the surface. Return uncovered for about 15-25 minutes, until the top is golden in places and the cream has thickened into a sauce rather than sloshing around the dish. Adjust the oven shelf up slightly near the end only if more colour is needed.
I remove from the oven and rest for 10-15 minutes before cutting. The bubbling settles and the potato layers hold together better. Serve with fish, lamb or roast vegetables and spoon a little of the garlic cream from the corners onto each portion.
If the top browns before the potatoes are tender, put the foil back on. If the sauce is still watery when the potatoes are soft, leave uncovered for a few more minutes and allow the full rest before serving.
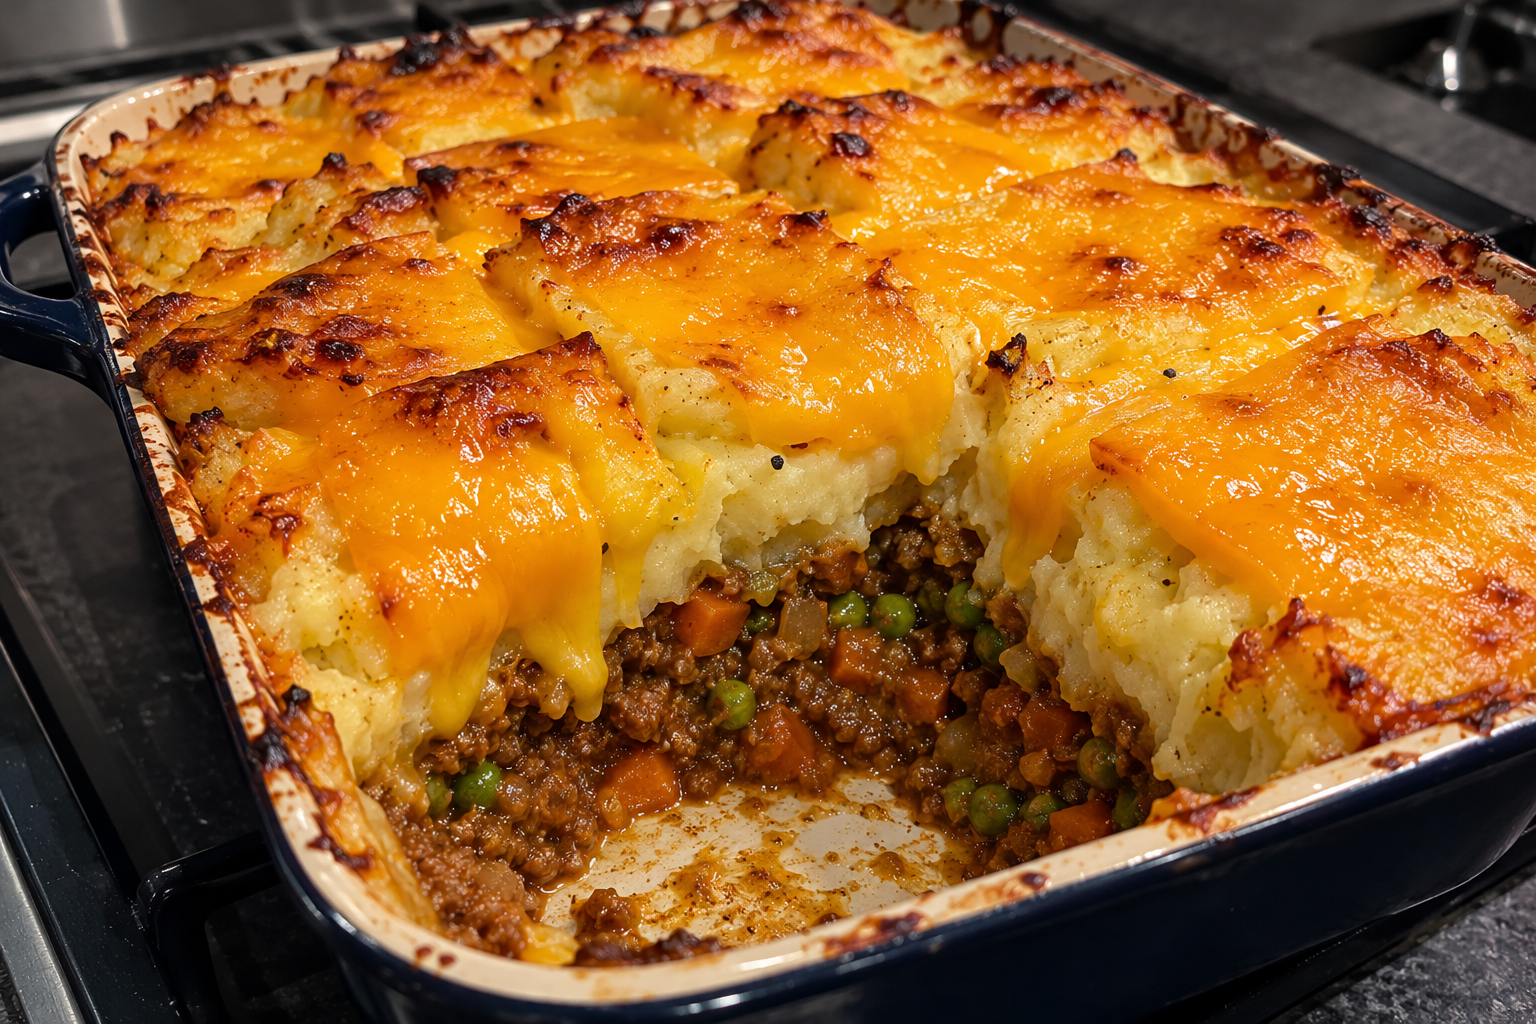
My shepherd’s pie is vegetarian. Not lamb, not beef: vegetarian mince, chopped carrots and peas, finished with an unreasonable quantity of cheese. I’ve had to correct this more than once because apparently everyone assumes the name means lamb.
The cheese isn’t just sprinkled on at the end. I grate a generous amount directly into the mashed potato, then lay more cheese over the top in slabs so it bakes into a proper golden crust. At this point, the potato is mainly there to hold the cheese together.
Serves: 4–6 · Prep: about 30 minutes · Cook: approximately 60 minutes · Oven: 190°C fan
I didn’t record the original weights, so the quantities below are sensible repeat estimates. The vegetarian mince, carrots, peas and heavy cheese treatment are the important bits of my actual version.
Ingredients
500–750g vegetarian mince, depending on the brand and how full you want the dish
1 large onion, finely diced (working quantity)
2 carrots, chopped into small cubes
150g frozen peas (working quantity)
2 tbsp olive oil
2 tbsp tomato purée (optional working addition)
250–350ml vegetable stock, added gradually
1 tsp dried thyme, black pepper and salt to taste
1.2kg floury potatoes, such as Maris Piper
65g butter and a splash of milk for the mash
150–200g grated mature cheddar suitable for vegetarians, to mix INTO the mash (working estimate)
Additional vegetarian-suitable mature cheddar, cut into thick slices or slabs to cover the top
Optional: 2 crushed garlic cloves and a splash of vegetarian Worcestershire-style sauce
An entirely unreasonable amount of cheddar — grated into the mash, then laid on in thick slabs to melt across the top.
Method
Start the potatoes. I peel the potatoes, chop them into roughly even pieces and simmer in lightly salted water for around 15–20 minutes, until completely tender.
Build the filling. I warm the olive oil in a broad pan and cook the onion and chopped carrot over medium heat until softened. If I’m using garlic, it goes in towards the end so it doesn’t burn.
Add the vegetarian mince. I stir it through, follow the brand’s instructions for cooking it and add tomato purée if using. Gradually add vegetable stock and thyme, then let it simmer until the filling is moist and properly thick rather than swimming in liquid.
Peas go in. I stir in the frozen peas towards the end, let them cook through and taste for seasoning. The filling wants to be thick enough to hold up a serious amount of mash.
Mash first. I drain the potatoes well, let the steam escape and mash them thoroughly. Only then do I work in the butter and a little milk.
Cheese, and plenty of it. I fold the grated cheddar into the mash until it’s evenly distributed. The mash needs to be spreadable but not runny. If it looks like enough cheese, I’ve probably underestimated it.
Assemble. I spoon the filling into a deep baking dish and cover it with the cheesy mash, starting around the edges. Once it’s smoothed out, I lay additional thick slabs of cheddar across the top. This is less a garnish and more a second roof.
Bake. Into a preheated 190°C fan oven for around 25–30 minutes, until the filling bubbles round the edges and the cheese is properly golden. I let it stand for ten minutes before dishing up.
If the filling is thin, I keep reducing it before adding the mash. And yes, there’s a lot of cheese. I’ve been told there’s such a thing as too much, but I’ve yet to see any convincing evidence.
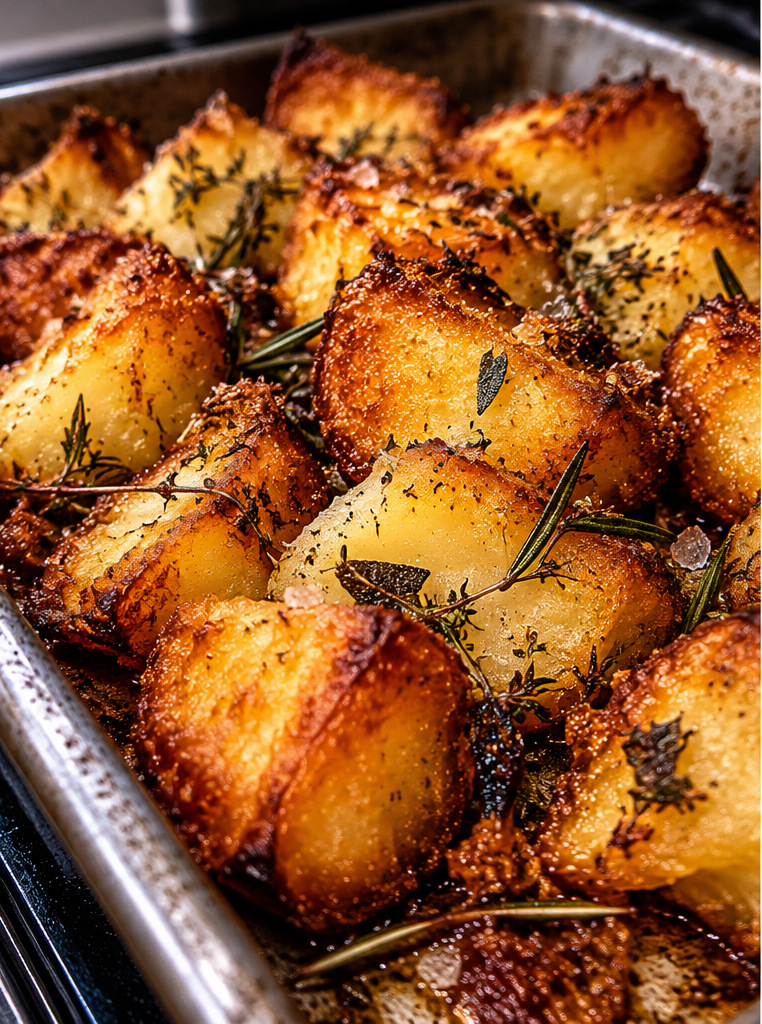
I want my roasties deep golden, properly crispy on the outside and fluffy in the middle, not pale, neat little potatoes. My favourite spud for the job is the King Edward. They were my grandad’s favourite and they’re mine too. I peel them to make lots of deep flat angles, deliberately take the boil further than most recipes suggest, then shake them with a ridiculous quantity of rosemary, thyme, sage and Maldon salt. They go straight into hot oil, get turned to coat, then I brush butter over the top before roasting at 240°C fan for at least 45 minutes. The ragged edges go beautifully crisp. That’s the whole point.
SERVES: about 6 · PREP: 20–30 minutes plus boiling · ROAST: at least 45 minutes at 240°C fan, longer if they need more colour. I normally judge doneness by the colour and crunch, not an exact minute on the clock.
Ingredients
King Edward potatoes — my preferred roastie, and my grandad’s favourite too (about 1.5 kg for six as a practical quantity)
4 good pinches of Maldon sea salt, added to the drained potatoes before shaking
4 tbsp rosemary
4 tbsp thyme
2 tbsp sage
Oil for the preheated roasting tray — enough to coat each potato properly when turned (rapeseed or another high-heat roasting oil)
Butter to brush generously over the hot potatoes before they go into the oven
A large saucepan with lid, colander, heavy metal roasting tray and a pastry brush
The colour I’m after: deeply golden King Edwards, proper rough edges and enough crunch to make them worth the effort.
Method
Peel for angles, not neatness. I peel the King Edwards to create plenty of deep, flat faces and sharp corners. I don’t want smooth, round potatoes. Keep the pieces a broadly similar size so they cook together, but make the edges deliberately angular — those are what turn into the crunchy bits.
Get the oil hot. While the potatoes are boiling, preheat the oven to 240°C fan. Put the heavy metal roasting tray and oil into the oven to get properly hot. The fat should be ready to sizzle when the drained potatoes land in it; make sure the tray is stable and leave enough room between the pieces.
Overboil — deliberately. Put the potatoes in a large pan of water and boil them until they’re very soft, almost at the point of falling apart, but still holding their shape. That’s further than the usual parboil. Test the biggest piece with a knife: it should slide through easily, but the potato shouldn’t disintegrate when lifted. The exact time depends on how big you cut them.
Drain thoroughly. Tip the potatoes carefully into a colander and give the steam a little time to escape. I want them tender and dry enough on the outside that they rough up properly, not dripping water into hot oil.
Season before the shake. Return the drained potatoes to the empty saucepan. Add four good pinches of Maldon salt, four tablespoons of rosemary, four tablespoons of thyme and two tablespoons of sage. Yes, that’s a lot of herbs. These are proper herby roasties, not potatoes that have merely been waved near a sprig of rosemary.
SHAKE. Put the lid on firmly, hold it in place and give the saucepan a good, deliberate shake. I want the outer surfaces to break down into a rough, fluffy coating, with all the salt and herbs caught in the edges. Stop before the potatoes become mash. It’s that starchy, shaggy surface that gives me the crust I want.
Into hot oil. Wearing oven gloves, carefully take out the hot tray. Lower the potatoes into the oil away from you so it doesn’t splash. They should sizzle. Use a metal spoon or tongs to rotate each potato until all its sides are coated. Spread them in one layer with space between them.
Brush with butter. While the potatoes are hot, brush butter across the tops. It melts onto the surfaces and through those rough edges. Don’t drown the tray — I want the oil and butter coating the spuds rather than a puddle of liquid at the bottom.
Roast hard and hot. Put the tray back into the oven at 240°C fan for at least 45 minutes. Check partway through, and turn carefully if one side is colouring faster. Butter and herbs can catch at this temperature, so keep an eye on any dark patches without pulling them while the potatoes are still pale.
Judge by the crust. I’m after a proper deep golden colour, sharply crisp edges and a soft fluffy middle. If they’re merely light gold at 45 minutes, give them longer, checking regularly. They should crunch when you cut into one. Serve straight away, ideally with the main roast and plenty of gravy.
This is from my Borniak pork-loin cook in October 2025. I use a dry brine, then paprika, garlic, mustard and thyme to build flavour without hiding the pork.
SERVES 6 · PREP 15 min · COOK 2–3 hr + rest
For this I use my Borniak UW-150 and an Inkbird Wi-Fi probe in the thickest part of the pork, away from any fat. Pork loin is much less forgiving than short ribs, so I follow the core temperature rather than letting the smoker run for hours just because the recipe gives a time.
Ingredients
1.2–1.5 kg boneless pork loin joint
1½ tsp fine salt (about 8–9 g), for dry brine
1 tsp smoked paprika
1 tsp freshly ground black pepper
1 tsp dried thyme
2 tsp Dijon mustard
2 garlic cloves, crushed (or 1 tsp granules)
1 tbsp neutral oil
Beech or apple wood chips
Probe thermometer
Method
I set up before lighting: check the smoker manual, ventilation, drip tray, clean racks, fuel, an independent rack-height thermometer and a sanitised meat probe. Keep raw food refrigerated until the smoker has stabilised. Record starting temperature and time.
Day before, check the pork loin is evenly shaped and leave a thin layer of fat. Pat dry, sprinkle with 1½ tsp fine salt and refrigerate uncovered on a rack overnight for a simple dry brine. If you cannot do overnight, allow 2–4 hours in the fridge instead.
Take it out while preheating the Borniak, but do not leave raw pork standing warm. Mix paprika, black pepper, thyme, mustard, garlic and oil into a paste. Spread thinly all over the pork.
I preheat smoker to 110–120°C, within the rated limit in your specific UW150 manual. The original cook notes mention a cabinet around 120–125°C; stay within your model’s safe rated setting rather than copying a higher number blindly.
I insert a clean meat probe into the thickest middle of the loin, avoiding the fat layer. Put on a rack with airspace all around and add a moderate beech or apple smoke for the first hour.
Continue cooking, usually another 60–120 minutes depending on thickness, until the centre is fully cooked: 70°C held for 2 minutes or 75°C for 30 seconds is a useful FSA-equivalent safety endpoint.
Lift the pork to a board and loosely tent with foil. Rest 15 minutes, keeping the resting juices. Slice across the grain into 1 cm thick slices, spoon over the juices and serve while hot.
Write down the actual smoker-air temperature, centre temperature, total time, smoke duration and final texture. If the food is finished early, either keep it properly hot at 63°C or above under monitoring or chill it promptly; do not leave it sitting lukewarm in a turned-off smoker.
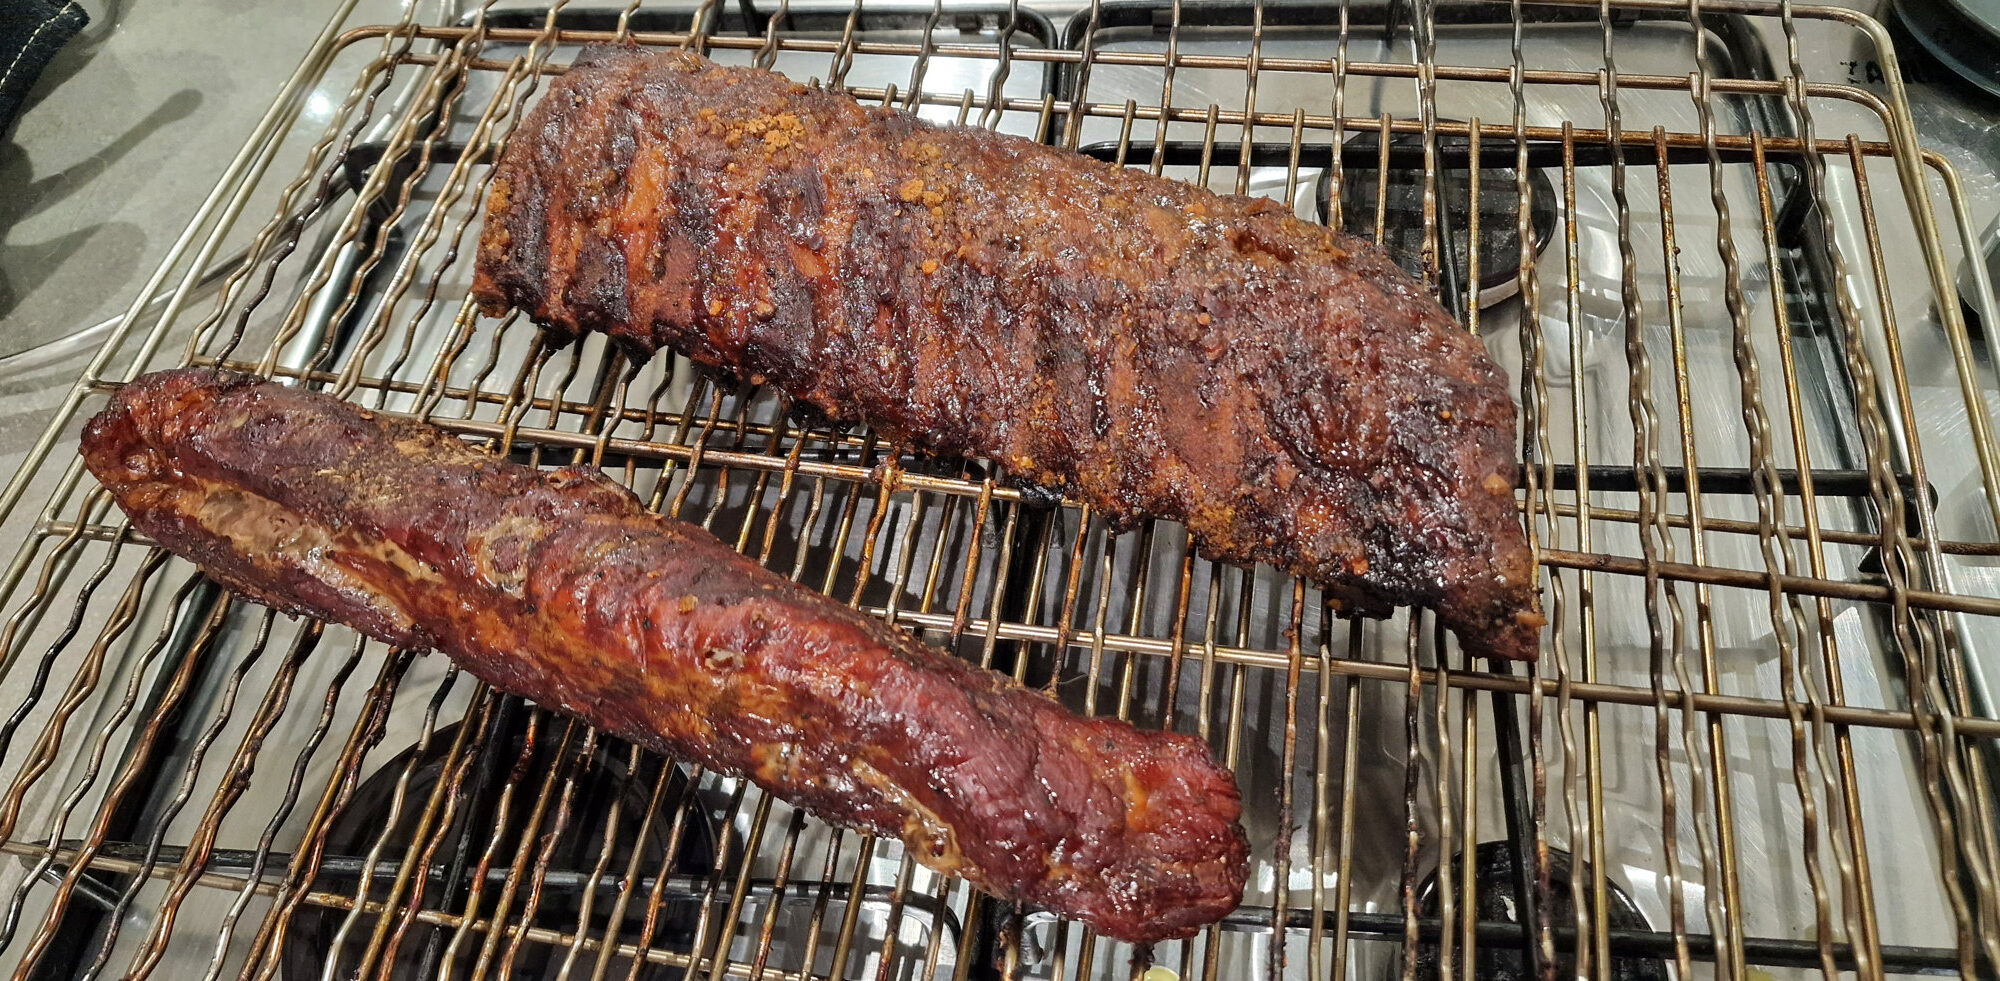
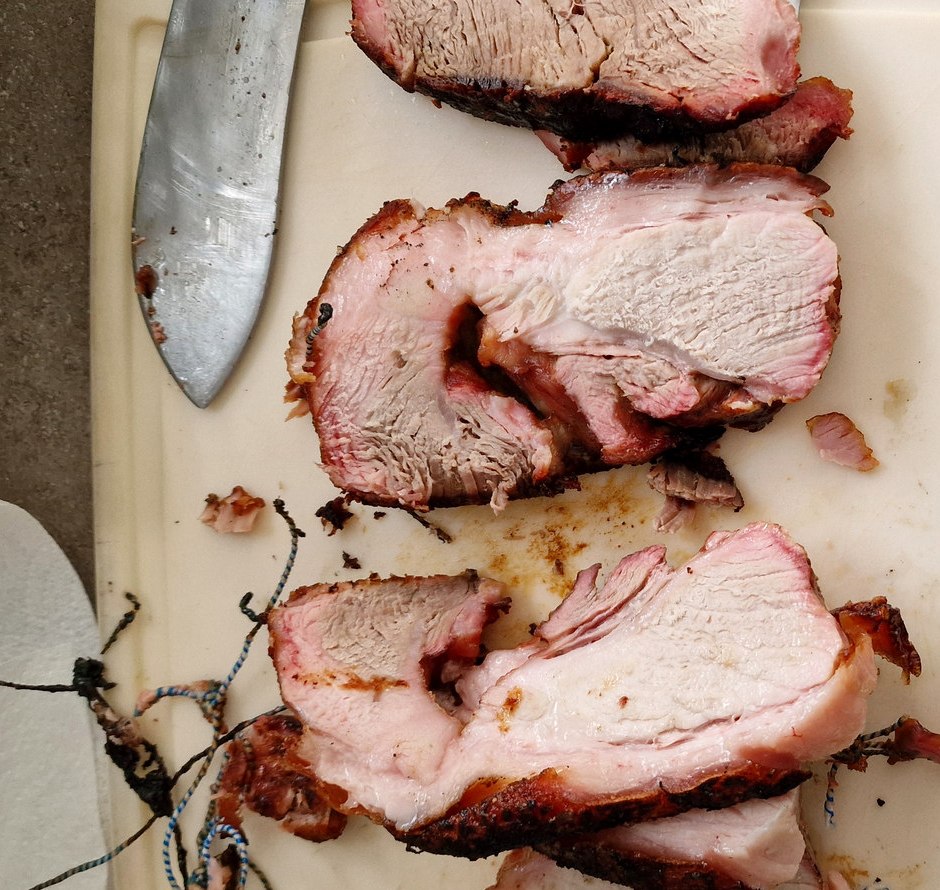
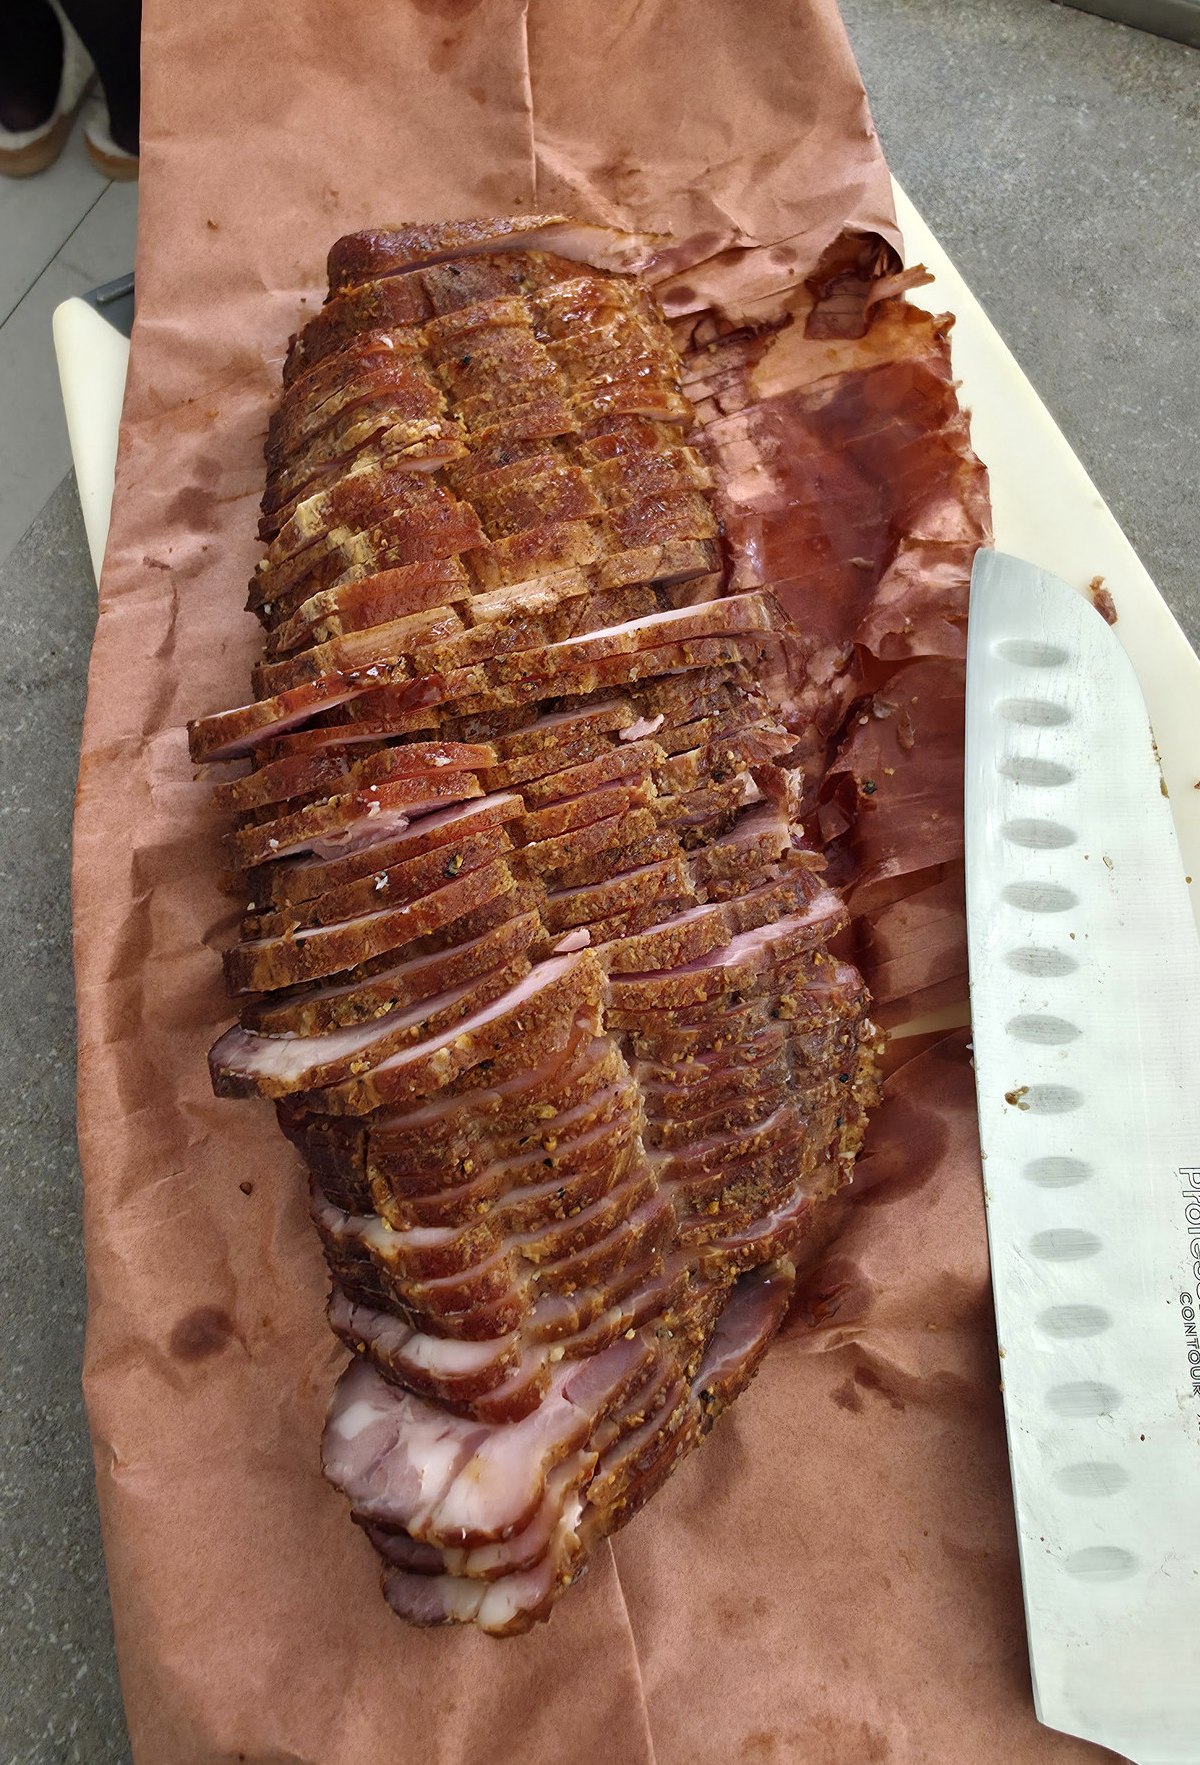
An earlier pork cook, photographed in May 2025. A separate batch from the recipe described above.Another pork cook, photographed in April 2026. A separate batch, but useful for seeing the cooked result.