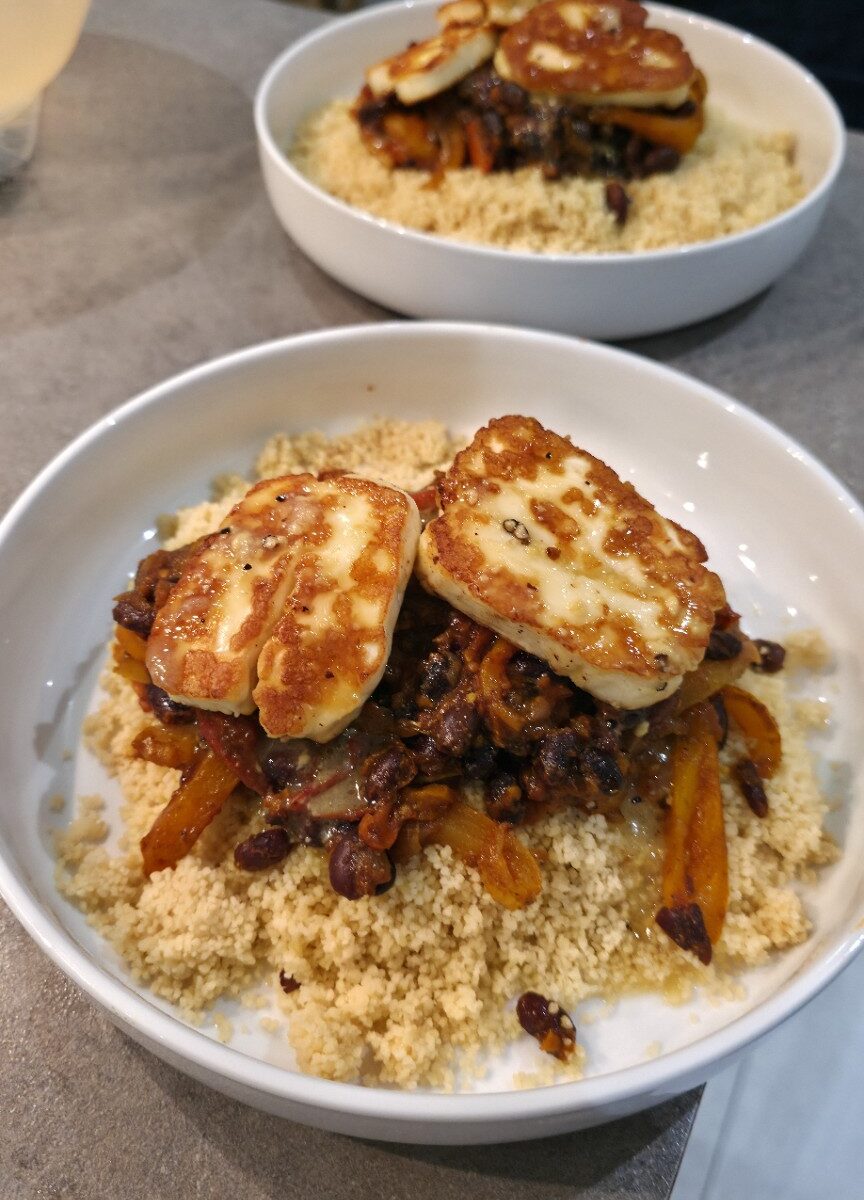
Smoky Black Bean & Halloumi Couscous with Lemon-Garlic Dressing

Golden pan-fried halloumi on smoky black beans, peppers and couscous in a white bowl, photographed in Jimmy's kitchen

This started as a Friday-night rummage through the kitchen: halloumi, three peppers, an onion and some couscous, but no chickpeas. I did have black beans, cherry tomatoes, plenty of garlic and a jar of Kinder’s Woodfired Garlic seasoning. The result was a rich, smoky black-bean and pepper mixture over fluffy couscous, topped with beautifully golden halloumi and a sharp lemon, garlic, honey and Dijon dressing. Rather good, as it turns out.

There’s a lesson in this one. On my first attempt I cooked the onions and peppers a bit too long. The flavour was great, but they lost their bite while I was waiting for the couscous water to boil. I don’t own a kettle, so this updated version starts the water early, shortens the vegetable cooking and keeps the couscous separate from the sauce. It’s the way I’ll make it next time.

Serves: 3–4 comfortably (or two enormous bowls)   Prep: 15 minutes   Cook: about 25–30 minutes   Equipment: large cast-iron or stainless frying pan, second frying pan, small saucepan with lid, heatproof bowl.
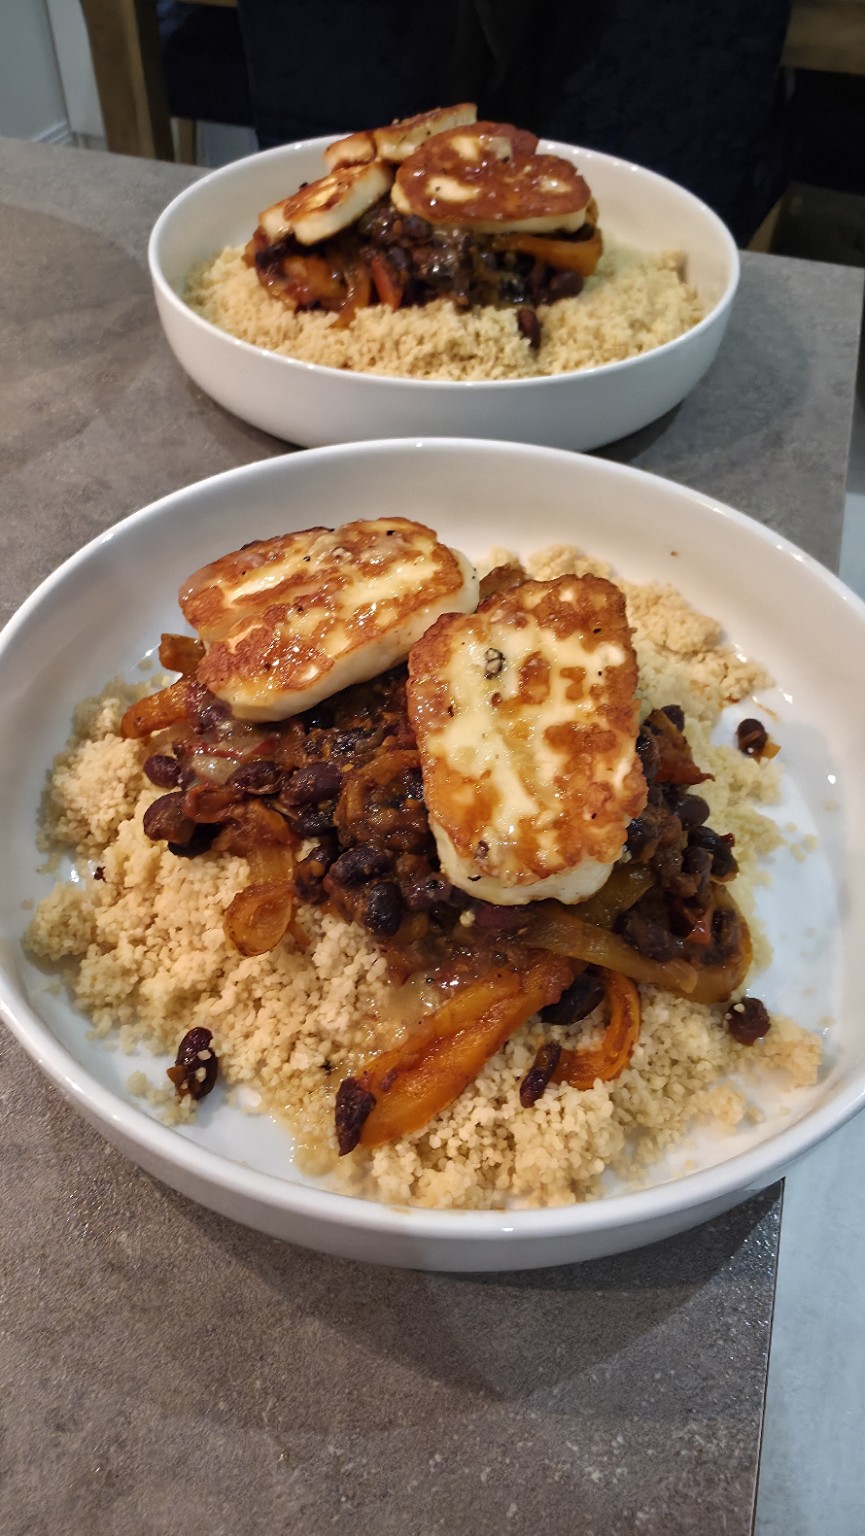
Two bowls of couscous topped with smoky black bean peppers and golden halloumi, served with a glass of white wine
Two very generous Friday-night portions. The quantities below make enough for three or four normal appetites.

Ingredients

For the smoky black beans and peppers

  • 1 large onion, sliced into thin half-moons (about 3mm)
  • 3 peppers — I used red, orange and yellow — sliced into strips roughly 5mm wide
  • 10–14 cherry tomatoes, halved
  • 1 x 400g tin of black beans, drained and rinsed
  • 3 cloves of garlic, finely chopped
  • 1 tbsp tomato purée
  • 1 tsp Kinder’s Woodfired Garlic seasoning (or an extra small pinch of smoked paprika and garlic powder)
  • 1 tsp smoked paprika
  • 1 tsp ground cumin
  • ½ tsp dried oregano
  • ½ tsp chilli flakes, optional
  • 1–2 tbsp olive oil, plus a splash of water when needed
  • Freshly ground black pepper; salt only after tasting

For the couscous and halloumi

  • 300g dry instant couscous (use 150–200g for smaller portions)
  • 350ml boiling water for the 300g couscous, or follow your packet’s liquid ratio
  • 1 tsp Maggi liquid seasoning, optional, or vegetable stock instead of plain water
  • 2 tsp olive oil for the couscous
  • 225g halloumi, sliced approximately 1cm thick
  • 1–2 tsp olive oil for frying the halloumi

For the lemon, garlic and honey dressing

  • 2 tbsp extra virgin olive oil
  • Juice of ½ lemon, plus the other half to finish
  • 1 tsp Dijon mustard
  • 1 tsp honey
  • 1 clove garlic, finely grated
  • A generous grind of black pepper

Method

1. Start the water and prepare everything

First, put around 450–500ml water in a small saucepan, cover with a lid and bring it towards the boil on the hob. I’ll measure out the 350ml I need when I make the couscous; starting with slightly more water allows for a bit of evaporation. There’s no kettle shortcut in this kitchen, and I don’t want the vegetables sitting around cooking while I wait.

While that heats, halve and thinly slice the onion, cut the three peppers into strips, halve the cherry tomatoes, finely chop three garlic cloves, drain and rinse the beans, and cut the halloumi into thick slices. Pat the halloumi completely dry with kitchen paper. Grate the fourth garlic clove separately for the dressing.
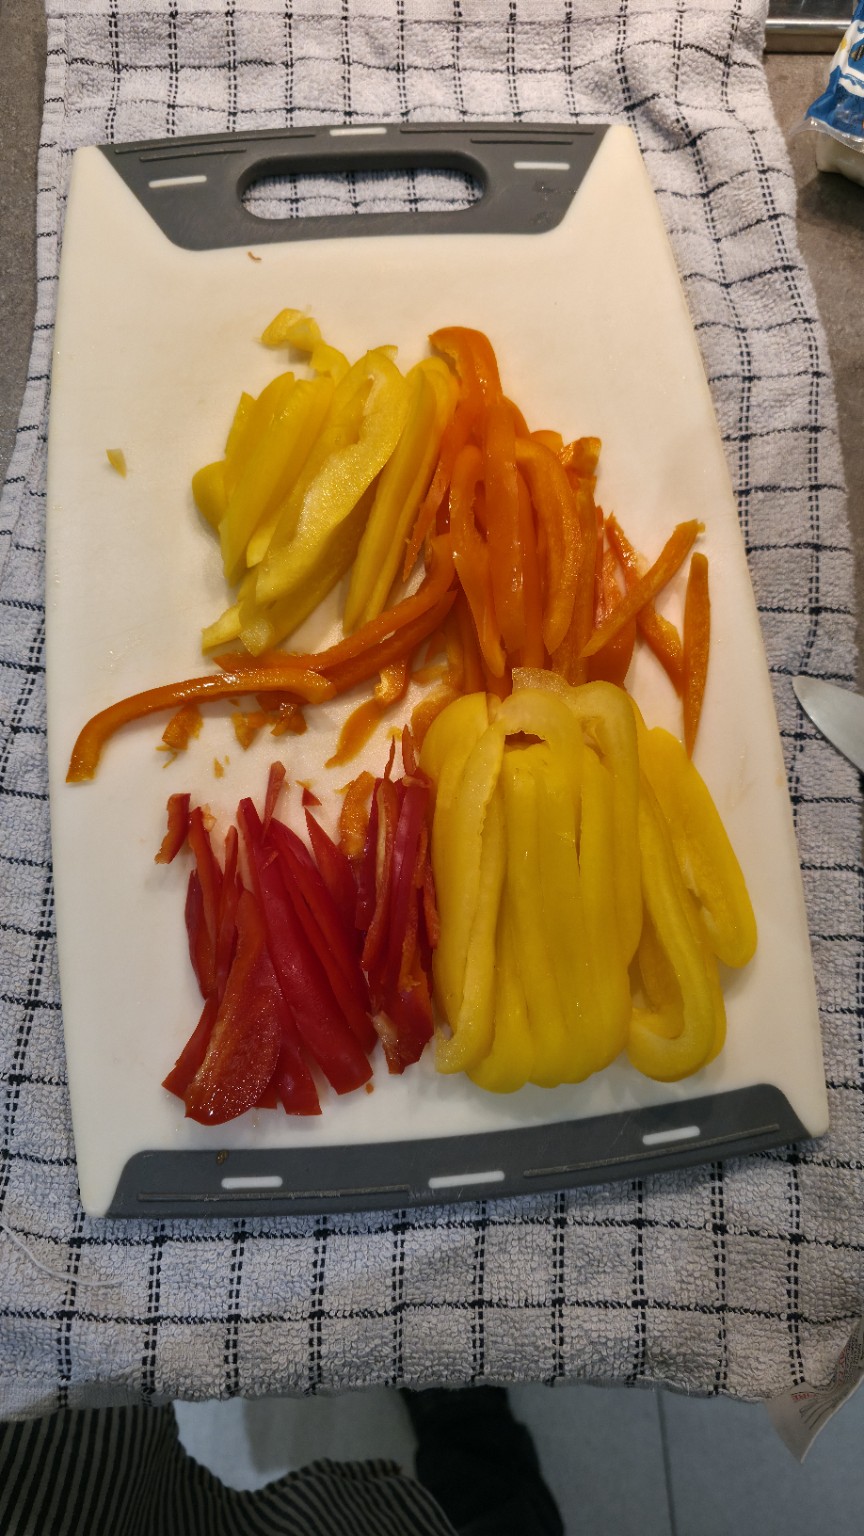
Red orange and yellow peppers sliced into strips on a white chopping board
Peppers prepared in three colours before anything goes into the pan.

2. Make the dressing now, not at the end

Whisk together the olive oil, juice of half a lemon, Dijon, honey, grated garlic and black pepper in a bowl. Taste it. I want it sharp, garlicky and only gently sweet. Add a touch more honey if it’s too tart. Put it to one side and whisk again just before serving. Making this early means the vegetables won’t overcook while I’m distracted.

3. Soften the onions — but don’t take them too far

Heat a large cast-iron or stainless frying pan over medium heat with 1 tbsp olive oil. Add the onion and a small pinch of salt. Cook for 8–10 minutes, stirring every minute or two, until softened and lightly golden. I’m not chasing fully dark, jammy caramelised onions here; they need to retain some structure. If they start catching, add a tablespoon of water rather than leaving them on the heat for longer.
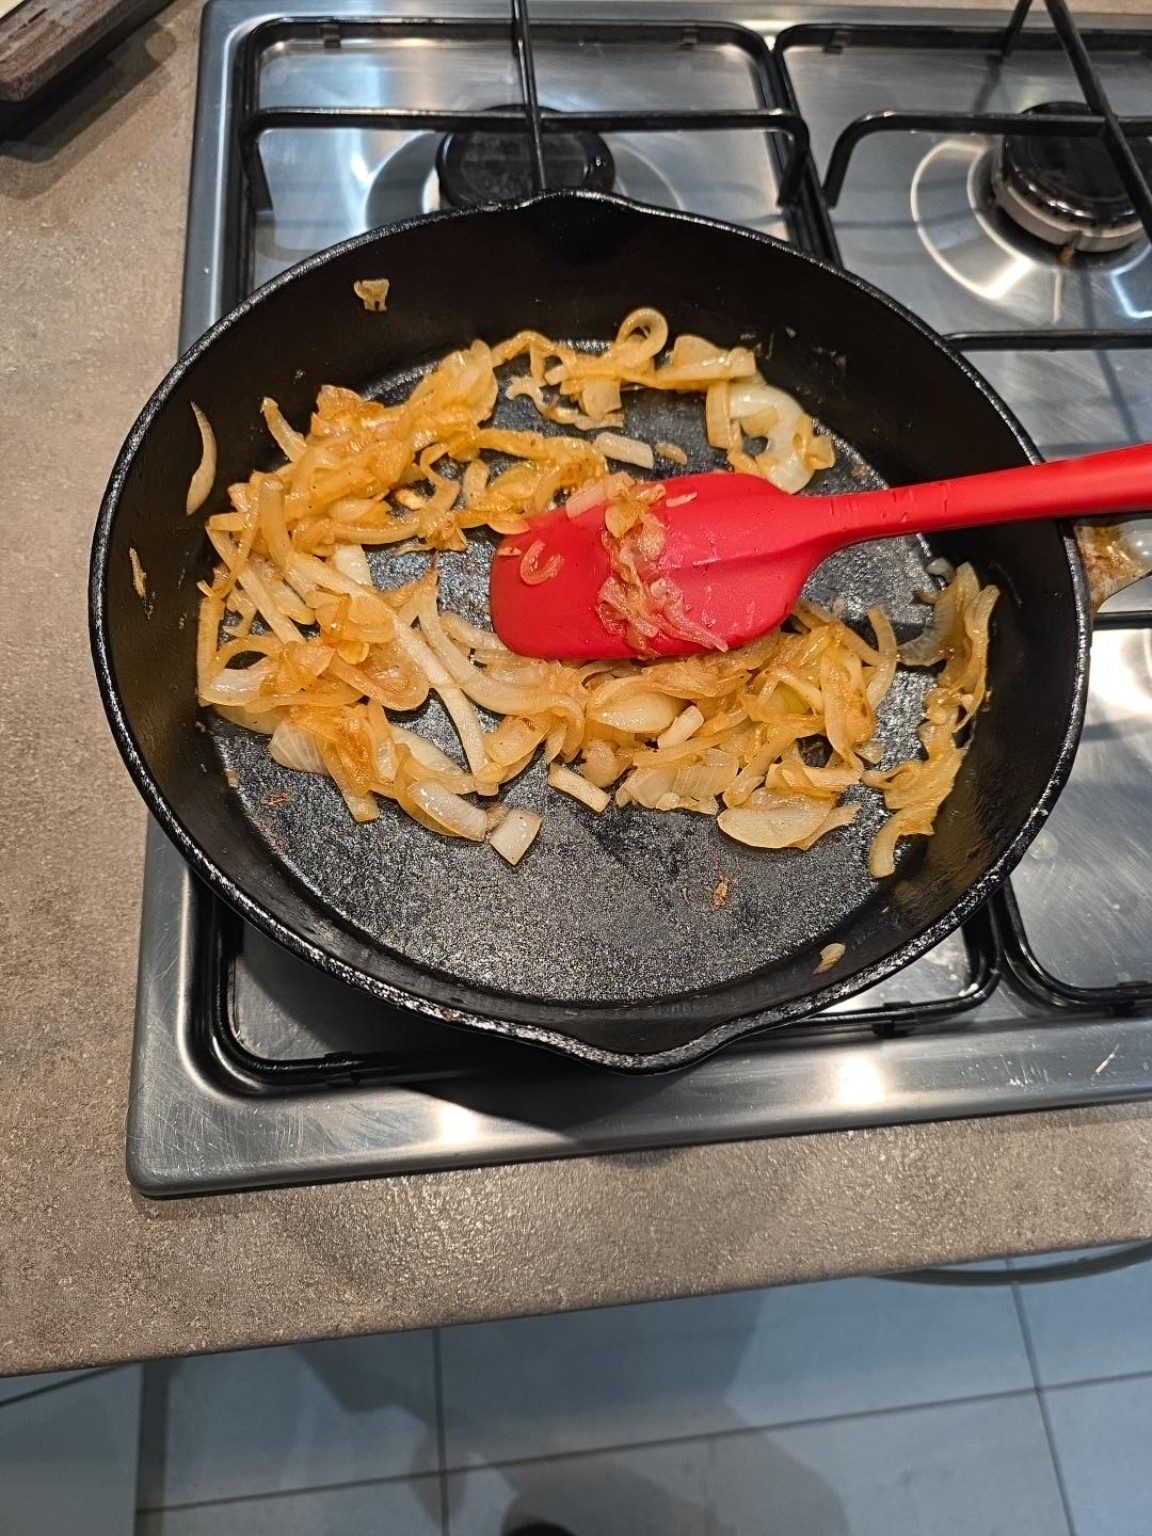
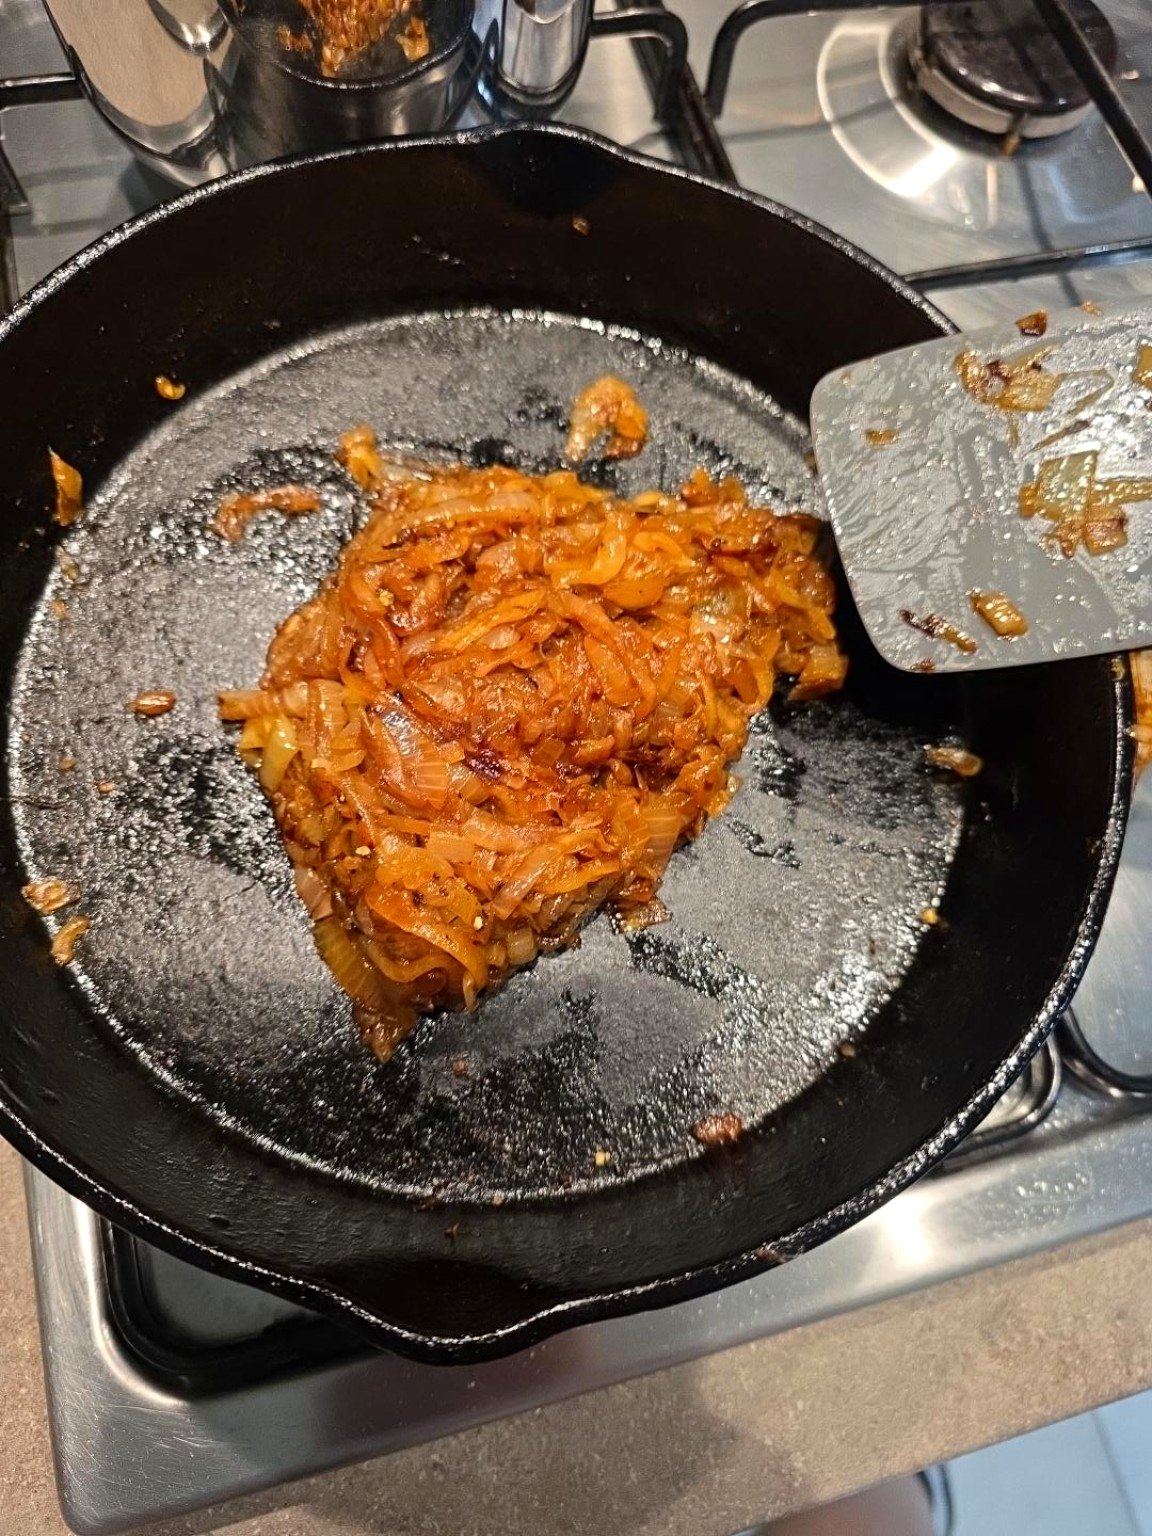
Thinly sliced onions turning golden in a cast-iron pan alongside a red spatula
The onions softening in cast iron. A little less cooking time next time will help preserve the texture.

4. Give the peppers a quick, hot fry

Increase the heat to medium-high. Add the sliced peppers and a little extra oil if necessary. Cook for 4–5 minutes, turning them occasionally rather than constantly stirring. I want a bit of colour and a little remaining bite. If your pan is very crowded, use a larger pan or cook them in batches — a heap of peppers will steam rather than sear.
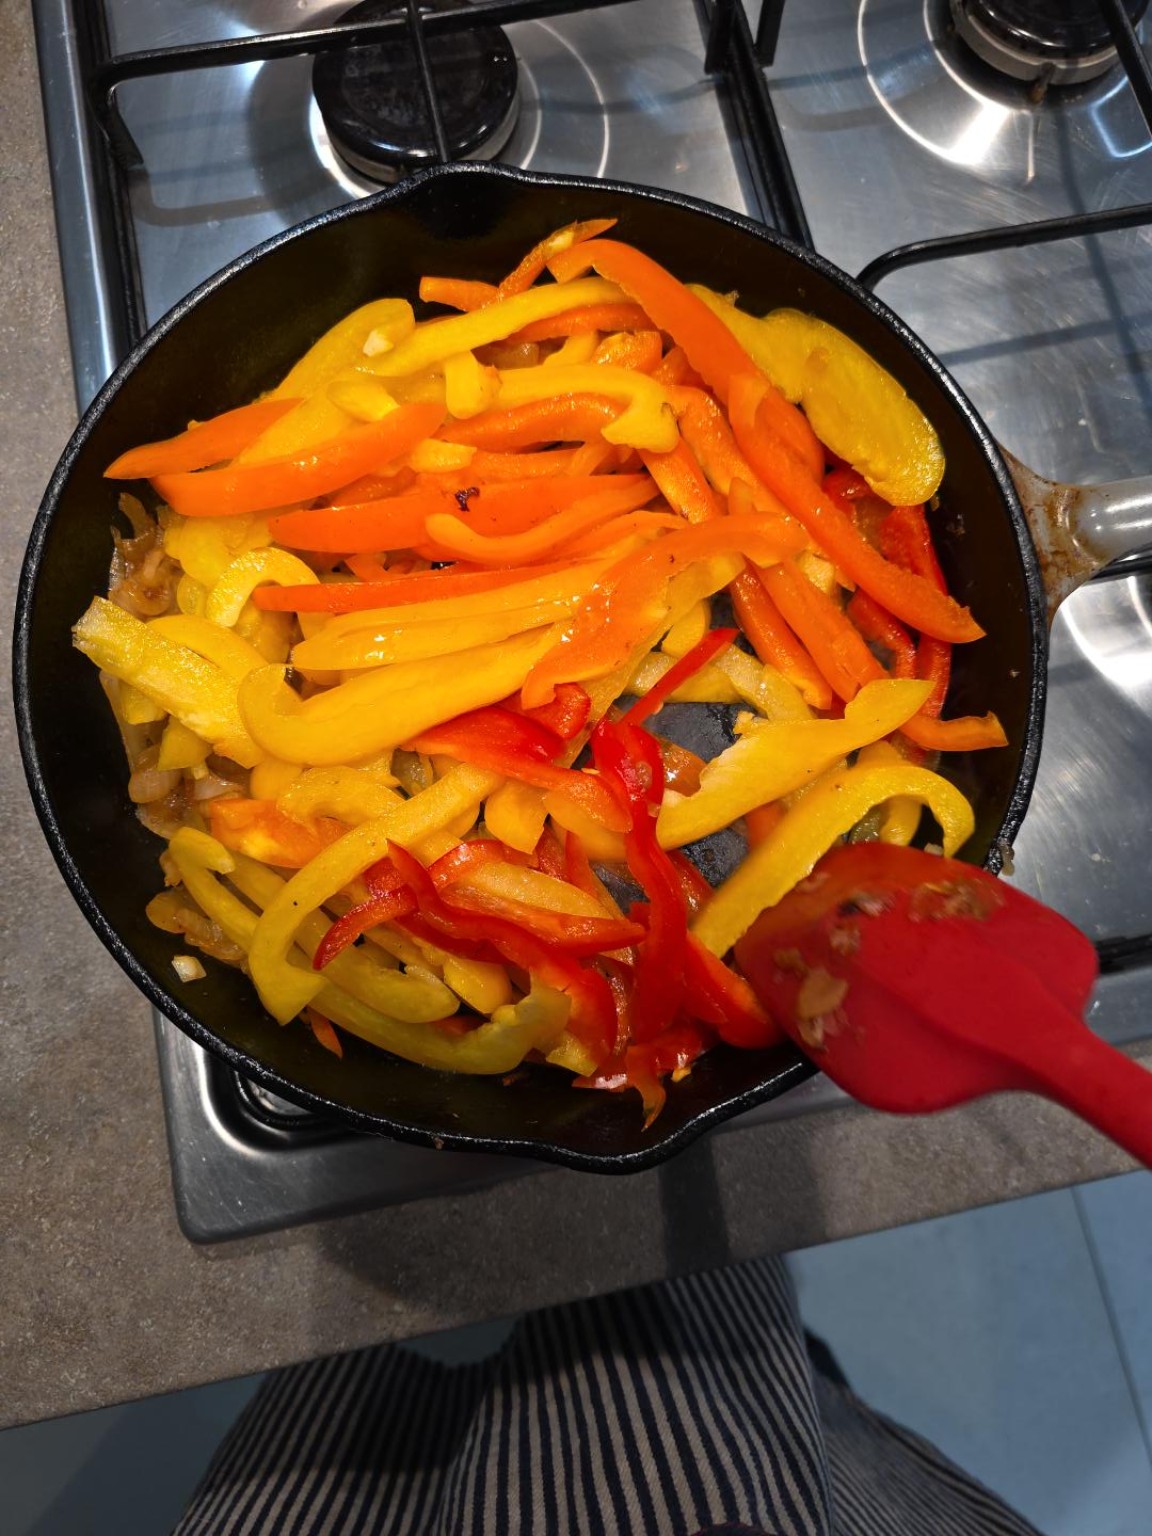
Red, orange and yellow pepper strips cooking with onions in a black cast-iron frying pan
The peppers frying with the onions. Keeping them a little firmer is the refinement for next time.

5. Blister the tomatoes briefly

Push the peppers aside and place the halved cherry tomatoes cut-side down against the pan. Give them 2 minutes undisturbed, then fold everything together and cook for about 1 more minute. A few tomatoes should release their juice and start forming a sauce, but I don’t need every single one to completely collapse.
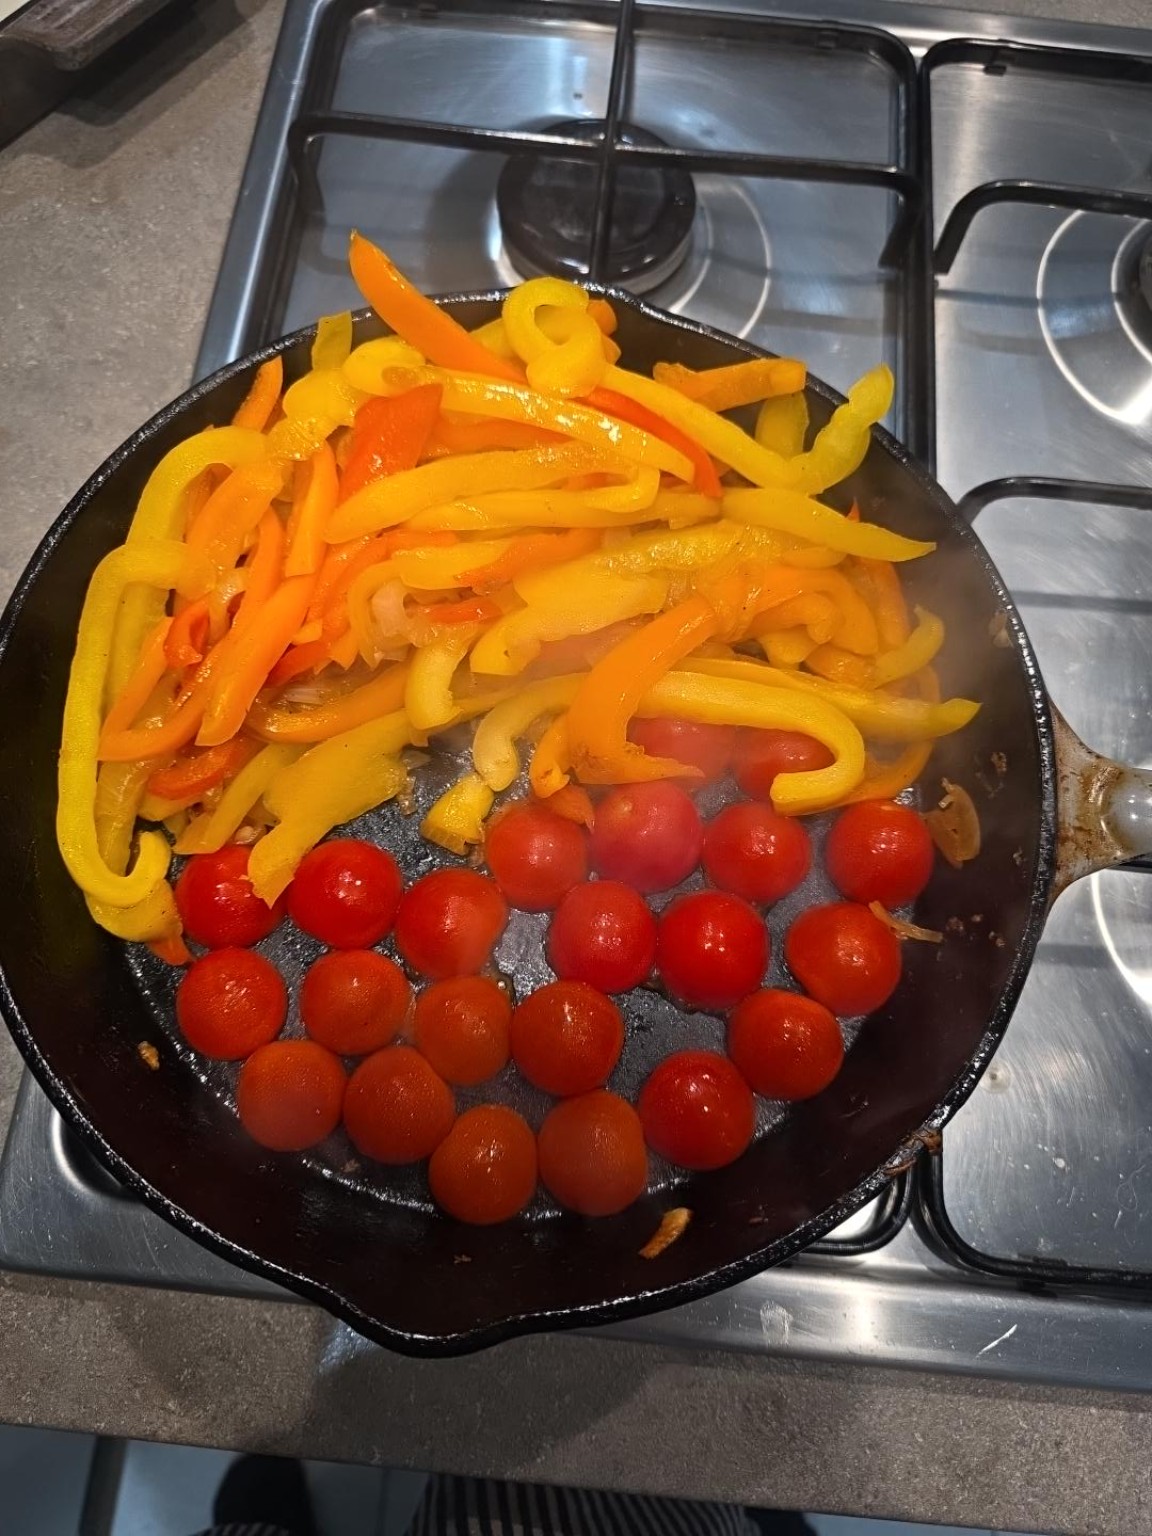
Halved cherry tomatoes placed cut-side down in cast iron with red, orange and yellow peppers
The tomatoes go in cut-side down for a quick blister before the smoky seasonings.

6. Add the garlic and smoky seasoning

Reduce the heat to medium. Add the three chopped garlic cloves and stir for 30 seconds. Add the Kinder’s Woodfired Garlic, smoked paprika, cumin, oregano, optional chilli flakes and tomato purée. Stir for around 60 seconds to toast the spices and cook out the tomato purée. Add a small splash of water if it begins to stick. Go easy on salt — the seasoning and halloumi may already bring plenty.
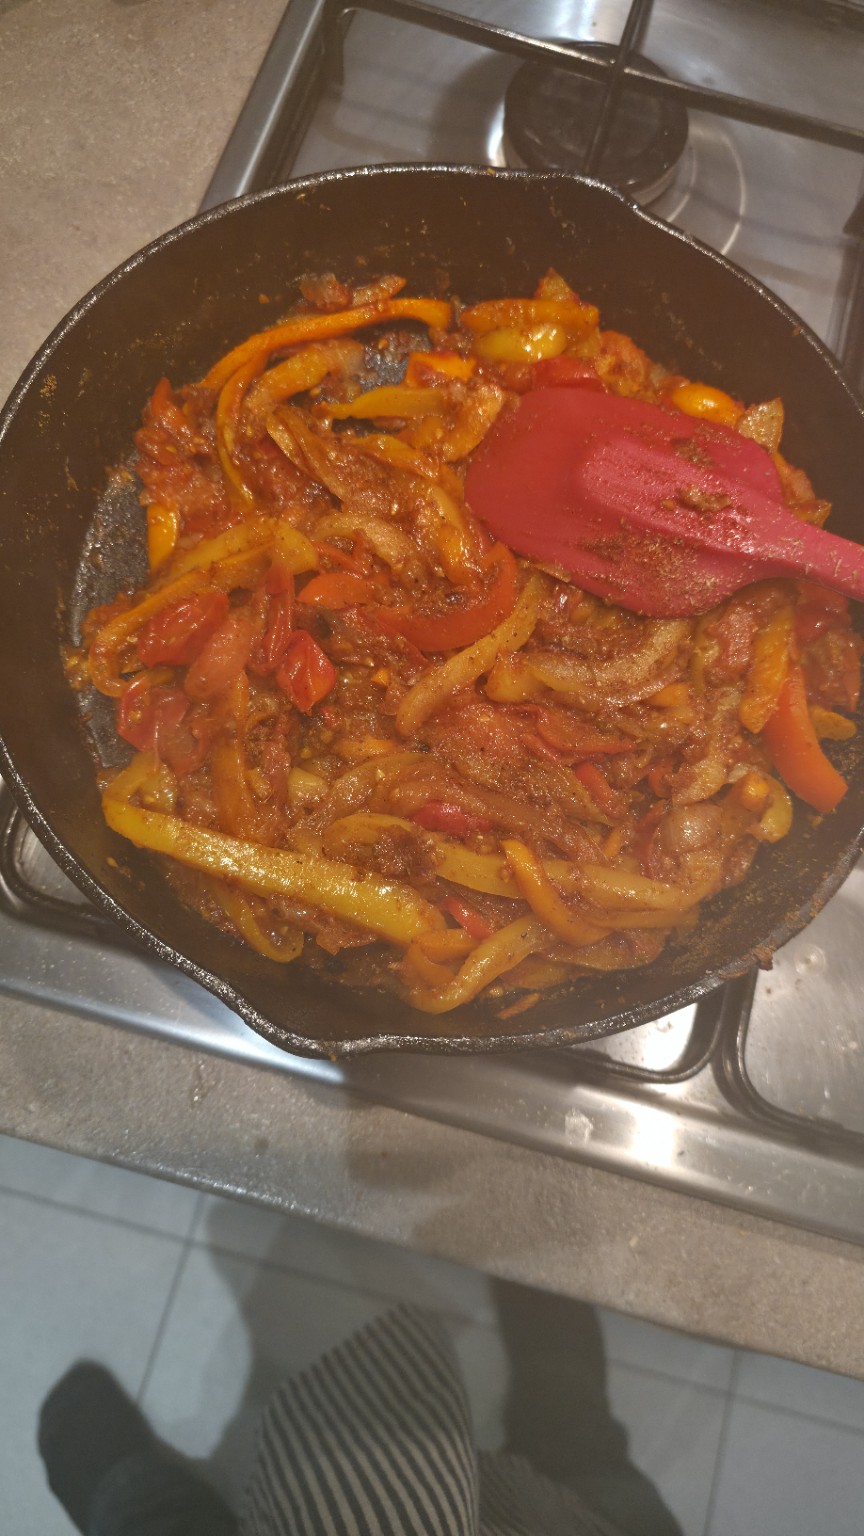
A rich orange-red smoky tomato and pepper mixture with spices in a black cast-iron pan
The smoky tomato and pepper base just before adding the black beans.

7. Warm the black beans, then STOP cooking
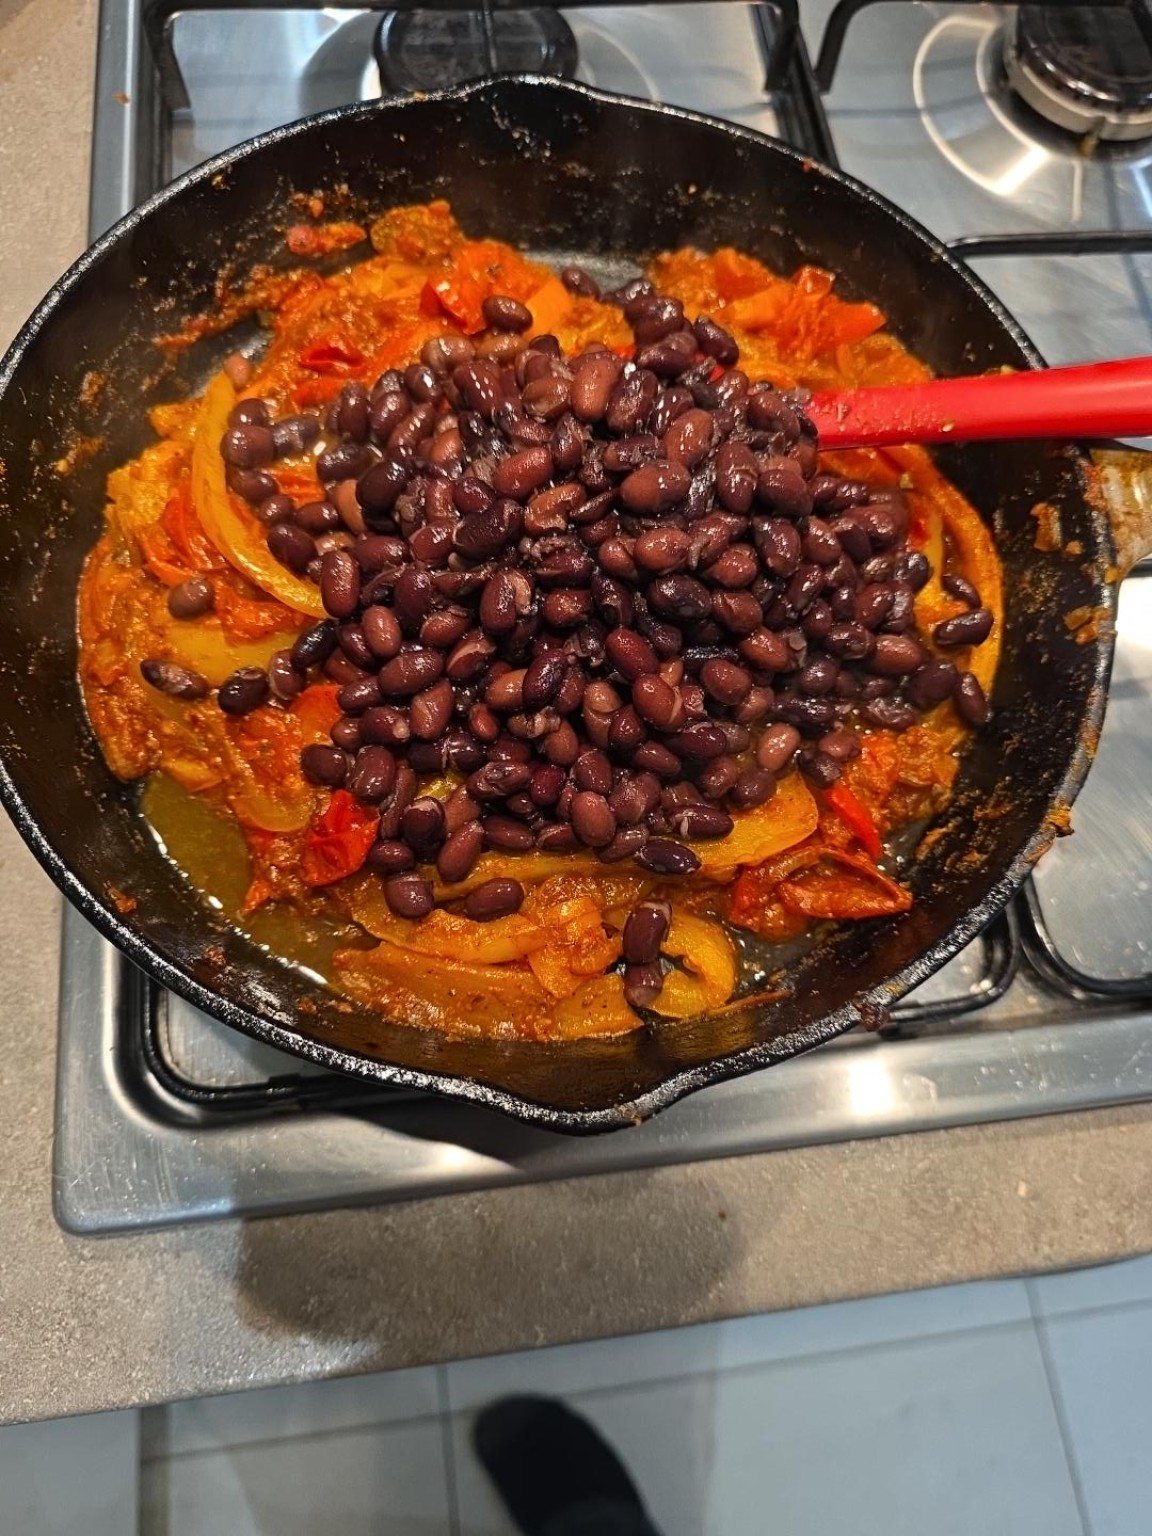
Drained black beans added to the centre of a cast-iron pan with peppers and smoky tomato sauce
Black beans go in last, simply to heat through.

Add the drained black beans and 2–3 tbsp water. Fold through gently and heat for 2–3 minutes, until piping hot. Taste the sauce and adjust the seasoning. Then take the pan off the heat. This is the important change from my first attempt: don’t keep simmering it into a soft, mushy ragout while doing the rest of the cooking.
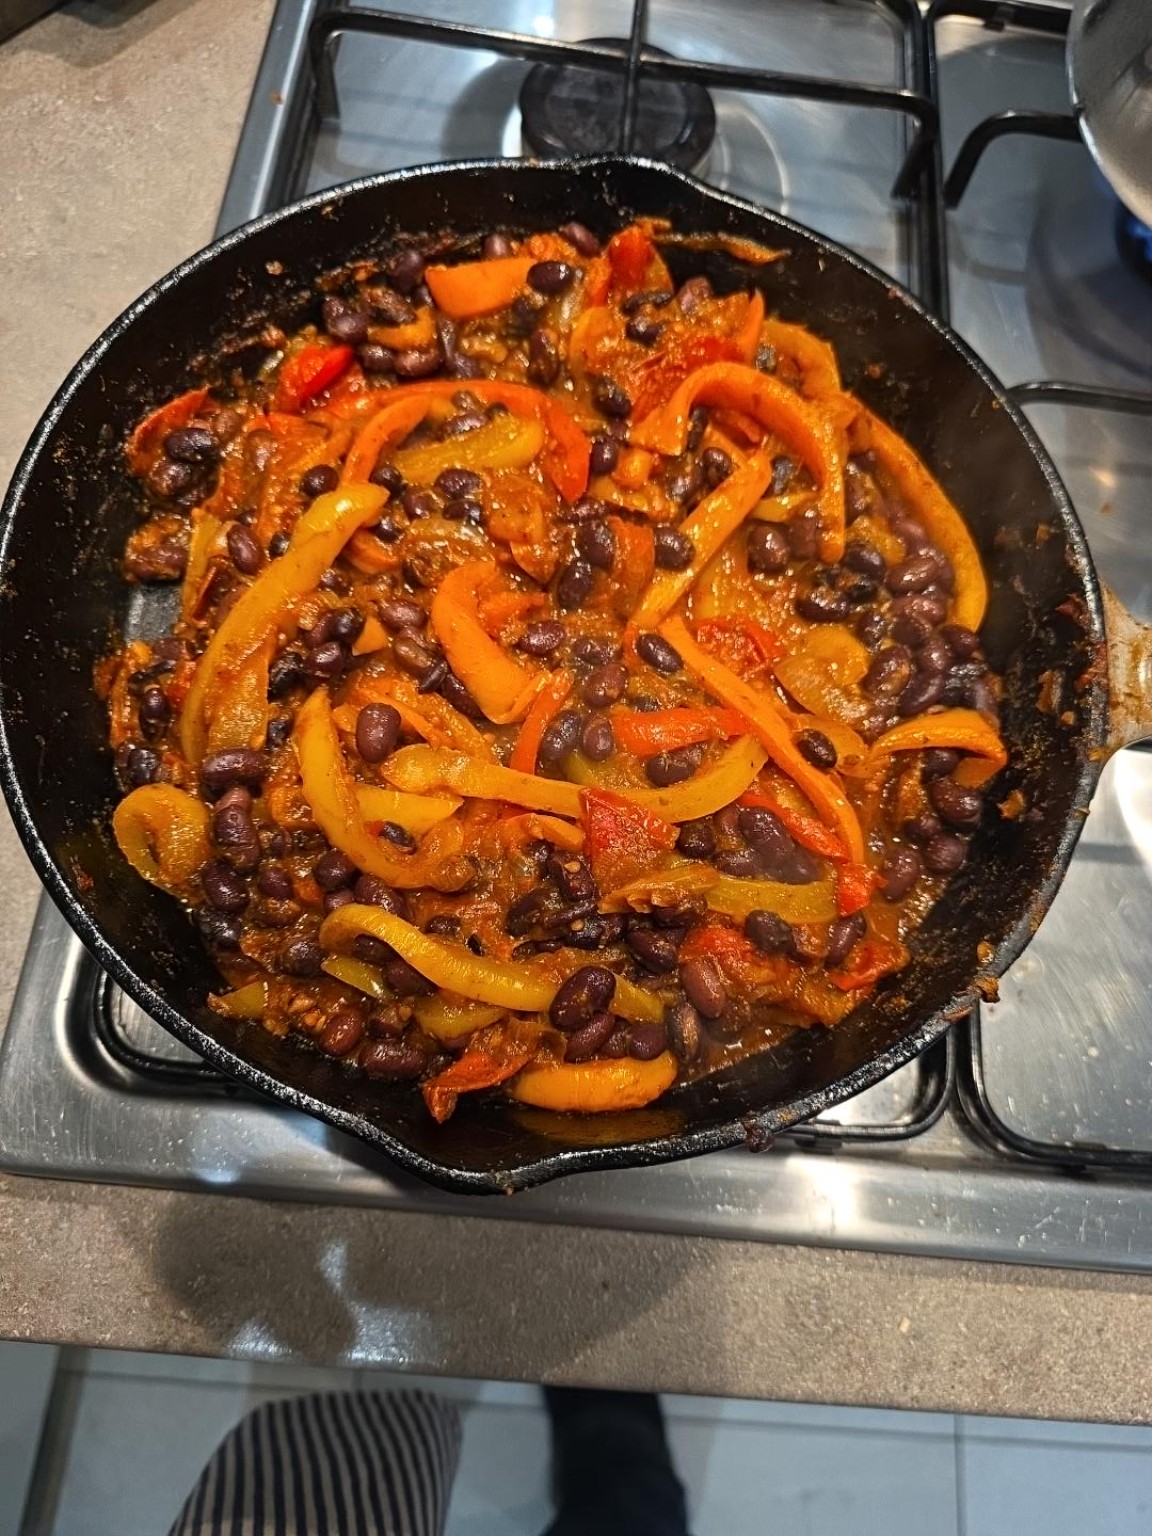
Black beans and colourful peppers in smoky tomato sauce in a cast-iron frying pan
My first batch tasted excellent but softened more than I wanted. Next time I’ll stop cooking a little sooner.

8. Make the couscous

Put 300g dry couscous in a large heatproof bowl. Measure 350ml of boiling water from the saucepan and season it lightly with a teaspoon of Maggi liquid seasoning if using (or use vegetable stock instead). Stir in 2 tsp olive oil and a few grinds of black pepper, pour over the couscous and stir once. Cover tightly with a plate for 5 minutes, then remove the plate and fluff thoroughly with a fork. If your brand needs a slightly different liquid ratio, follow the packet. If it remains firm, add a small splash more boiling water and cover briefly.

I accidentally ended up with 300g of couscous on the night. That’s an enormous amount for two, so 150–200g is a sensible option for smaller appetites; just reduce the water to match your packet’s instructions. Either way, keep the couscous separate from the vegetables so it stays fluffy.

9. Fry the halloumi last

Heat a separate stainless steel or cast-iron frying pan over medium heat and add 1–2 tsp olive oil, enough to create a thin film. Make sure the halloumi is well dried. Lay the slices in the pan without crowding and leave them alone for approximately 2–3 minutes. Check underneath using a thin spatula; once a golden crust has formed, gently slide the spatula under and flip. Give the second side another 1–2 minutes. Take the slices off before the darker patches turn bitter.

My halloumi was properly patted dry before it went into the pan, so that wasn’t the issue. It still initially welded itself to the stainless steel and split into a few pieces when I tried to lift it. I gave the crust more time to form, then slipped a thin metal spatula underneath rather than pulling at it. The result was beautifully golden halloumi in the end — but drying it thoroughly certainly didn’t stop it sticking!
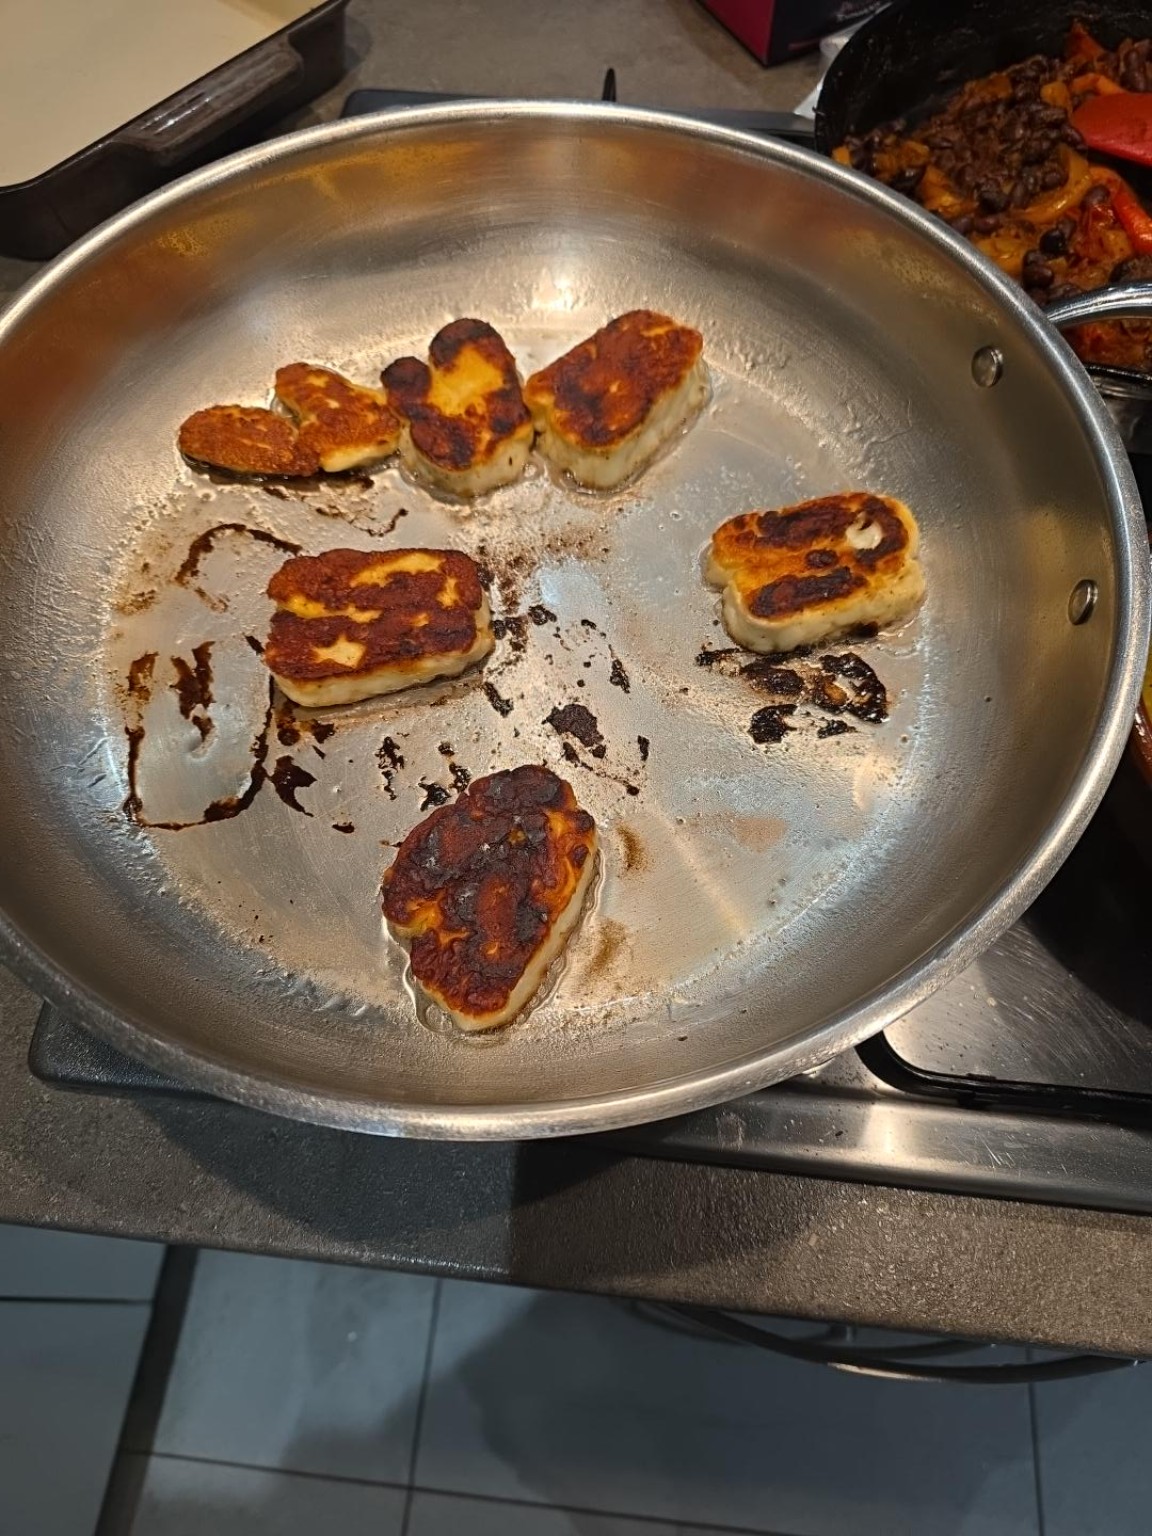
Thick slices of halloumi with deep golden crusts in a stainless steel frying pan
The halloumi finally released from the stainless steel and developed a proper crust.

10. Plate it up

Fluff the couscous again and divide it between warm shallow bowls. Spoon the smoky black bean and pepper mixture over the centre, leaving the couscous visible around the edges. Stack the golden halloumi on top. Whisk the dressing again, start with about a tablespoon per bowl and add more to taste. Finish with a squeeze of the remaining lemon and a little black pepper.
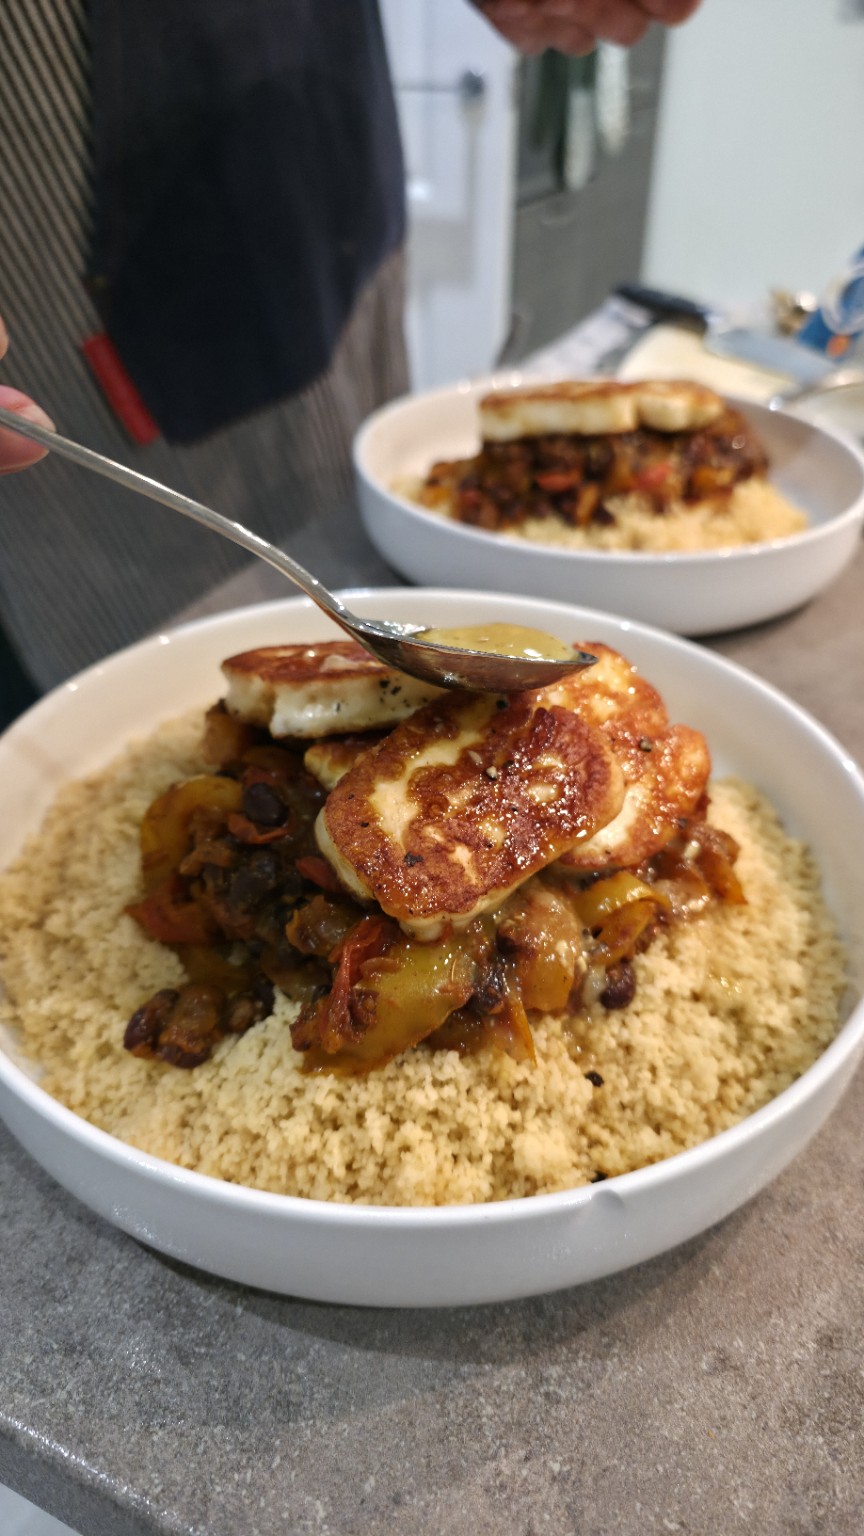
Lemon garlic and honey dressing being spooned over browned halloumi and black bean couscous
The final drizzle of lemon-garlic dressing cuts through the smoky beans and salty halloumi.

What I’ll remember for next time

  • Start the water on the hob before the vegetable pan gets busy. The lack of a kettle should not mean overcooked peppers.
  • Stop the onions when they’re lightly golden, not fully caramelised; keep the peppers tender with a little bite.
  • Let some tomatoes break down into sauce, but don’t reduce the whole mixture into mush.
  • Take the beans off the heat as soon as they’re hot, and keep the couscous separate until plating.
  • Pat the halloumi properly dry, use a thin film of oil, and let the first side develop a crust before trying to release it.
  • Don’t skip the lemon dressing. Its acidity is what balances the rich, smoky filling and salty cheese.

A very satisfying dinner made from what was in the cupboard. The first version was rather good despite the slightly overcooked vegetables, so this is the refined version I’m keeping in Our Kitchen. And yes, four cloves of garlic still feels like a perfectly reasonable starting point.
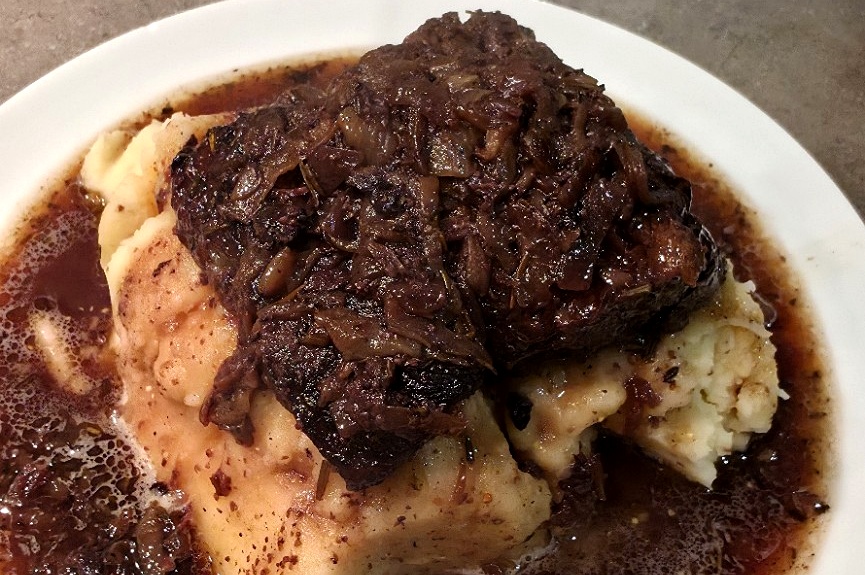
Slow Cooker Red Wine Wagyu Short Ribs

Home-cooked red wine Wagyu short ribs on garlic mash with rich gravy, photographed after serving

These started out as a £7 pack of British Wagyu short ribs, an onion and a fairly reckless amount of red wine. I had no beef stock, so 500ml of wine went in. Eight hours later the bones had come away, the beef was meltingly tender and the gravy was outrageous. Sometimes keeping things simple really does work.

I served the ribs with garlic mash and minted peas. The mash soaks up the red wine gravy, and the peas cut through all that richness. As far as the garlic goes, my rule is simple: there’s no such thing as enough.

Serves: 2   Prep: about 15 minutes for the beef   Slow cooker: 7–8 hours on LOW   To serve: allow about 45 minutes for the mash and peas.

Ingredients

For the Wagyu short ribs

  • 588g bone-in British Wagyu short ribs
  • 1 whole onion
  • 500ml red wine
  • A generous sprinkling of dried rosemary
  • Salt and freshly ground black pepper
  • A little oil for frying

For the garlic mash

  • 600g floury potatoes, such as Maris Piper or King Edward (approximate amount for two)
  • 2 whole bulbs of garlic
  • 60g butter (approximate — add to taste)
  • 1 tsp Dijon mustard
  • 1 tbsp wholegrain mustard
  • Just a splash of milk — enough to loosen it, not drown it
  • A little olive oil for roasting the garlic
  • Salt and black pepper

For the minted peas

  • 250g frozen garden peas (approximate amount for two)
  • 1 tbsp dried mint
  • Maldon sea salt
  • Freshly ground black pepper

Slow-cook the beef

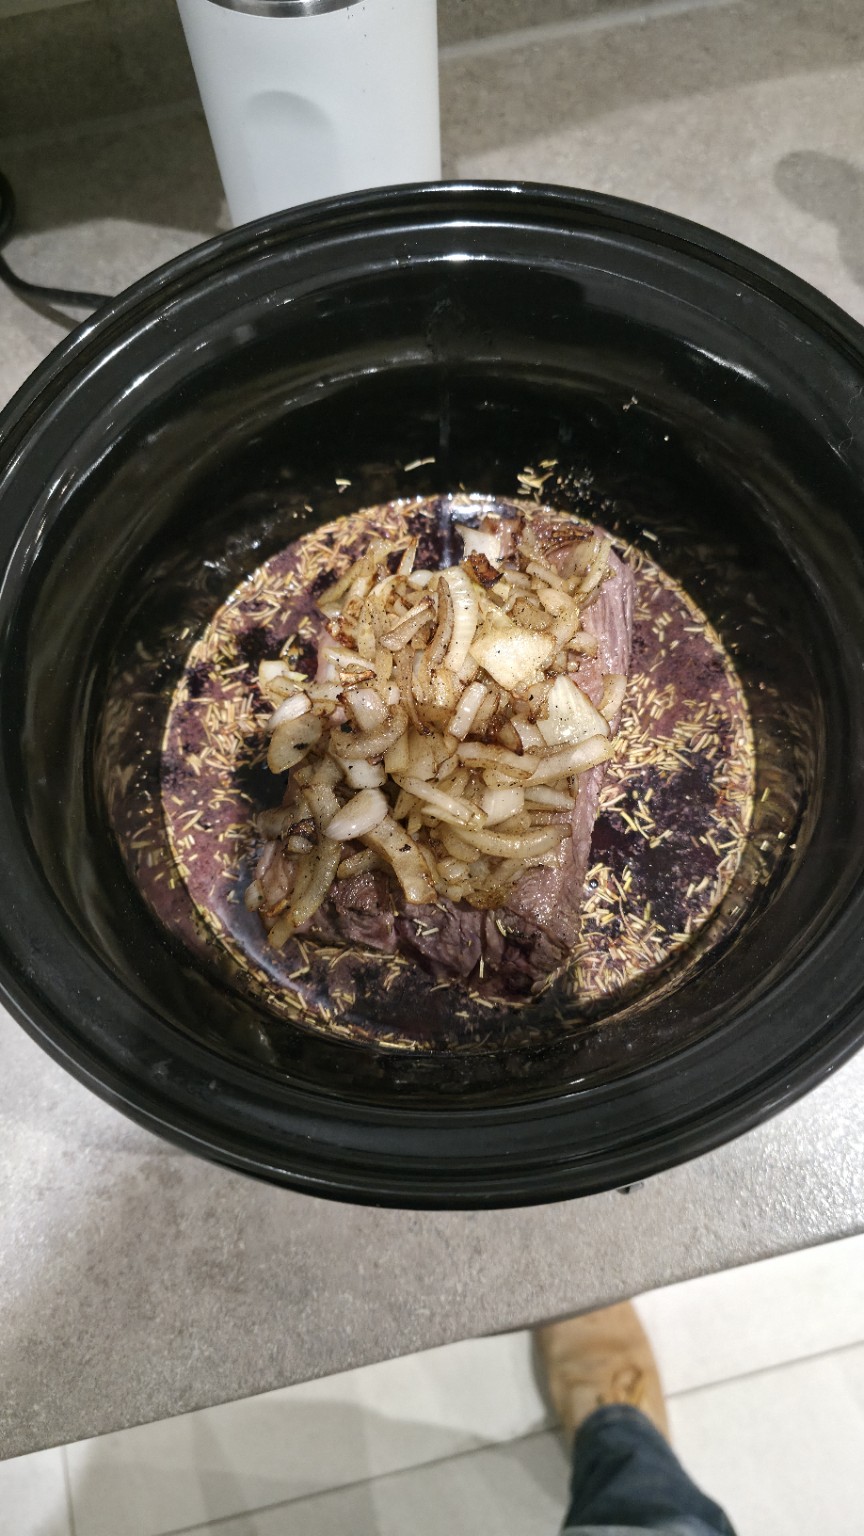
Short ribs, caramelised onions and dried rosemary in red wine before slow cooking
Into the slow cooker, with the onions piled on top.
  1. Start with the onion. I peel and halve it, slice each half about 3mm thick, then cut those slices in half again. That gives me short, fairly even pieces instead of great long strands.
  2. Brown the ribs. I pat the beef dry, season it with salt and pepper and sear the meaty sides in a hot frying pan with a little oil. I want plenty of colour before the slow cooker does its work.
  3. Fry the onion. Into the same pan it goes, picking up all the browned bits from the beef. I cook it until it starts turning golden.
  4. Into the slow cooker. I put the ribs in bone-side down, heap the onions on top and add a generous scattering of dried rosemary.
  5. Pour in the wine. All 500ml of it. No stock. The beef doesn’t need to be submerged.
  6. Leave it alone. Lid on, LOW for 7–8 hours. By the end, a fork should slide into the beef without resistance, and the bones may come completely free. I lift the beef out carefully because it can fall apart under its own weight.
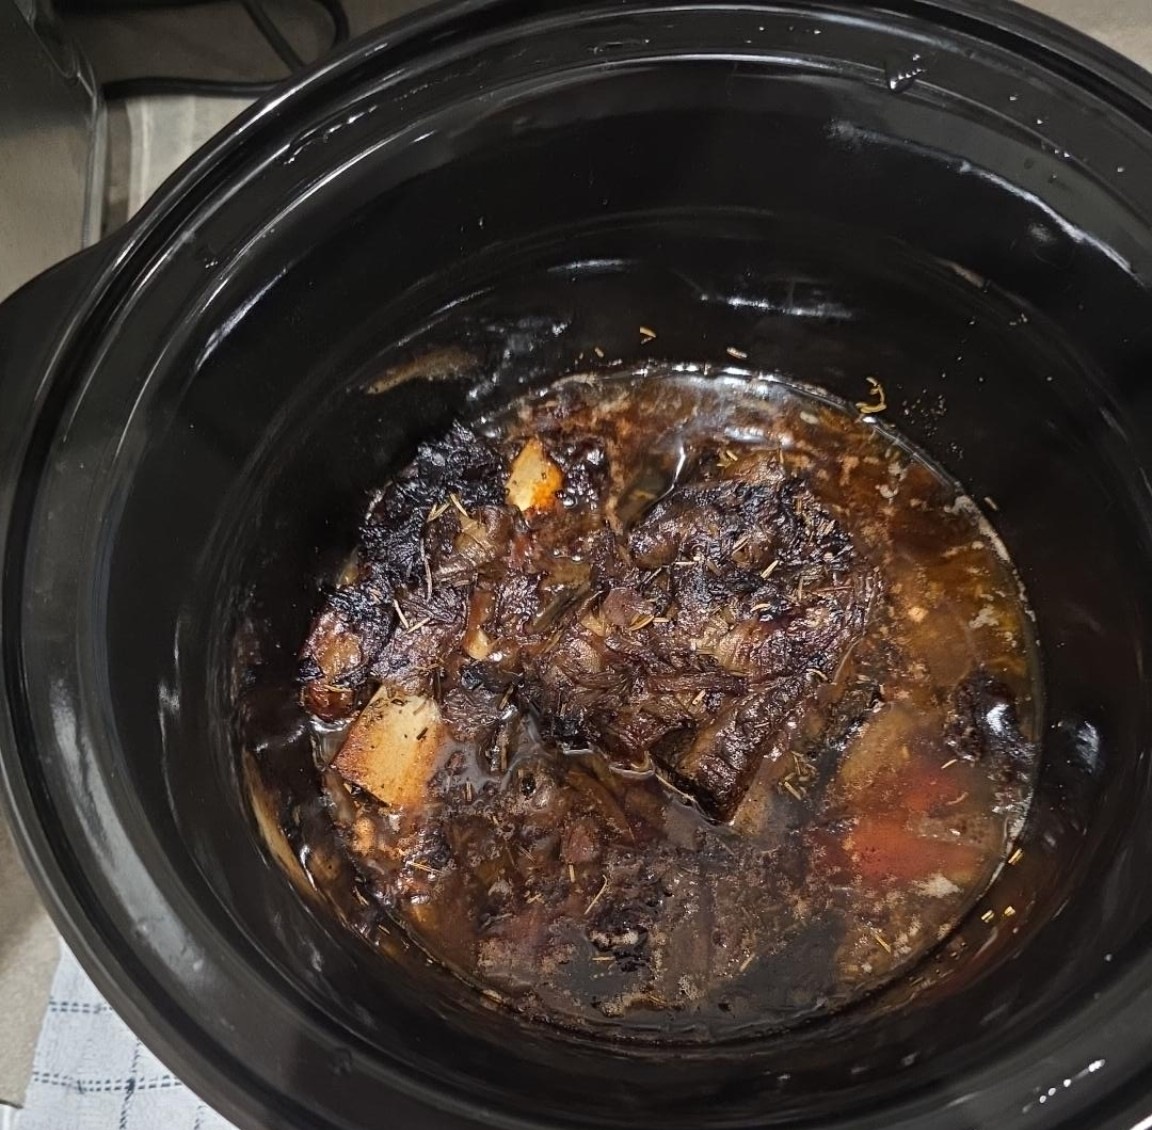
Wagyu beef short ribs in the slow cooker after eight hours, tender and separated from the bone
Eight hours later. The meat had practically fallen away from the bones.

If I’m making it the day before

I save every drop of the cooking juices. Once the beef is done, I transfer the meat and gravy into shallow containers and get them into the fridge promptly, within two hours. I don’t leave them sitting in the switched-off slow cooker all day.

Once cold, the fat rises and sets on top of the gravy. I spoon off the thick layer but leave a little behind for flavour. To reheat, I gently warm the gravy in a covered pan with the ribs nestled in it, adding a splash of water only if I need to. I spoon the liquid over the meat and heat it until it’s piping hot all the way through, ideally 75°C in the centre. No hard boiling: the beef is already tender enough.

Make the garlic mash

I didn’t weigh the potatoes or butter when I made this, so those quantities are a guide. The two roasted bulbs of garlic and the two mustards are what went into the mash.

  1. Roast the garlic. I heat the oven to 180°C fan, slice the tops off both garlic bulbs, drizzle with a little olive oil and wrap them in foil. After around 35–45 minutes they should be soft enough to squeeze straight out of the skins.
  2. Cook the potatoes. I peel them, cut them into roughly even pieces and boil them in salted water until tender, usually 15–20 minutes. Then I drain them properly and let the steam escape.
  3. Garlic first. I squeeze both roasted bulbs straight into the potatoes. Not two cloves. Two whole bulbs.
  4. Mash before butter. This is the important bit: I mash the potatoes and garlic as much as I possibly can before any butter goes in. Really work at it.
  5. Add the flavour. In goes the butter, a teaspoon of Dijon, a tablespoon of wholegrain mustard and just a splash of milk to loosen it. Then I season to taste.
  6. Keep going. Mash until your arms hurt, and then mash some more.

Make the minted peas

  1. Cook the peas. I boil the frozen peas in water for around 2–3 minutes, until hot and still bright green, then drain them well.
  2. Mint and seasoning. I toss the hot peas with a full tablespoon of dried mint, Maldon sea salt and black pepper. That’s it — simple, fresh and exactly what I want next to the rich beef and mustardy garlic mash.

Get it on the plate

I start with a generous spoonful of garlic mash, carefully settle the Wagyu on top and spoon over plenty of the dark red wine gravy. Minted peas go alongside.

The original 500ml of wine gave me a relatively small amount of very concentrated sauce. I was tempted to add more when I reheated it, but after tasting it I didn’t bother. It was already exactly where I wanted it.

Foopie — Foo Young Pizza Pie

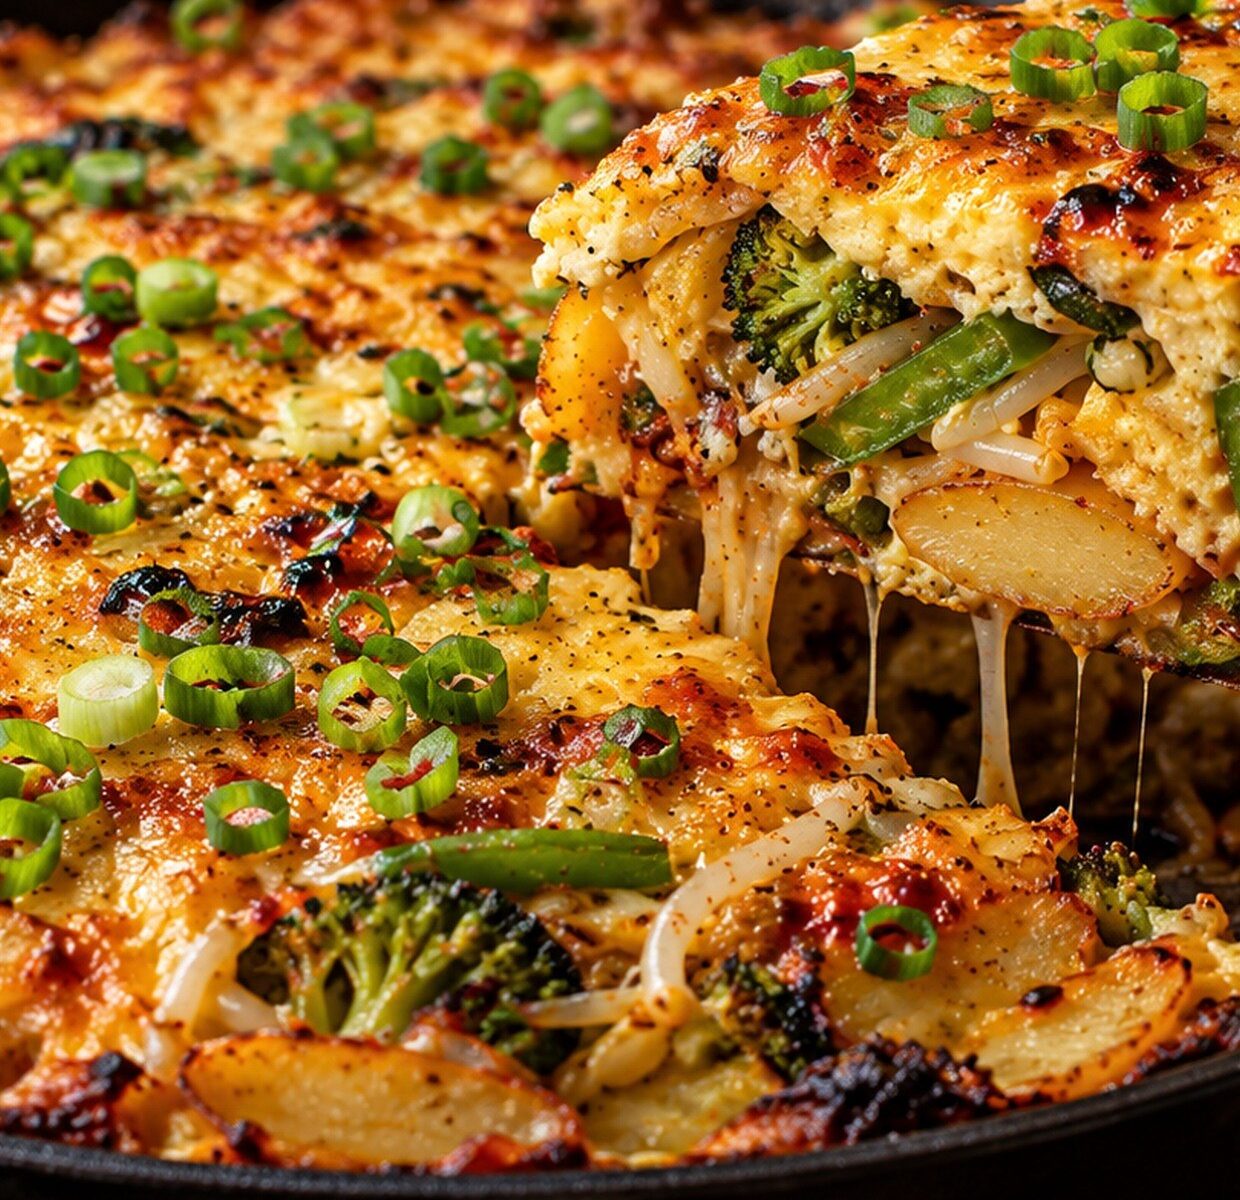
Golden cheesy Foo Young pizza pie with potato, broccoli, vegetables and spring onions

Foopie is neither fish pie nor pasta. It’s my peculiar cross between foo young, frittata and pizza pie, with a potato base, masses of vegetables, soy, five-spice, gochujang, six eggs and a cheesy top. The single most important instruction is: don’t scramble it.

SERVES 4–6 · PREP 25 min · COOK 35–45 min

Ingredients

  • 500 g waxy potatoes, sliced 2–3 mm thin
  • 1 whole broccoli (about 300 g florets), finely chopped
  • 150 g green beans, cut into 2 cm pieces
  • 1 large onion, thinly sliced
  • 150 g beansprouts
  • 5 garlic cloves, finely chopped
  • 2 tbsp neutral oil
  • 5 tbsp light soy sauce, divided, plus to taste
  • 1½ tsp Chinese five-spice
  • 1 heaped tbsp gochujang paste
  • 2 tbsp oyster sauce
  • 6 large eggs plus 75 ml milk
  • 125 g grated mature cheddar
  • 3 spring onions, cut into 1 cm pieces
  • An ovenproof 28–30 cm cast-iron or stainless-steel frying pan (no PTFE or non-stick coating)

Method

  1. I set a large ovenproof frying pan, lid, mixing jug, chopping board and oven gloves out. Check that the pan handle is ovenproof before using the grill. Slice every vegetable before heating the pan; the potatoes take longest and must soften before the egg is poured.
  2. I set the grill to medium-high near the end of cooking, not yet. Put the frying pan on the hob and check its handle is ovenproof. Wash the potatoes, slice thinly (about the thickness of a £1 coin) and cut all the other vegetables before turning the heat on.
  3. I heat the EMPTY stainless-steel pan for 1 minute over medium heat, then add 2 tbsp oil. Arrange the sliced potatoes as a broad, even base. Cook for 7–10 minutes, turning gently every couple of minutes, until beginning to soften; splash in 1 tbsp soy and 2 tbsp water if they start to stick.
  4. I add all the chopped broccoli and green beans. Stir carefully to bring the vegetables through the potato base. Add the sliced onion and beansprouts. Cover with a lid for 5–7 minutes to steam-soften, stirring once; the potatoes must be almost tender before the egg goes in.
  5. Shake in the five-spice, add 3 more tbsp soy, the gochujang and oyster sauce, and stir until every vegetable is glossy. Add the chopped garlic and fry another minute. If a lot of liquid gathers, take off the lid and bubble gently until the pan is moist but not soupy.
  6. Crack SIX eggs into a jug, add 75 ml milk and beat thoroughly with a fork until a single golden mixture. Taste the cooked vegetables now; they are already salty from soy and oyster sauce, so do not add salt automatically.
  7. Lower the hob to medium-low. Pour egg mixture evenly over the vegetables, then gently lift and settle the mixture ONCE so it runs into any gaps. Do NOT scramble it: leave the bottom to set for 2–3 minutes without stirring. Turn on the medium-high grill.
  8. I scatter the grated cheese over the top. Put the ovenproof frying pan under the grill for 2–3 minutes until the cheese begins to melt. Add chopped spring onions, then return under the grill for about 3–5 minutes, keeping a close eye on the surface.
  9. The Foopie is ready when the cheese is golden and the centre no longer wobbles with liquid egg. If the top colours before the middle sets, move the pan farther from the grill and give it another 2 minutes. Rest 5 minutes, then slide out or slice into wedges.

The quantities that weren’t captured in the original voice recording are sensible repeat estimates, but the six eggs and the order of cooking are the real thing. Because I use oyster sauce, this isn’t vegetarian as written.

White-Wine Prawn Linguine

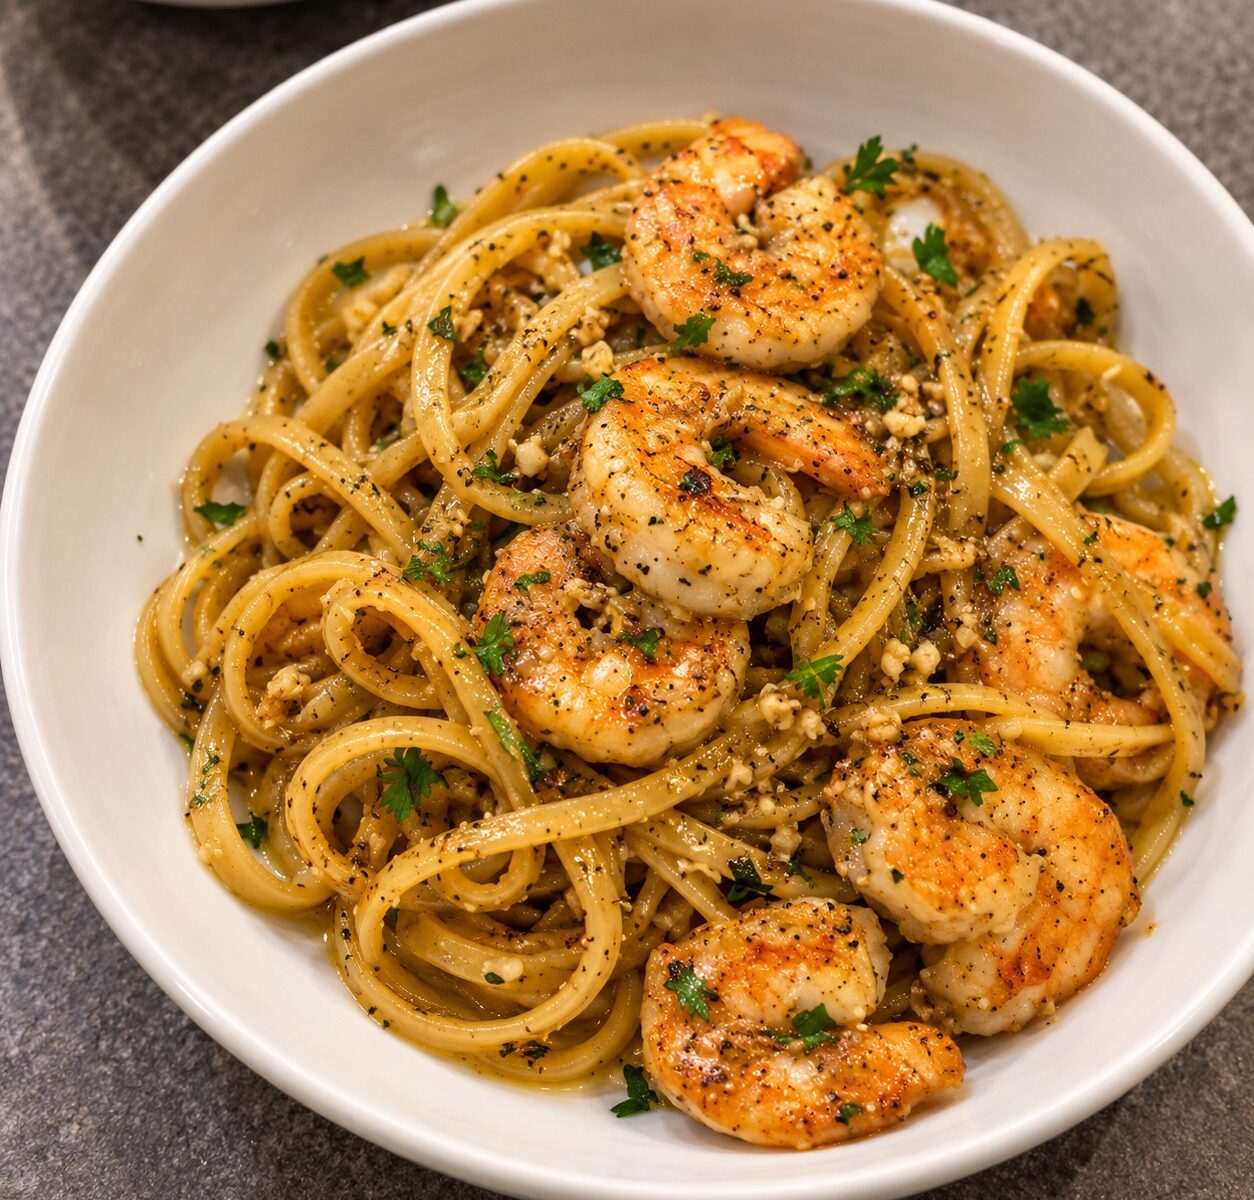
White-wine prawn linguine with golden prawns in a white bowl

This was a proper last-minute supper: no cream, no lemon and only garlic granules. I made the sauce from shell stock, white wine and butter, and it turned out so well that it’s going in the regular rotation.

SERVES 2 generous · PREP 10 min · COOK 15 min

Ingredients

  • 200 g dried linguine
  • 250–300 g raw peeled prawns (or raw shell-on prawns)
  • 1 tbsp olive oil
  • 30 g cold butter, cubed
  • 100 ml dry white wine
  • 100 ml fish or chicken stock
  • 1 tsp garlic granules
  • ½ tsp chilli flakes, to taste
  • ¼ tsp dried dill and ¼ tsp sumac (optional)
  • Black pepper; chopped parsley if available
  • A mug of reserved pasta water
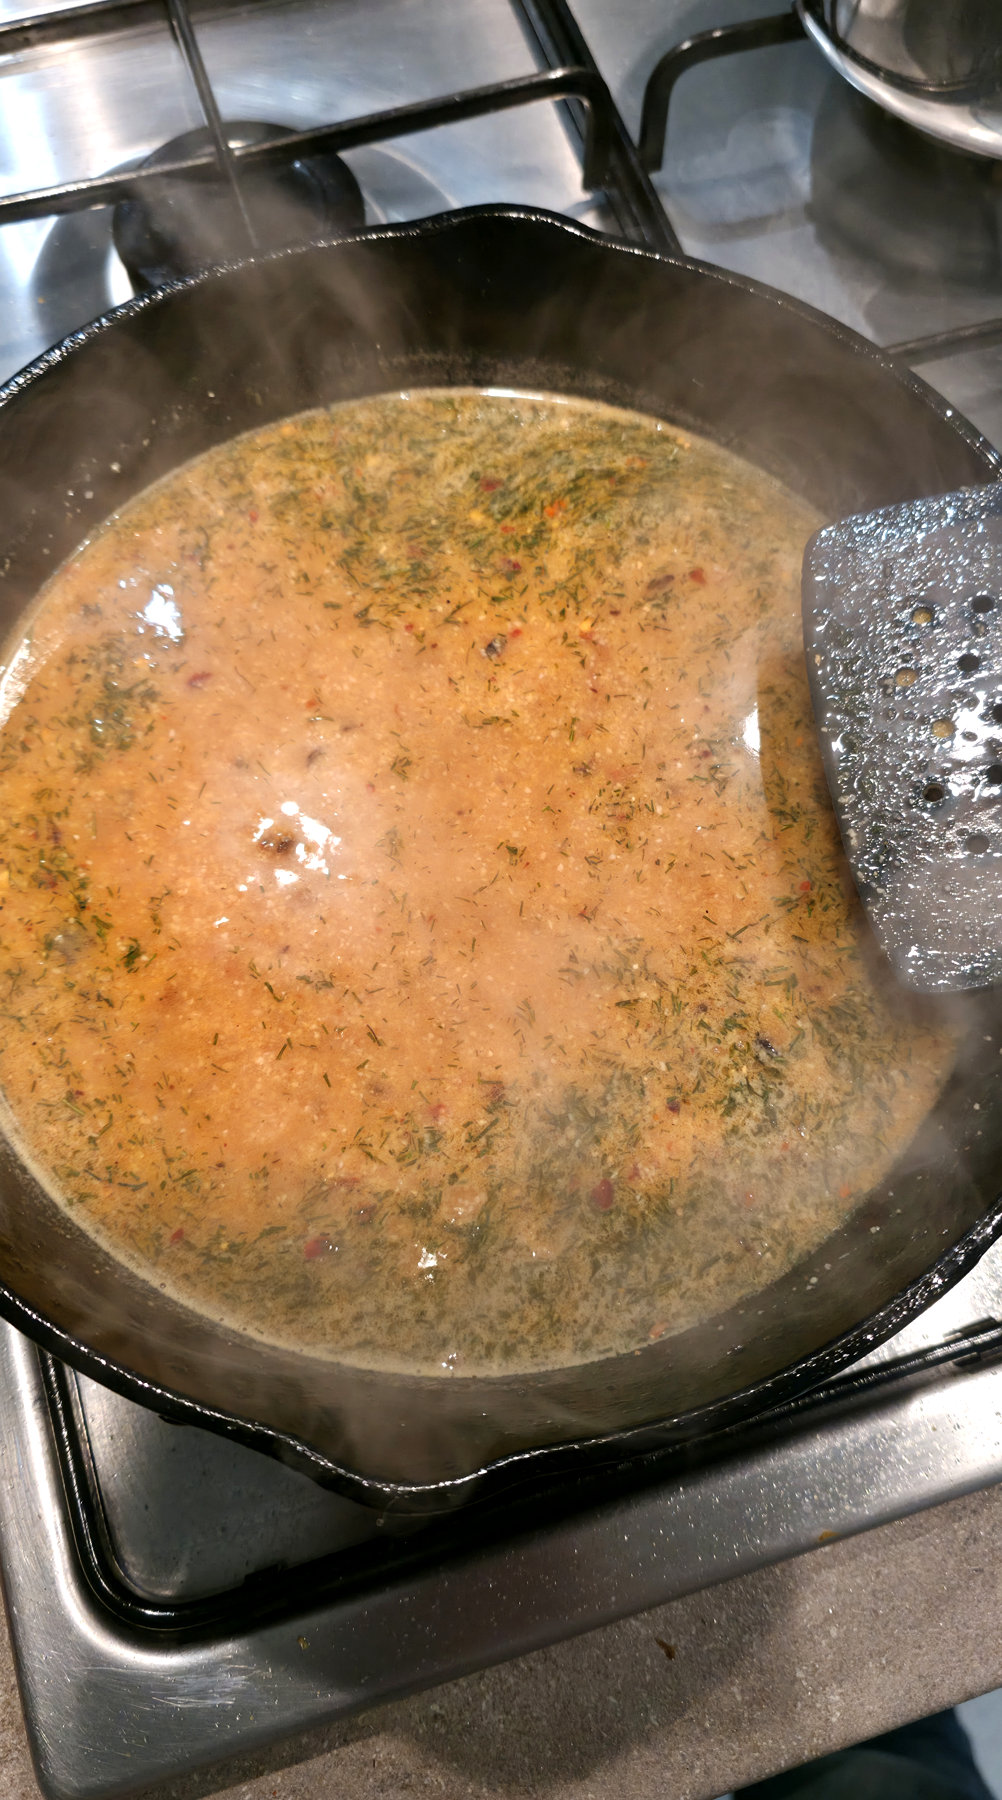
Prawn linguine sauce simmering gently in a saucepan
The white-wine stock and butter sauce coming together.

Method

  1. Get ready: pat the prawns completely dry. If shell-on, remove the heads/shells and make stock by gently simmering them in water for 10 minutes; strain carefully. Keep all ingredients beside the hob.
  2. I boil a large pan of water. Salt it, add the linguine and stir immediately to separate. Set a timer for 1 minute less than the packet says. Put an empty mug by the colander.
  3. I heat olive oil in a large frying pan over medium-high heat. Fry the prawns in one layer for about 60–90 seconds per side until pink, opaque and just firm. Move to a plate; do not leave them in the pan.
  4. I turn the heat down to medium. Add garlic granules and chilli; stir for 15 seconds. Pour in the wine carefully and let it bubble until reduced by roughly two-thirds, about 2–3 minutes.
  5. I add 100 ml strained stock and simmer 2–3 minutes. The liquid should taste concentrated, not watery. If salty, loosen with a splash of water rather than more salt.
  6. Before draining the pasta, scoop out a mug of starchy cooking water. Add the nearly cooked linguine to the sauce with 2–3 tbsp pasta water; toss for 45–60 seconds until shiny. Turn the heat LOW. Stir in cold butter one cube at a time. Put the
  7. prawns back in for 30–60 seconds to heat through. Add more pasta water a spoonful at a time until sauce coats the strands.
  8. Finish with black pepper, optional dill and sumac, and parsley if you have it. Taste before salting. Serve immediately while the sauce is glossy.
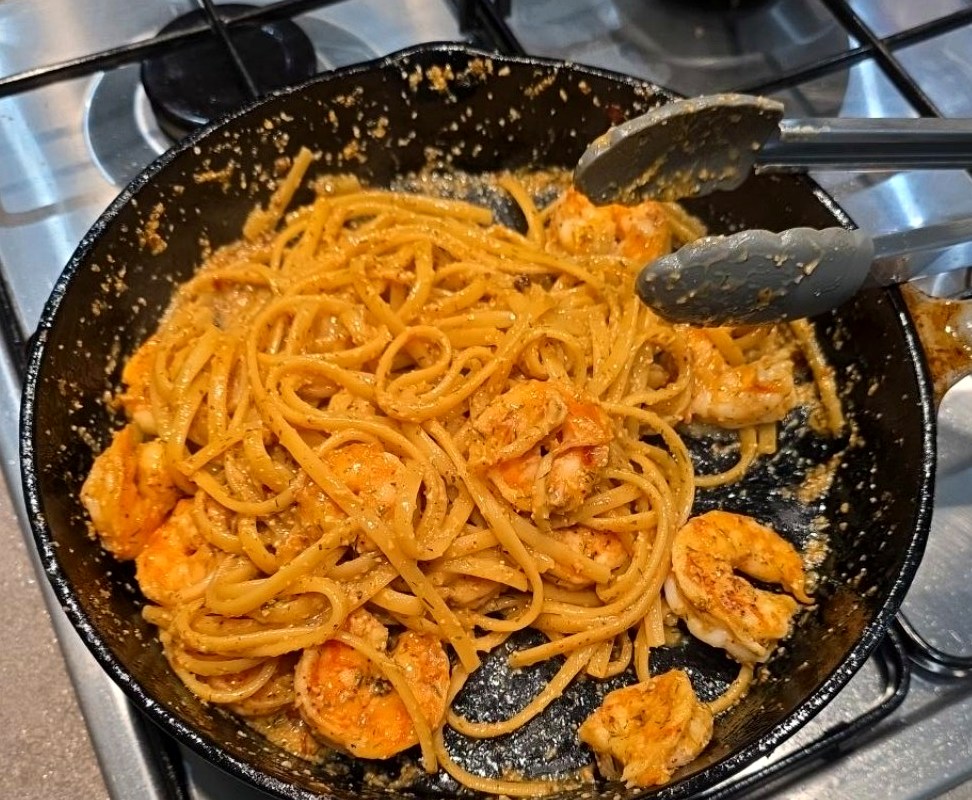
The white-wine prawn linguine tossed together in the cast iron frying pan with stainless steel tongs
The linguine and prawns tossed through the reduced wine, shell stock and butter in my cast-iron pan, 25 October 2026.
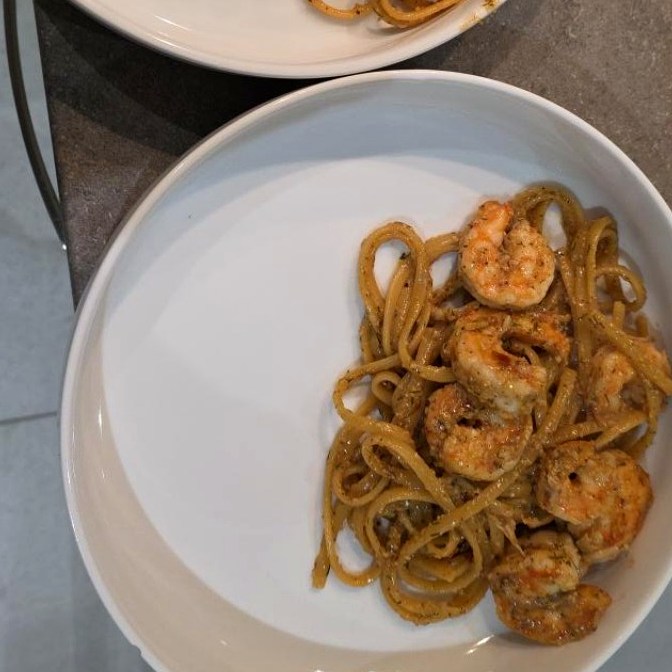
Finished white-wine prawn linguine in a white bowl with golden prawns and glossy sauce
The actual finished supper from 25 October 2026 — no cream, no lemon, and only garlic granules.

Ultimate Onions & Oven-Bottom Burgers

Two homemade pork burgers on Lancashire oven-bottom muffins, topped with melted cheese and dark caramelised onions on a white plate

The onions were the star of this one. I started with three enormous onions in a cast-iron pan, reduced them slowly with butter, balsamic vinegar, Henderson’s Relish and black pepper, and ended up with something I’d happily eat straight out of the pan. No added sugar needed. They went on pork burgers in proper Lancashire oven-bottom muffins, with Blackjack Vintage cheddar on the bottom, a slice of American cheese over each patty and a frankly excessive amount of onions. The onions were a genuine 10/10, but on my first attempt, 13 October 2026, I cooked the burgers entirely in the oven. They were juicy, but too wet on the outside and missing a proper crust. I’ve since made them again with a reverse sear — gentle oven cooking followed by a hot pan finish — and the burgers were much better. That’s the version I’d recommend now. The photographs below show the original oven-only cook, not the later reverse-seared batch.

SERVES 2 · PREP 10–15 min · COOK roughly 40–60 min (mostly reducing the onions; actual burger time depends on thickness). The onion sauce quantities below are practical amounts for repeating the cook, not weights I recorded on the night.

Ingredients

  • 3 very large onions, sliced into even half-moons about 3–4 mm thick
  • About 20–25 g butter, divided between the start and the final onion glaze
  • 1 tbsp neutral oil, such as rapeseed oil
  • 1–2 tsp balsamic vinegar, then adjust to taste
  • ½–1 tsp Henderson’s Relish, then adjust to taste
  • Plenty of freshly ground black pepper and a small pinch of salt
  • No sugar — they sweeten as they cook
  • 2 pork burger patties (thicker patties, about 25–30 mm, work best for the reverse-sear version)
  • 2 Lancashire oven-bottom muffins, not brioche rolls
  • Blackjack Vintage cheddar, two generous slices for the bottom muffin halves
  • 2 slices of American cheese, one for each burger patty
  • A little butter for toasting the muffins
  • A cast-iron or stainless-steel frying pan, a spatula and a clean instant-read food thermometer
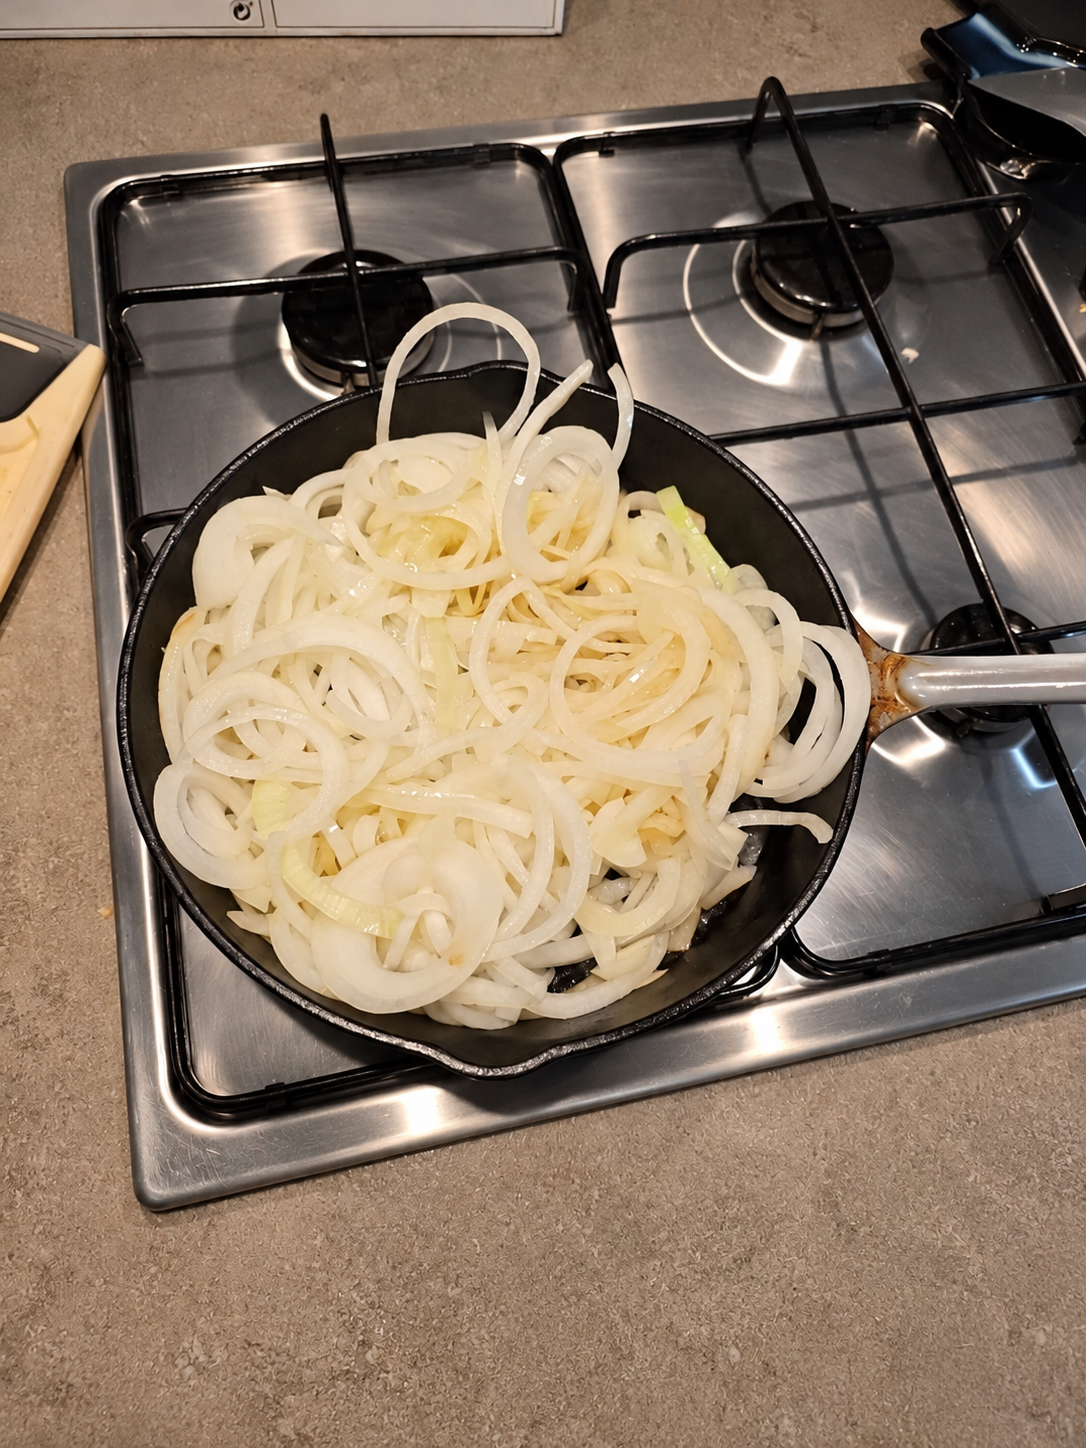
Freshly sliced onions in a black cast-iron skillet on the gas hob before caramelising
Three enormous onions at the start of the cook, before they collapse into the sticky caramelised pile. Cleaned-up version of my original kitchen photograph.
Deep golden caramelised onions cooked down to a sticky mass in cast iron
The finished onions. Balsamic, Henderson’s Relish and pepper — no sugar needed.

Method

  1. Read through the method first. Get the cheeses out, split the oven-bottom muffins and put the pan, spatula and thermometer within reach. The onions take longer than the burgers, so they go on first. I use cast iron or stainless steel — no PTFE or non-stick pans in my kitchen.
  2. Slice the onions. Peel the three big onions, halve them from top to bottom and slice into even half-moons around 3–4 mm thick. Three enormous onions look like a ridiculous quantity for two burgers. They won’t once they’ve cooked down.
  3. Start gently. Set a wide, heavy cast-iron pan over medium-low heat. Add the oil and most of the butter. Once it’s melted, add the onions and a small pinch of salt. Toss until coated, then spread them across the pan. I want a gentle sizzle, not browned edges in the first two minutes.
  4. Soften before you caramelise. Give them about 15 minutes, turning every three or four minutes so the bottom doesn’t burn. They should collapse, go soft and turn translucent. If anything starts catching, lower the heat and add a tablespoon of water to loosen the sticky bits.
  5. Build the proper colour. Keep them on the low-to-medium heat for another 20–30 minutes, stirring more frequently as they darken. They should shrink dramatically and turn deep golden brown, not black or crispy. I’m not adding sugar; time and the onions’ own sweetness do that job.
  6. Finish the 10/10 onions. Stir in the remaining butter, a teaspoon or so of balsamic vinegar, about half a teaspoon of Henderson’s Relish and plenty of freshly ground black pepper. Let that bubble gently for about a minute until the liquid coats everything and the onions look glossy and sticky. Taste; add a little more balsamic or Henderson’s if needed. Transfer them to a warm bowl so the residual heat of the cast iron doesn’t burn them.
  7. For the improved version I’ve now tried: start in the oven. The reverse sear made a real difference compared with my original oven-only attempt. For a repeatable approach, preheat the fan oven to about 130°C. Set the pork patties on a rack over a tray to catch the juices, and cook gently until a clean probe reads about 60–65°C in the thickest centre. This is only the intermediate temperature: the burgers are not cooked enough to eat yet. Timings depend entirely on their size and thickness; use the thermometer, not a fixed number of minutes.
  8. Then reverse-sear in a very hot pan. Take the burgers out, drain any collected moisture and carefully pat the outsides dry. Heat a clean cast-iron or stainless-steel skillet until properly hot, add a thin film of oil and sear for about 45–90 seconds per side to create the dark, savoury crust that the oven-only burgers missed. Check the centre again: because this is minced pork, it must finish thoroughly cooked — for example, at least 75°C held for 30 seconds (or an equivalent safe time–temperature combination). If the outside is browning too fast before the centre is done, turn down the heat and continue until safe. A dark crust is not proof of a fully cooked middle.
  9. Melt the American cheese. Put one slice on each burger just before it finishes, letting the residual heat soften it. Cover very briefly with a lid if it needs help. Keep the Blackjack Vintage cheddar separate: that goes on the bottom muffin, not on top of the patty.
  10. Toast the proper Lancashire oven-bottoms. Cut the muffins open and toast the cut sides with a little butter in the warm pan until lightly golden. Don’t over-toast them: an oven-bottom is soft and bready, and I still want that texture. A light crust simply stops the butter and onions soaking straight through.
  11. Build in the right order. Bottom half of oven-bottom muffin, a generous slice of Blackjack Vintage cheddar, hot pork burger, melted American cheese, then a magnificent pile of sticky caramelised onions. Add the top of the muffin, press it down just enough to hold together and serve immediately. Two cheeses, two different jobs: Blackjack for the rich cheddar flavour underneath, American for the melty layer above.
  12. What I actually did on 13 October 2026. The photographs are of the burgers cooked completely in the oven, without the final skillet sear. I followed the burger packaging and checked that the pork was cooked through. The onions and cheese combination was excellent, but the patties released moisture and didn’t get the crust I wanted. I’ve now cooked them again using a reverse sear and the result was much better. I’m keeping the original photos because they document the first attempt; I don’t yet have a photograph of the improved batch. The oven temperature and timings above are a practical repeat guide, not a precise log of the second cook.
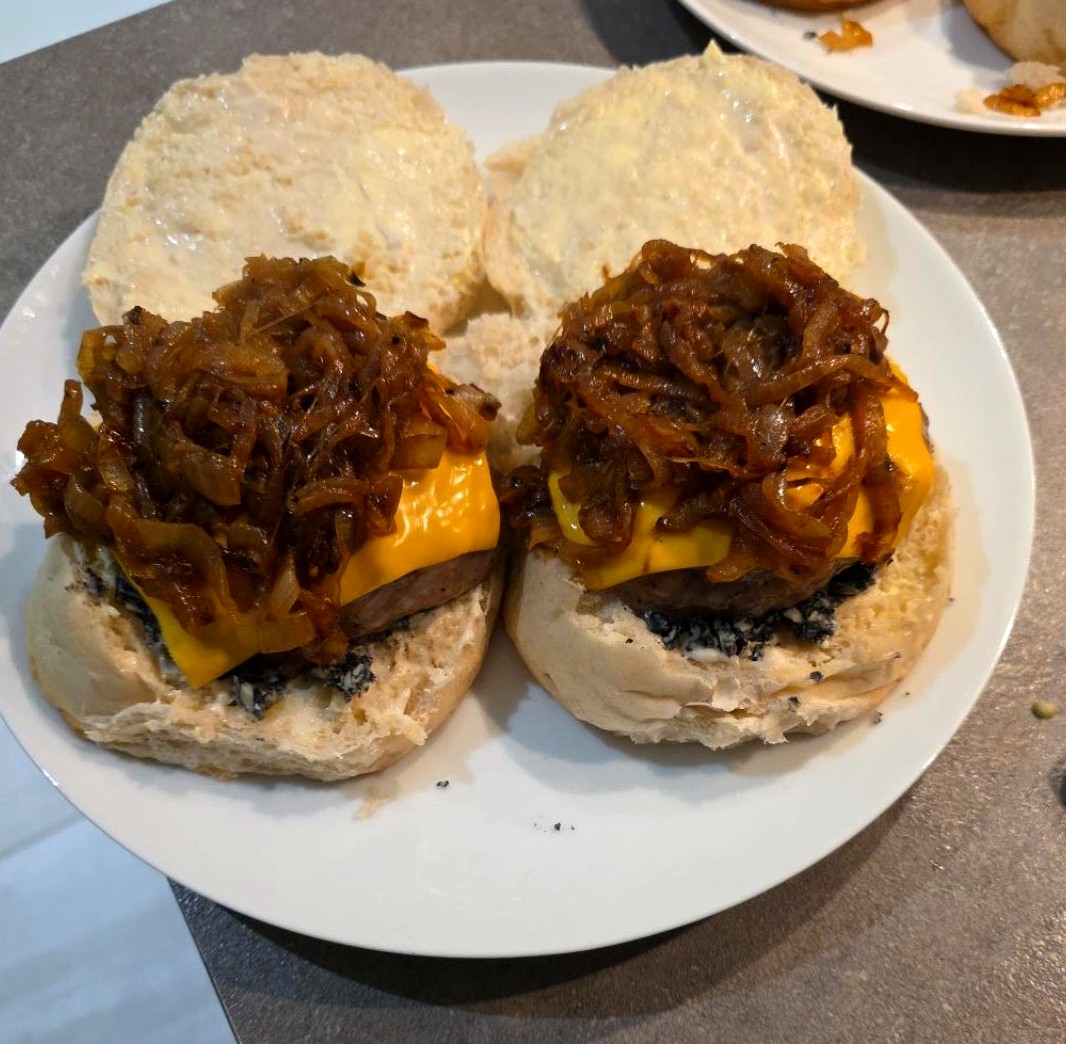
Two pork burgers with Blackjack Vintage cheddar, melted American cheese and caramelised onions on Lancashire oven-bottom muffins
The original oven-only burgers from 13 October 2026. The onions were 10/10; I’ve since repeated the burgers with a reverse sear and they’re much better.

White-Wine Mushroom Linguine & Hot-Honey Halloumi

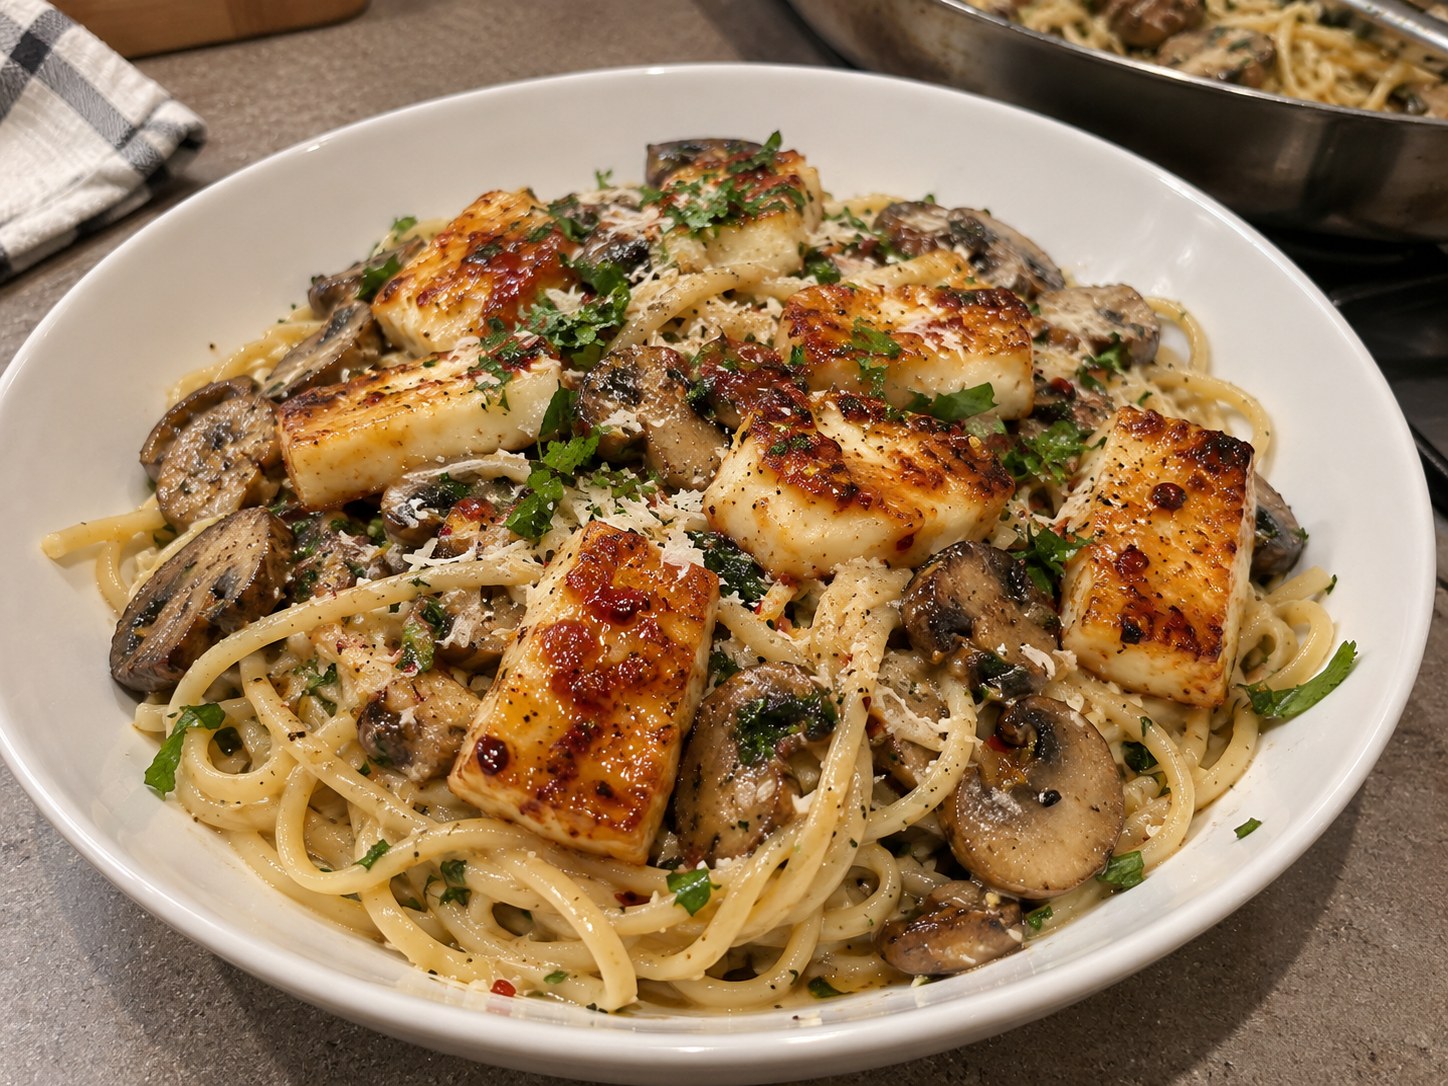
Mushroom linguine topped with golden halloumi and hot honey

I like the mushrooms properly browned, the sauce glossy and the halloumi golden. The honey and chilli go on the cheese right at the end so they don’t burn. This was especially good with cheesy garlic panini.

SERVES 2 generous · PREP 15 min · COOK 25 min

Ingredients

  • 200 g linguine
  • 250 g chestnut mushrooms, sliced
  • 1 small courgette, half-moons
  • 200 g halloumi, thick slices
  • 60–75 ml dry white wine
  • 100 ml cream OR 4 tbsp crème fraîche
  • 40 g grated Parmesan-style cheese
  • 2 garlic cloves, minced
  • 1 tbsp oil; 1 tbsp butter
  • 1 tbsp honey; pinch chilli flakes
  • ½ lemon, optional
  • 250 ml reserved pasta water
  • Panini and mozzarella, optional sides
Mushroom linguine topped with golden halloumi and hot honey
Glossy white-wine mushroom linguine with golden, hot-honey halloumi.

Method

  1. I bring a large pan of salted water to a boil. Cook linguine to 1 minute short of the packet time. Before draining, reserve AT LEAST 250 ml pasta water.
  2. I pat mushrooms dry; heat a large frying pan over medium-high with oil. Add mushrooms in a single layer, leave alone for 2 minutes, then toss and brown for 6–8 minutes total until the moisture has evaporated.
  3. I add courgette and butter; cook 2–3 minutes until edges colour. Add garlic and stir for just 30 seconds—it should smell fragrant, not burnt.
  4. I pour in the white wine and simmer 2–3 minutes until reduced by at least two-thirds. Add cream or crème fraîche, then 2–3 tbsp pasta water; stir until gently bubbling.
  5. In a second frying pan, brown dry halloumi slices in a little oil, 1½–2 minutes each side. In a small mug combine honey and chilli. Drizzle into the pan for the final 20–30 seconds only; take off heat before it burns. Toss the drained pasta through the mushroom sauce with the grated cheese. Add the reserved pasta water a tablespoon or two at a time until the sauce turns glossy and coats every strand, rather than pooling at the bottom of the pan.
  6. I taste for pepper and salt (halloumi and cheese are salty). Serve pasta in bowls, stack honey-glazed halloumi on top. Add lemon if available and wanted.
  7. Optional garlic bread: split a panini, fill with mozzarella and a little garlic butter, and toast in the oven until golden and melted.

Honey-Mustard Halloumi Couscous

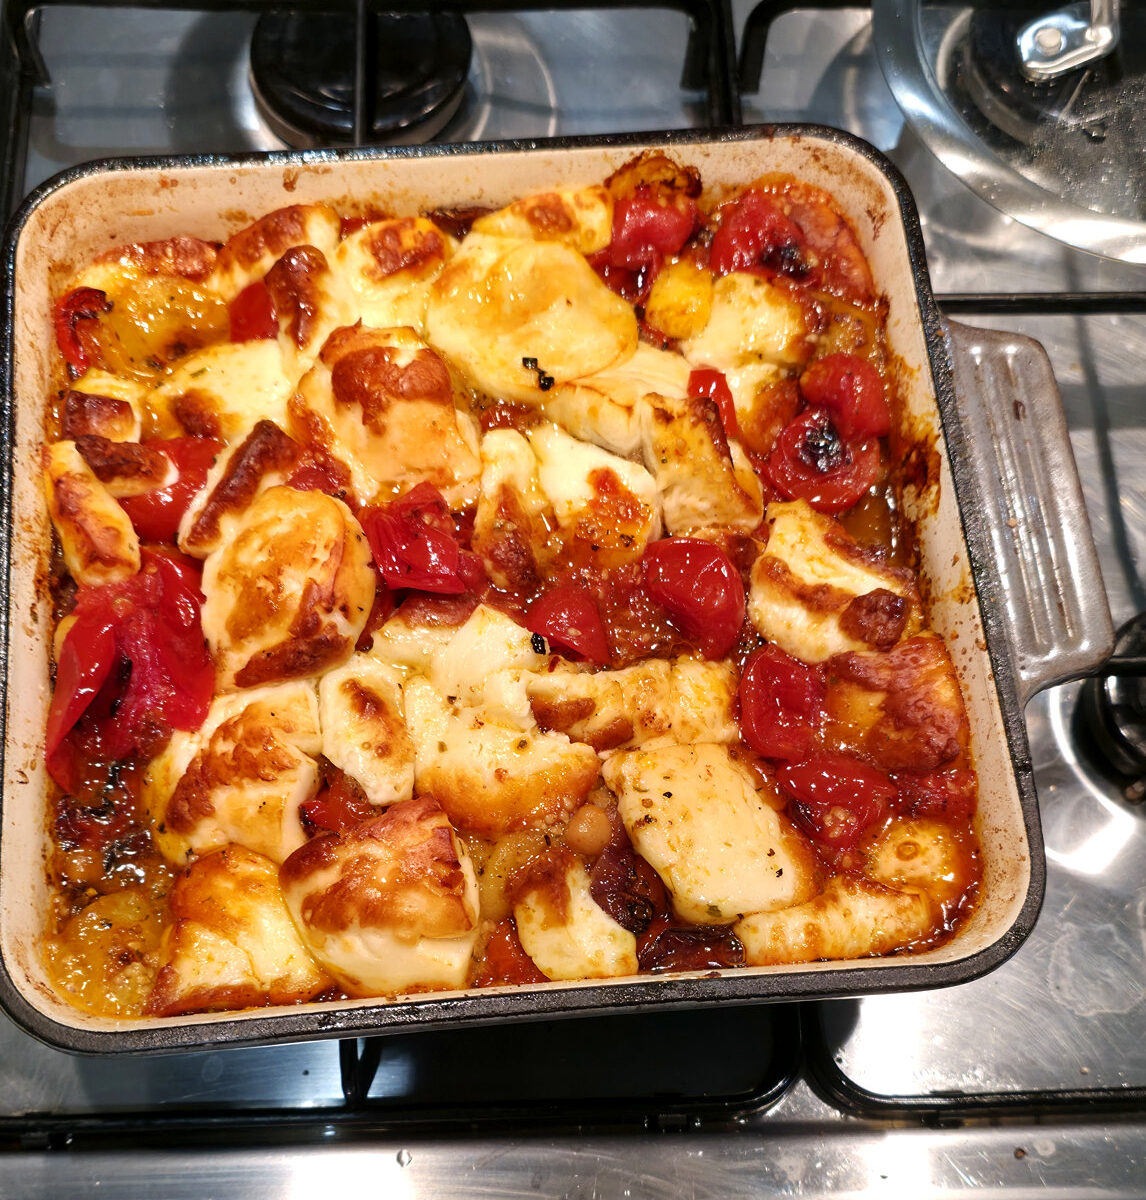
Original home-cooked halloumi traybake with golden halloumi pieces, blistered tomatoes, roasted pepper and honey dressing

This is one of those dinners that looks like I’ve put in far more effort than I actually have. A big tray of roast vegetables, chickpeas and golden halloumi, spooned over lemony couscous with a sticky honey-mustard dressing. It’s a proper meal, not just a few bits of cheese on a salad.

The trick is getting some colour on the vegetables, letting the tomatoes burst, and using all those lovely juices rather than leaving them stuck to the roasting tray.

Serves: 3–4   Prep: around 15 minutes   Cook: 35–40 minutes   Oven: 200°C fan

Ingredients

  • 450g halloumi, sliced into thick pieces
  • 2 peppers, cut into bite-sized chunks
  • 1 red onion, cut into wedges
  • 1 x 400g tin of chickpeas, drained and rinsed
  • 250–350g cherry tomatoes, left whole
  • 2 cloves of garlic, chopped or crushed (more if you fancy)
  • 1 tsp smoked paprika
  • 1 tsp dried oregano
  • ½ tsp ground cumin (optional)
  • Olive oil for roasting and a little for the couscous
  • 200g dry instant couscous
  • 250ml boiling vegetable stock (I used half of a 500ml stock cube)
  • 1 lemon
  • 1 tsp honey
  • 1 tsp Dijon mustard
  • 1 tbsp olive oil for the dressing
  • Freshly ground black pepper and salt to taste

Method

  1. Get everything ready. I put the oven on at 200°C fan, drain the chickpeas and chop the peppers and onion into fairly chunky pieces. The tomatoes stay whole because I want them to burst in the oven rather than disappear straight away.
  2. Roast the vegetables. I spread the peppers, onion and chickpeas over a large roasting tray, drizzle with olive oil and add the smoked paprika, oregano, optional cumin and plenty of black pepper. I toss everything well and roast it for 15 minutes. A decent-sized tray matters here; if it’s all piled up it just steams.
  3. Add the tomatoes and garlic. I give the tray a good stir, add the whole cherry tomatoes and garlic, then roast for another 10 minutes. By now the tomatoes should be blistering and the peppers starting to soften.
  4. Get the halloumi golden. I lay the halloumi slices over the vegetables and put the tray back for another 12–15 minutes. I’m after browned edges and soft centres. If it needs another minute under the grill, that’s fine, but I keep an eye on it.
  5. Make the couscous. While the halloumi finishes, I tip 200g couscous into a heatproof bowl, pour over 250ml boiling vegetable stock and give it one stir. I cover it for five minutes, then fluff it thoroughly with a fork. Half the lemon gets squeezed in, along with a drizzle of olive oil.
  6. Mix the dressing. I stir together the honey, Dijon mustard, a tablespoon of olive oil and the juice of the remaining half lemon. It should be sweet and tangy, not sickly. A little black pepper goes in too.
  7. Don’t waste the tomato juices. When the tray comes out, I squash roughly a third of the roasted tomatoes with the back of a spoon. I spoon the dressing over the vegetables and gently toss everything together, scraping up the lovely juices from the bottom of the tray.
  8. Bring it all together. I put the couscous into a big serving bowl, spoon the roasted vegetables and their juices over it, then arrange the golden halloumi on top. Give it a final taste before adding salt; the cheese and stock already bring plenty.

I particularly like the contrast between the salty halloumi, sweetness from the honey and tomatoes, and the fresh lemon running through the couscous. Don’t skip the lemon — it’s what keeps the whole thing from feeling too rich.

I did make this again when we’d run out of lemons. In a moment of questionable judgement I substituted a splash of Pinot Grigio. It was still lovely, but it definitely missed that sharp lemon kick. White-wine vinegar would have been a better emergency substitute. Lesson learnt: keep lemons in the house.

Creamy Salmon & Trout with Green Beans

Two salmon portions in creamy sauce with green vegetables in shallow bowls

The salmon-and-trout supper with green beans is one I keep coming back to. I want the fish just cooked and the sauce creamy without being heavy, so I use just a splash of wine.

SERVES 2 · PREP 15 min · COOK 20 min

Ingredients

  • 1 salmon fillet (about 150–180 g)
  • 1 rainbow trout fillet (about 150–180 g)
  • 150 g dry rice
  • 150–200 g green beans, ends trimmed
  • 100–150 g baby spinach
  • 2 garlic cloves, finely chopped
  • 25–30 ml dry white wine
  • 75 ml fish or vegetable stock
  • 200 g full-fat crème fraîche
  • ½ lemon, zest and a little juice
  • 1 tbsp olive oil; 1 tbsp butter
  • Fresh or dried dill; black pepper; salt
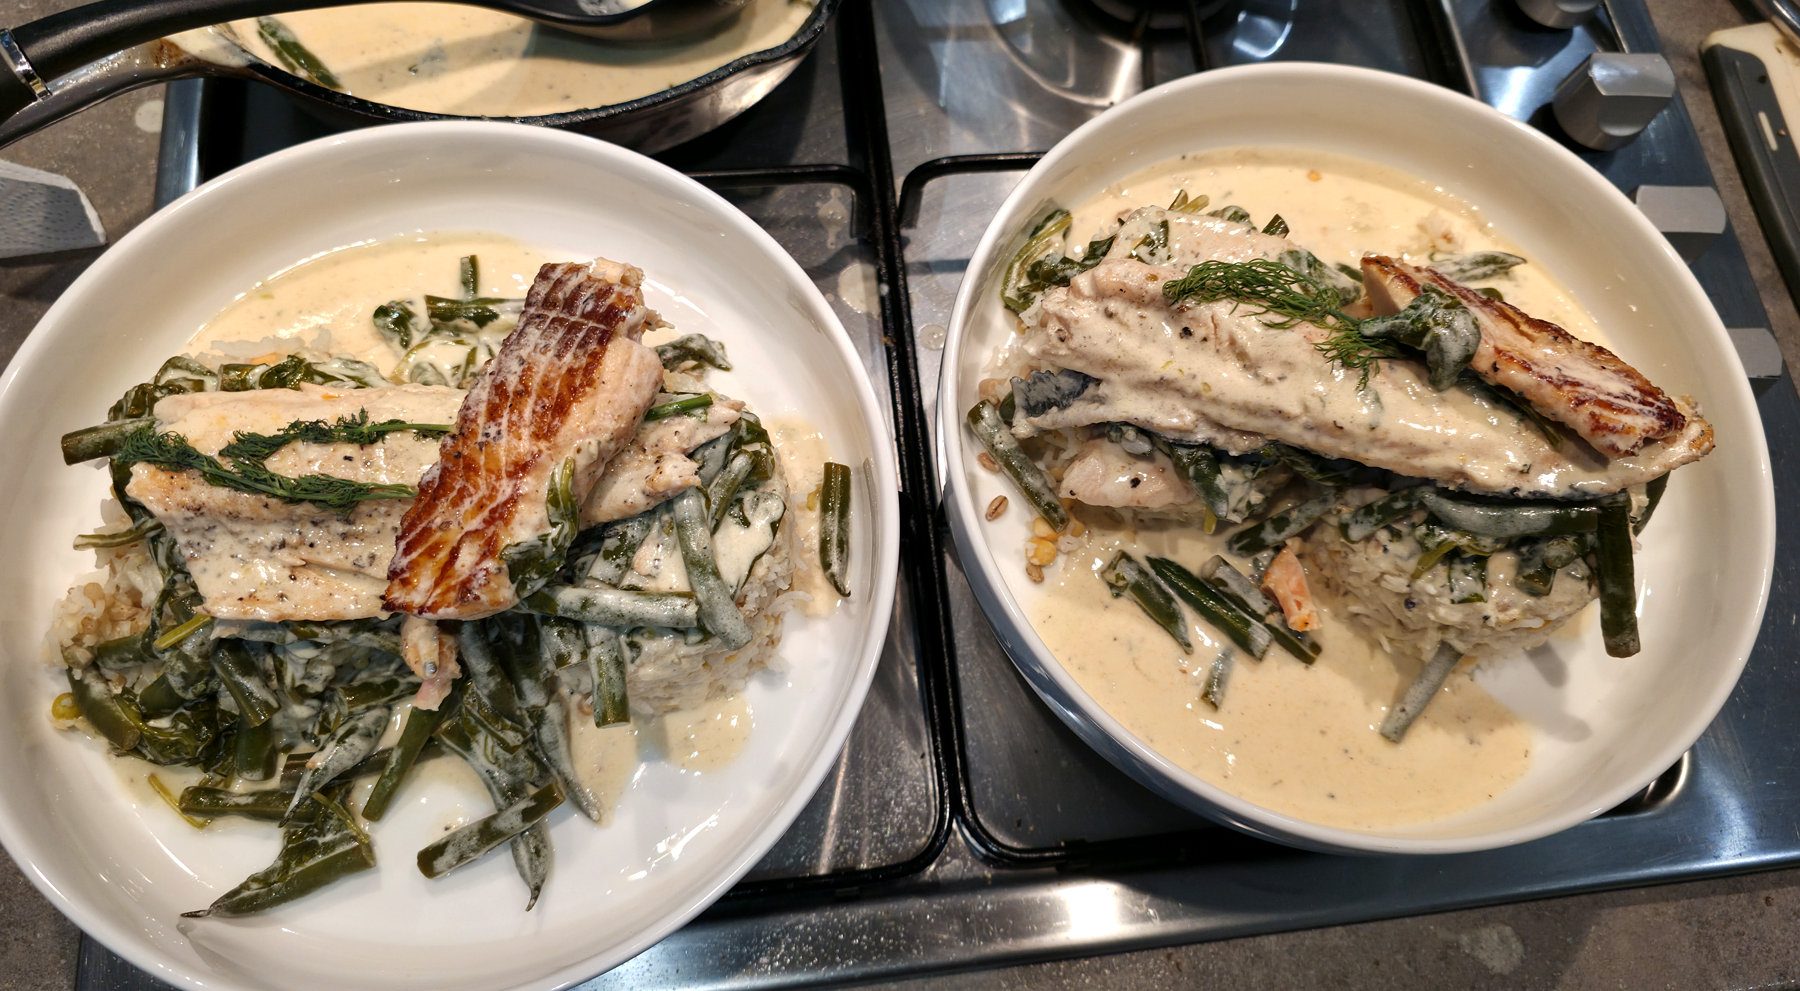
My finished salmon and trout supper with green beans, spinach and a creamy sauce, in two bowls on the hob
The original salmon-and-trout supper on 3 August 2026, with green beans and spinach folded through the creamy sauce.

Method

  1. I put the rice on first, following the packet directions. Set the table and warm two plates. Measure the white wine into a small cup: this time it is only 25–30 ml, not a large glass.
  2. I bring a second saucepan of water to a boil. Trim the beans and boil for 4 minutes, then drain. They should still have a little bite and will finish in the sauce.
  3. I pat the salmon and trout dry and season lightly. Preheat a wide stainless-steel frying pan or a well-seasoned cast-iron skillet over medium heat, then add the olive oil. Let the fish form a crust before trying to lift it. Put fish skin-side down; cook trout around 3 minutes and salmon around 3–4 minutes, until the skin is crisping.
  4. I turn carefully. Cook the trout another 30–60 seconds and salmon 1–2 minutes. Lift onto a plate while still slightly underdone; it finishes later in the sauce. If skinless, cook gently and turn once.
  5. I turn the heat down. Melt butter, add garlic and stir 20–30 seconds without browning. Pour in 25–30 ml wine, let it bubble for 1–2 minutes until only around 1 tbsp remains, then add 75 ml stock.
  6. Lower the heat. Stir in 200 g crème fraîche a spoonful at a time until smooth. Bring only to a gentle simmer, not a hard boil. Add the beans for about 2 minutes, then spinach until wilted.
  7. Return the fish to the pan, nestling into the sauce. Heat gently 1–2 minutes until the thickest centre is appropriately cooked and flakes readily. Do not crush the fillets when turning.
  8. I turn off heat, add a little lemon zest and a SMALL squeeze of juice, then dill and black pepper. Taste for acidity and salt. Spoon over rice with plenty of sauce.

Baked Feta, Tomato & Prawn Orzo

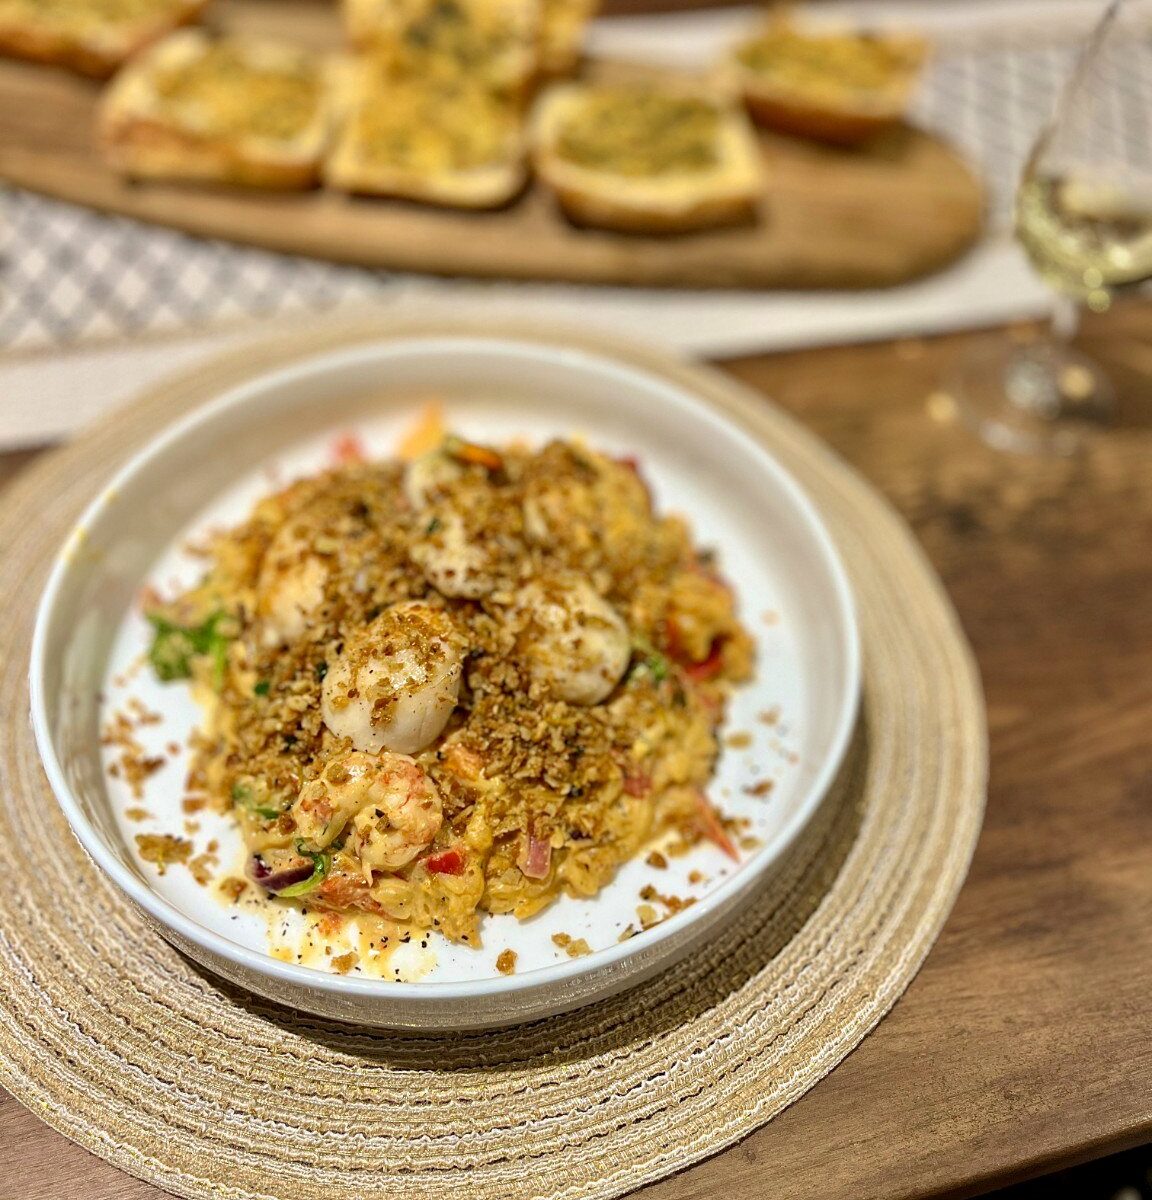
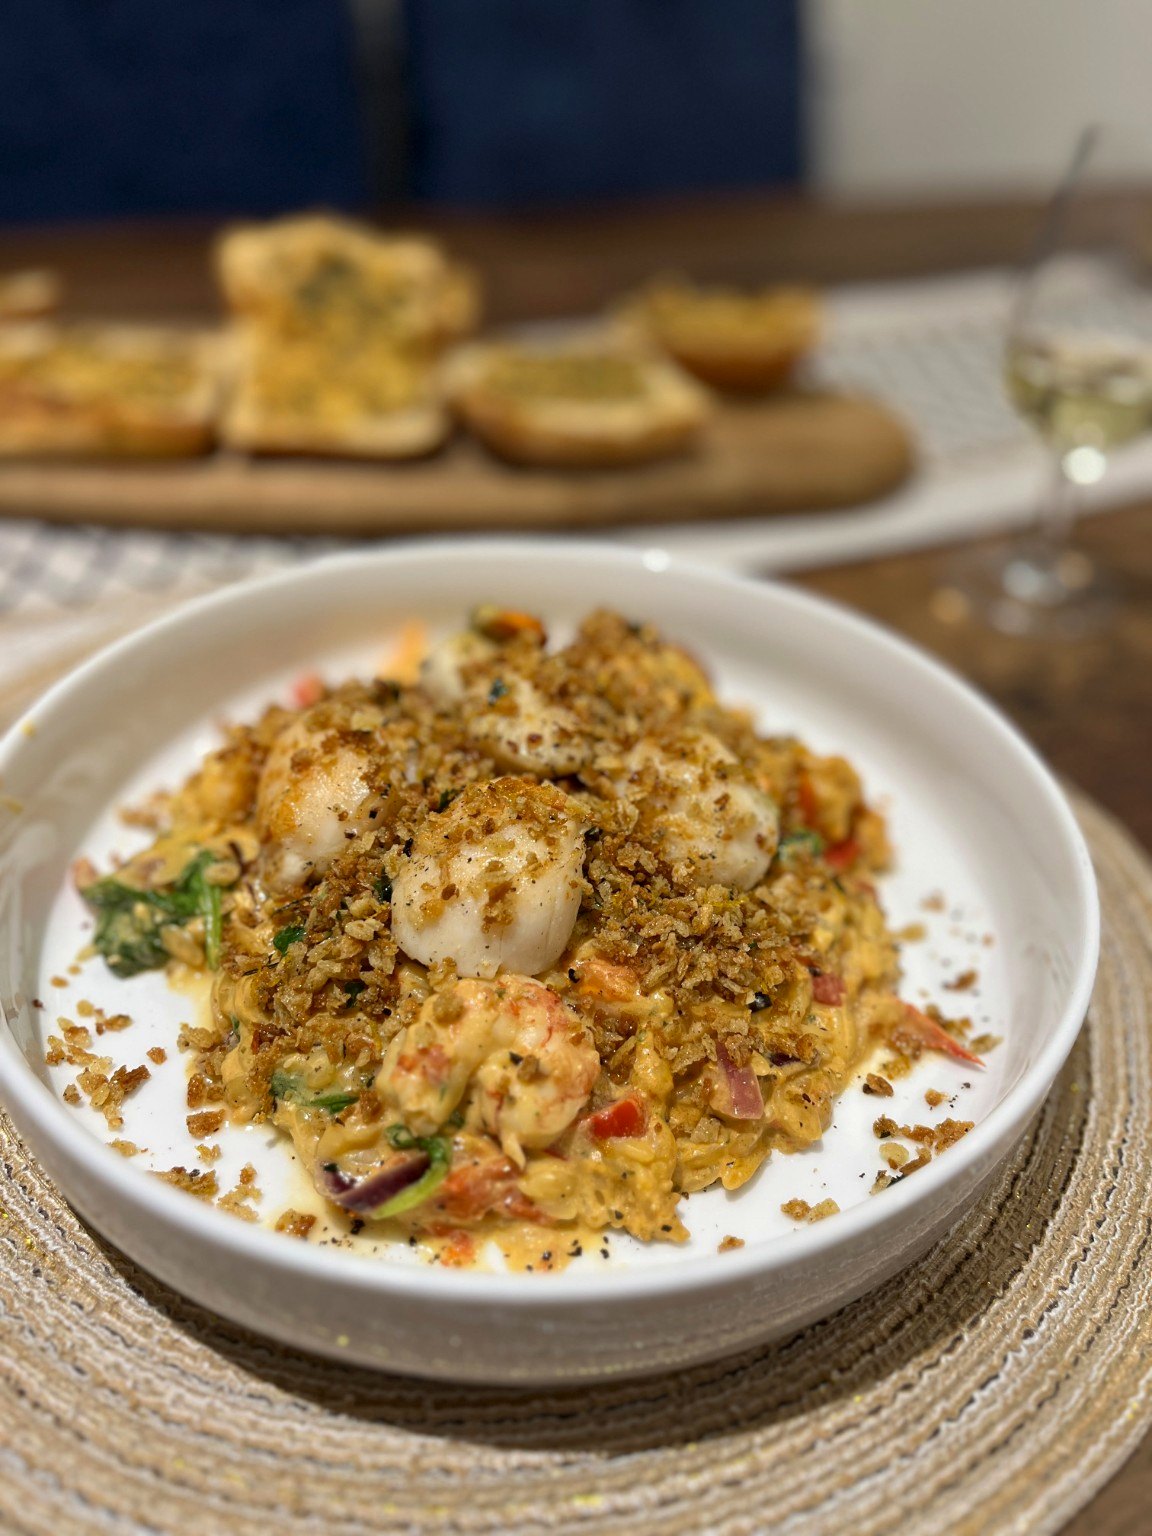
A white bowl of creamy feta and tomato orzo topped with seared scallops and golden lemon panko breadcrumbs

This is one of those trays that turns into a whole supper. The tomatoes and feta make the sauce, the orzo absorbs it and the prawns only need enough heat to cook through.

SERVES 2–3 · PREP 15 min · COOK 35–40 min

Ingredients

  • 180–200 g dry orzo
  • 200 g block feta
  • 250–300 g cherry tomatoes
  • 1 pepper, sliced; ½ onion, chopped
  • 200–250 g raw peeled prawns
  • 500 ml hot vegetable stock, plus extra
  • 2 tbsp olive oil
  • 2 cloves garlic or 1 tsp granules
  • Handful spinach
  • Black pepper; chilli flakes optional
  • Optional: 4 scallops and toasted breadcrumbs

Method

  1. I heat oven to 200°C fan. Choose a medium deep ovenproof dish. Put cherry tomatoes, sliced pepper and onion around a whole block of feta; drizzle with olive oil and pepper.
  2. Roast uncovered for 20 minutes until tomatoes split and feta feels soft. Use an oven glove to remove the dish. Mash feta and tomatoes together with a fork to make a rough, chunky sauce.
  3. I stir in garlic, 180–200 g dry orzo and 500 ml HOT stock. Scrape down any pasta stuck to the sides. The orzo should be just submerged; add another splash of hot water if needed.
  4. Return to the oven for 12 minutes, then carefully stir all the way to the corners. Check that orzo is not sticking. If the dish looks dry and pasta is still firm, add 50–100 ml more hot stock.
  5. Bake another 5–8 minutes until orzo is almost tender but still saucy. Remove, fold through spinach and raw prawns, and return to the oven for 4–6 minutes.
  6. I check a prawn in the centre: it must be opaque and firm. The pasta should be soft with a slight bite, never gluey; add boiling water 1–2 tbsp at a time if too thick.
  7. Rest 2 minutes and taste. Feta provides salt; usually it needs black pepper and perhaps a small squeeze of lemon, not more salt.
  8. Optional restaurant-style finish: sear dried scallops in a hot pan with butter for 60–90 seconds a side and serve on top with crisp lemon-chilli breadcrumbs.
The finished baked feta and prawn orzo, served with seared scallops and crisp crumbs
The finished feta-and-prawn orzo from 1 August 2026, topped with seared scallops and crisp lemon breadcrumbs.

Smoked Salmon, Dill & Pickled Shallots

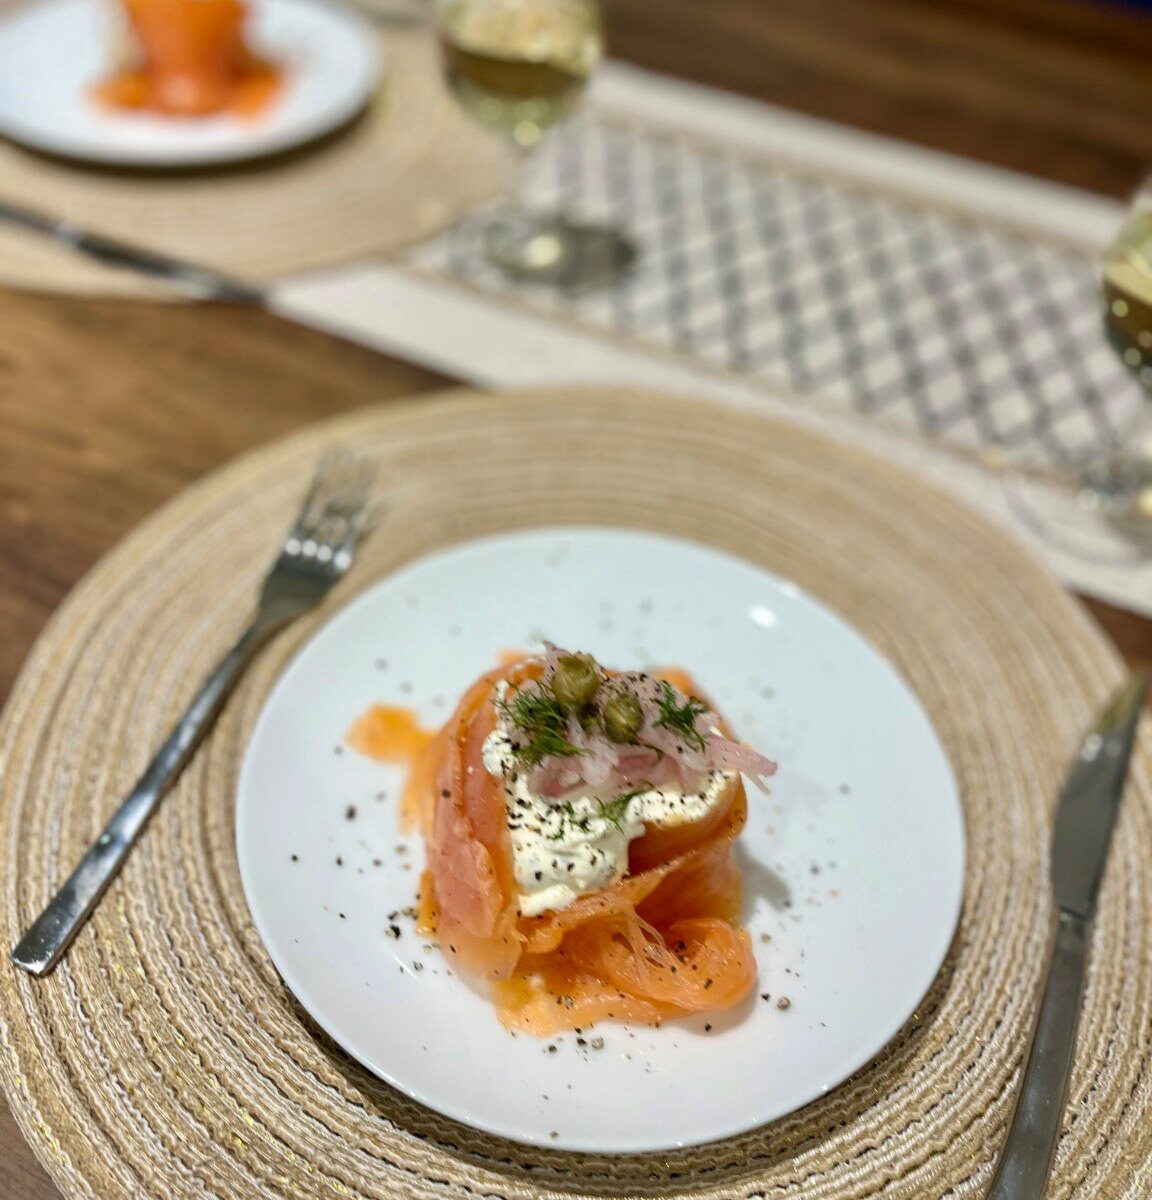
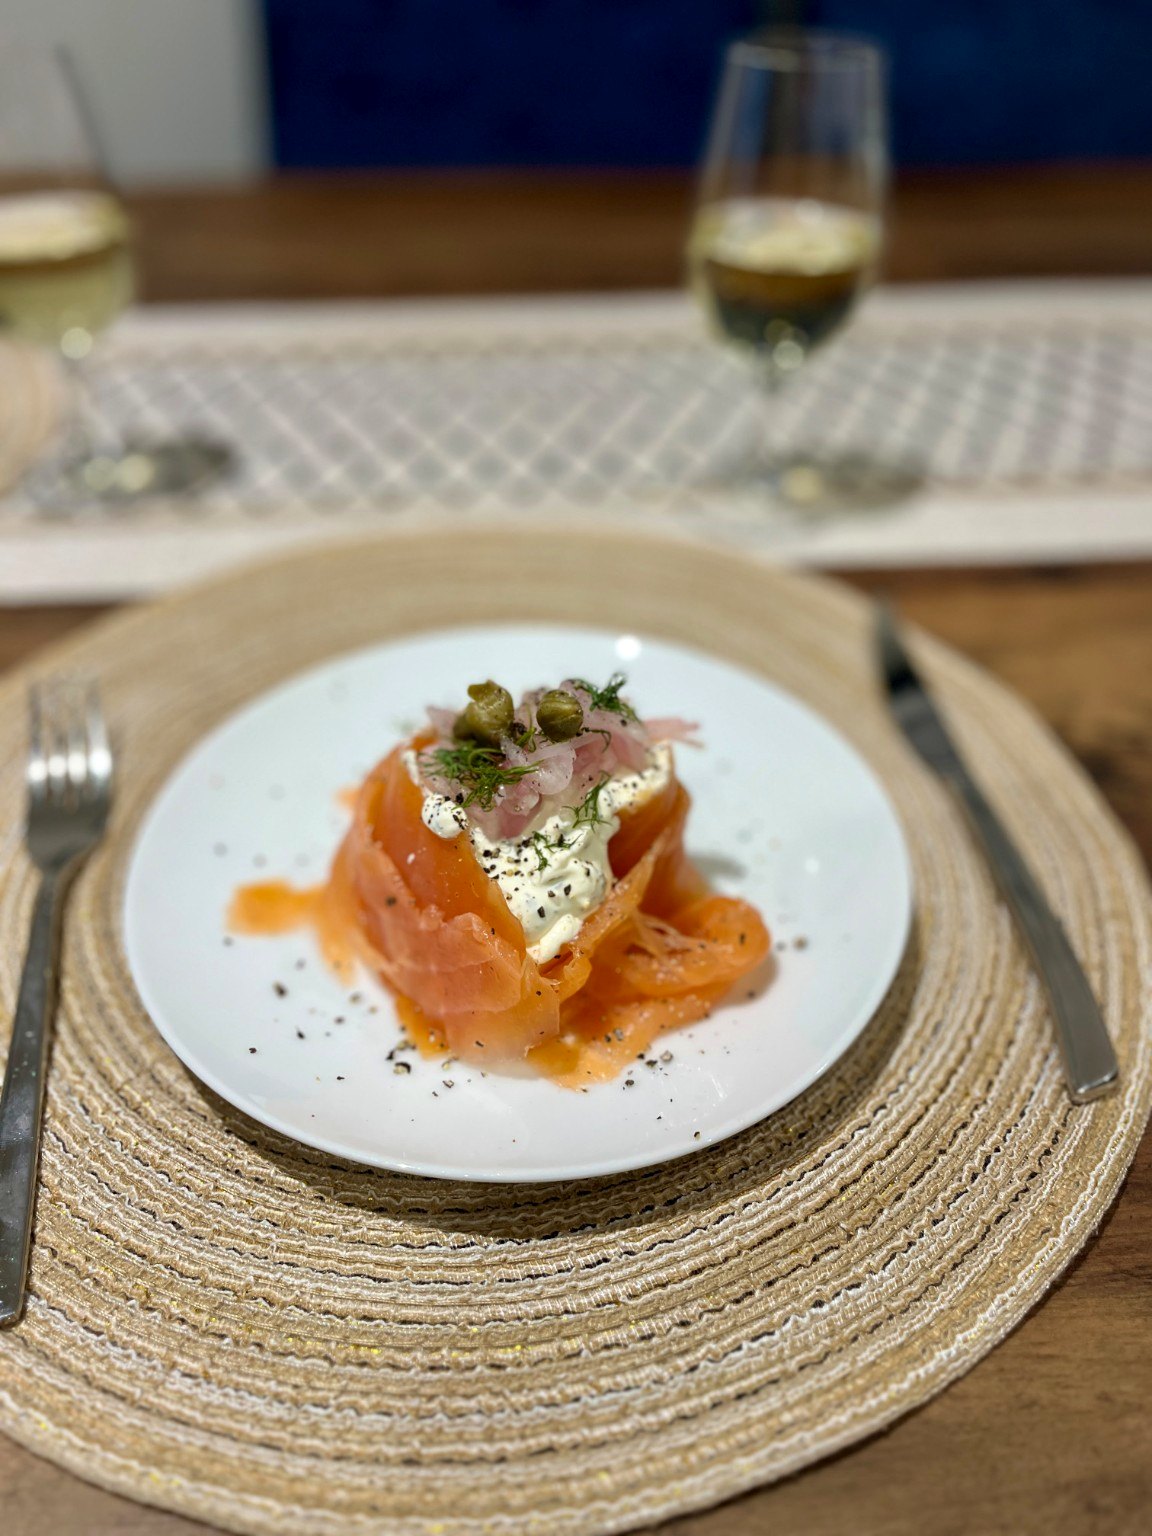
Smoked salmon folded around a creamy dill filling with pink pickled shallots and capers on a white starter plate

This is a starter I like getting ready ahead of time. Smoked salmon, dill and something sharp from the shallots are hard to beat; there’s no point complicating it.

SERVES 4 starters · PREP 15 min + pickling · COOK No cook

Ingredients

  • 180–200 g ready-to-eat cold-smoked salmon
  • 2 small shallots, sliced paper-thin
  • 4 tbsp white-wine vinegar
  • 1½ tsp icing sugar
  • ½ tsp fine salt
  • 100 g full-fat crème fraîche
  • 1 tbsp freshly chopped dill
  • ½ tsp finely grated lemon zest
  • 1 tsp lemon juice
  • Black pepper
  • Capers and extra dill, optional
  • Rye bread or crackers, optional

Method

  1. Make the shallot pickle FIRST. Peel shallots, slice as thinly as possible and separate the rings. Mix vinegar, icing sugar and salt in a small bowl until dissolved, then stir in shallots so most pieces touch the liquid.
  2. Leave the shallots for at least 15–20 minutes, stirring once. They should soften and become sharp-sweet instead of harsh and raw. For a make-ahead starter, cover and refrigerate.
  3. In another bowl, stir 100 g crème fraîche with the finely chopped dill, lemon zest and 1 tsp lemon juice. Grind in black pepper and taste. It should be fresh and gently tart, not aggressively lemony.
  4. Cover the dill crème fraîche and chill until serving. Keep the smoked salmon covered in the fridge. Do not leave fish sitting on the counter while you prepare the rest of dinner.
  5. When ready to eat, divide salmon loosely among four chilled plates. Do NOT compress it into a solid mound. Add a generous spoonful of dill crème fraîche to each plate.
  6. Lift the pickled shallots out of their liquid with a fork, let excess vinegar drip off, and scatter over salmon. Add a few capers and fresh dill if you have them. Put rye bread or crackers alongside and serve immediately.
Close-up of original smoked salmon starter with dill cream and pickled shallots
The starter served on 1 August 2026, with dill cream, capers and pink pickled shallots.